
Simon Hurst explores the benefits of using Excel Data Types for easy-to-create management accounts.
The potential of Data Types and where to find them in Excel
When I first read about the ability to create Excel Data Types using Power Query, I probably over-estimated its potential. Having thought about it a bit more and experimented with creating Data Types, I have downgraded my initial assessment from earth-shattering to quite interesting. However, it's certainly still worth investigating. Note that this feature is currently available to Office Insiders as a Preview so, depending on the upgrade channel you have chosen, it might not yet be available in your version of Excel.
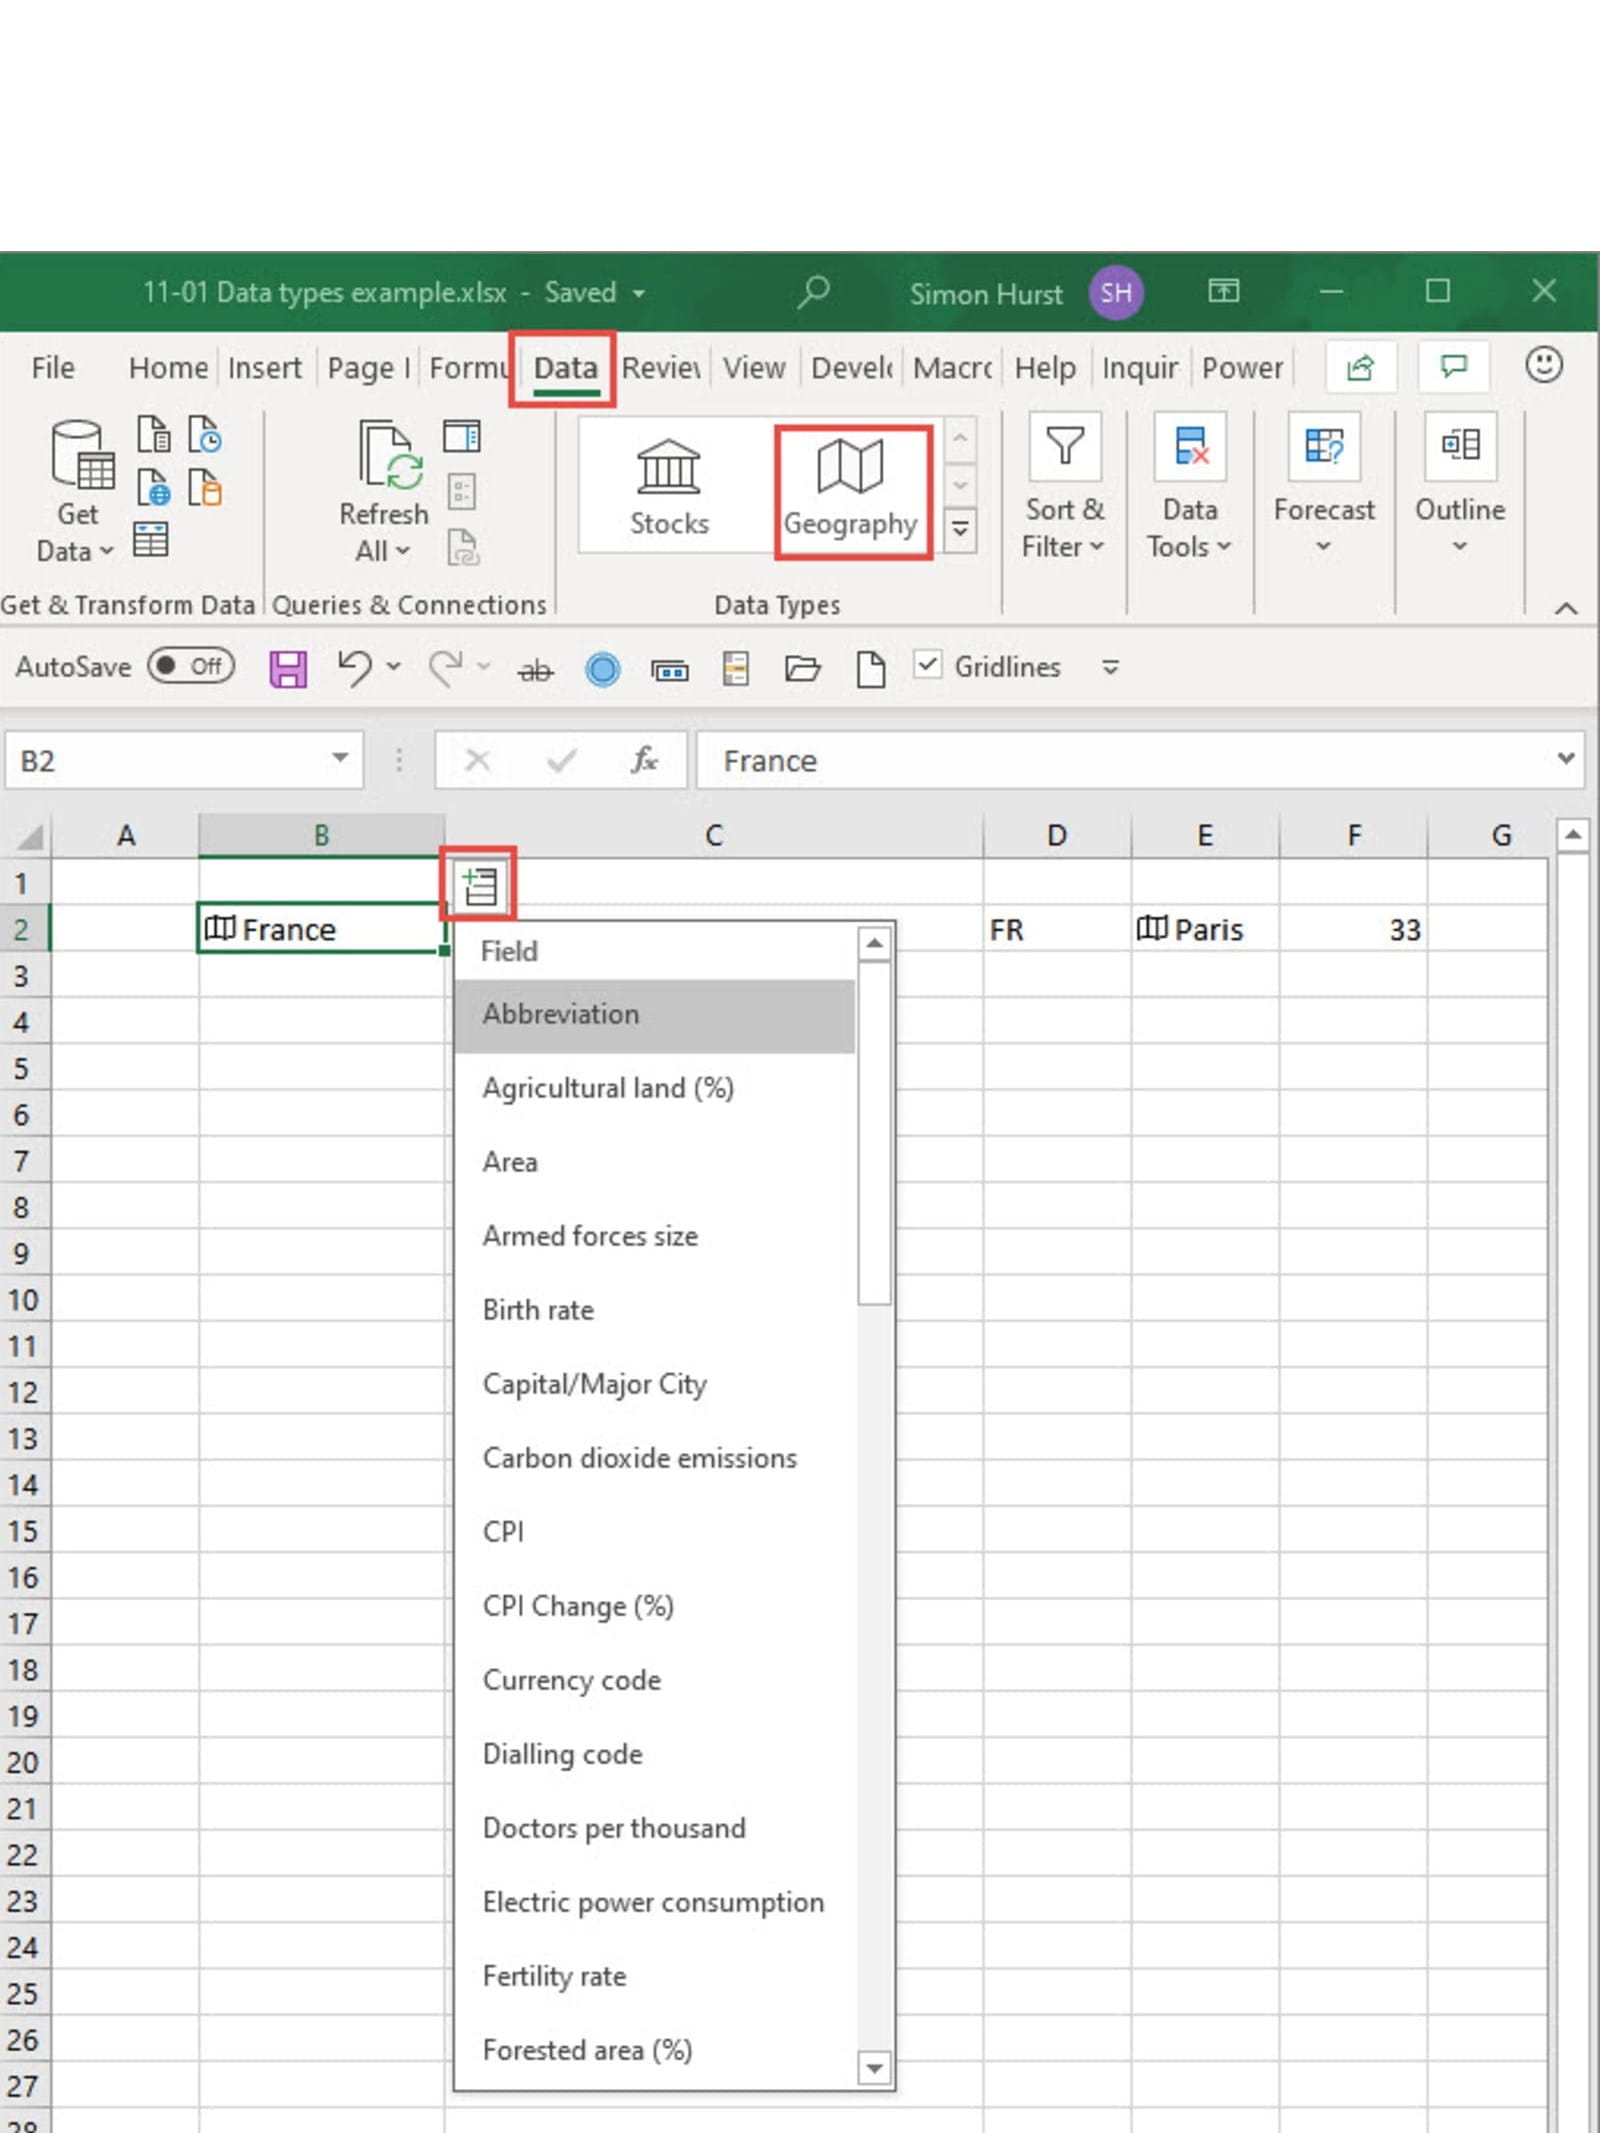
For those who have not yet come across Data Types in Excel, these are a relatively recent addition to the Data Ribbon tab. The new Data Type group includes two built-in Data Types: Stocks and Geography. The basic idea is that you can designate the contents of a cell, or perhaps more usefully an entire Excel Table column, as being one of the available Data Types. Then, for the built-in Data Types, Excel will check the cell entry or entries and, if it can identify them as being a valid item within that Data Type, will allow for further values or columns of values to be filled in by looking the values up online:
Several Excel Community Archive articles cover Data Types in more detail but, at the time of writing, it is not possible to search for any of them.
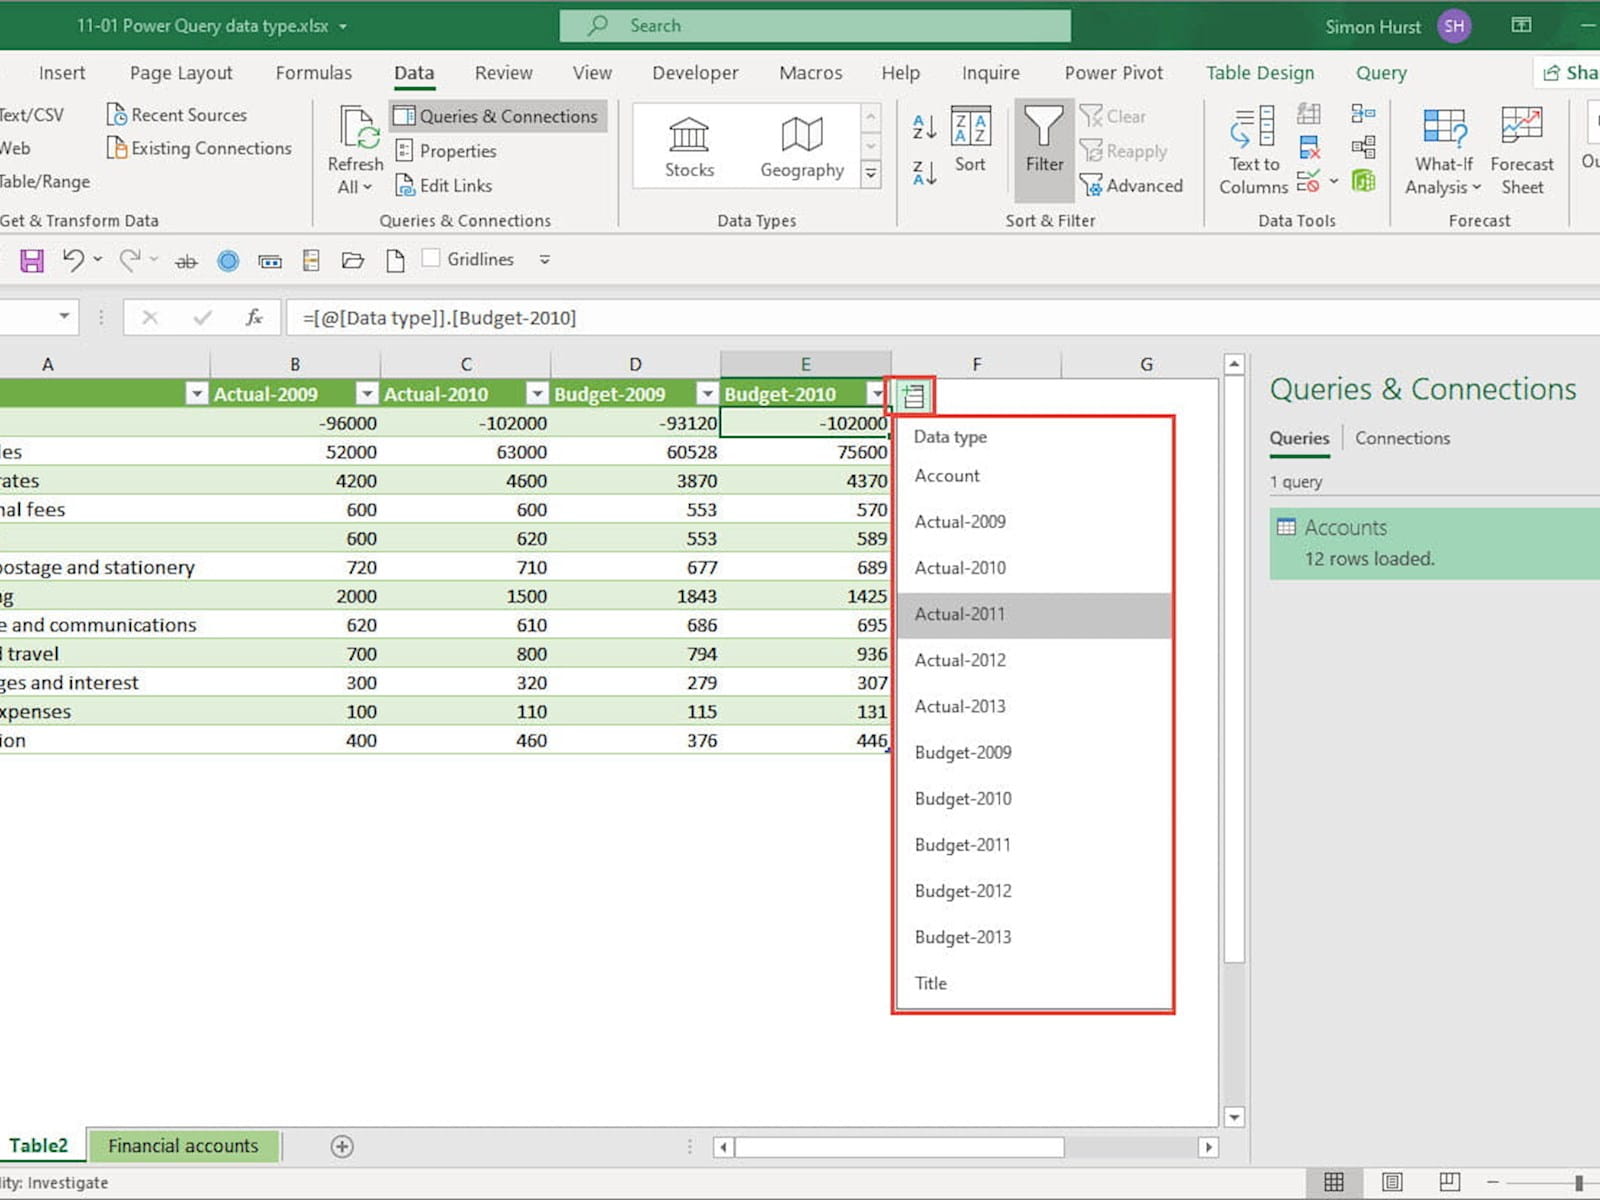
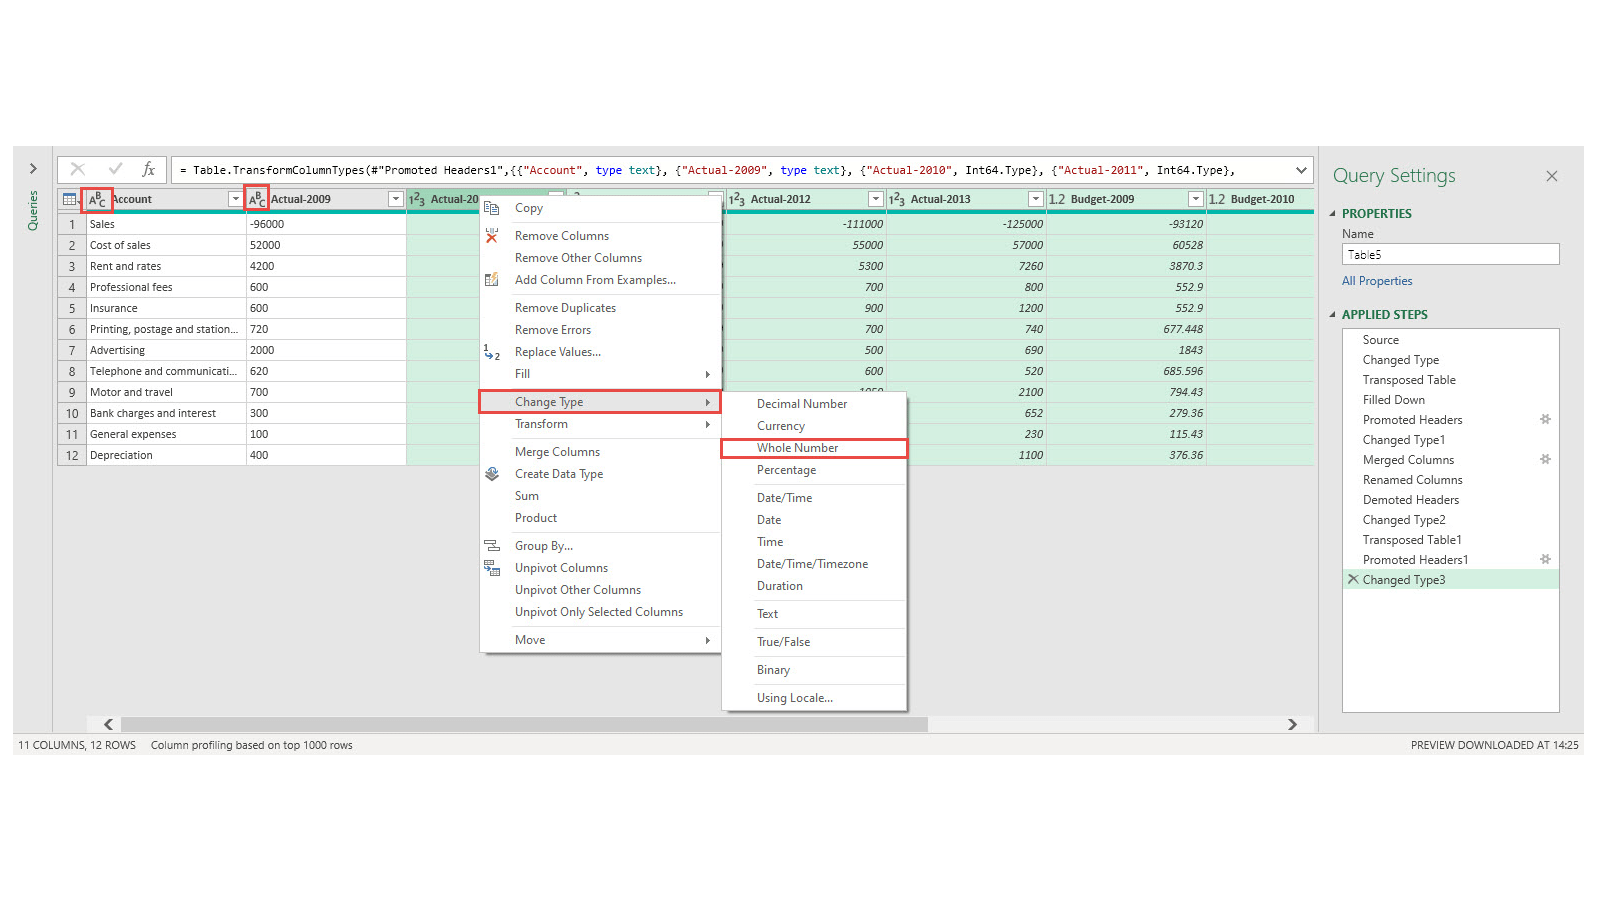
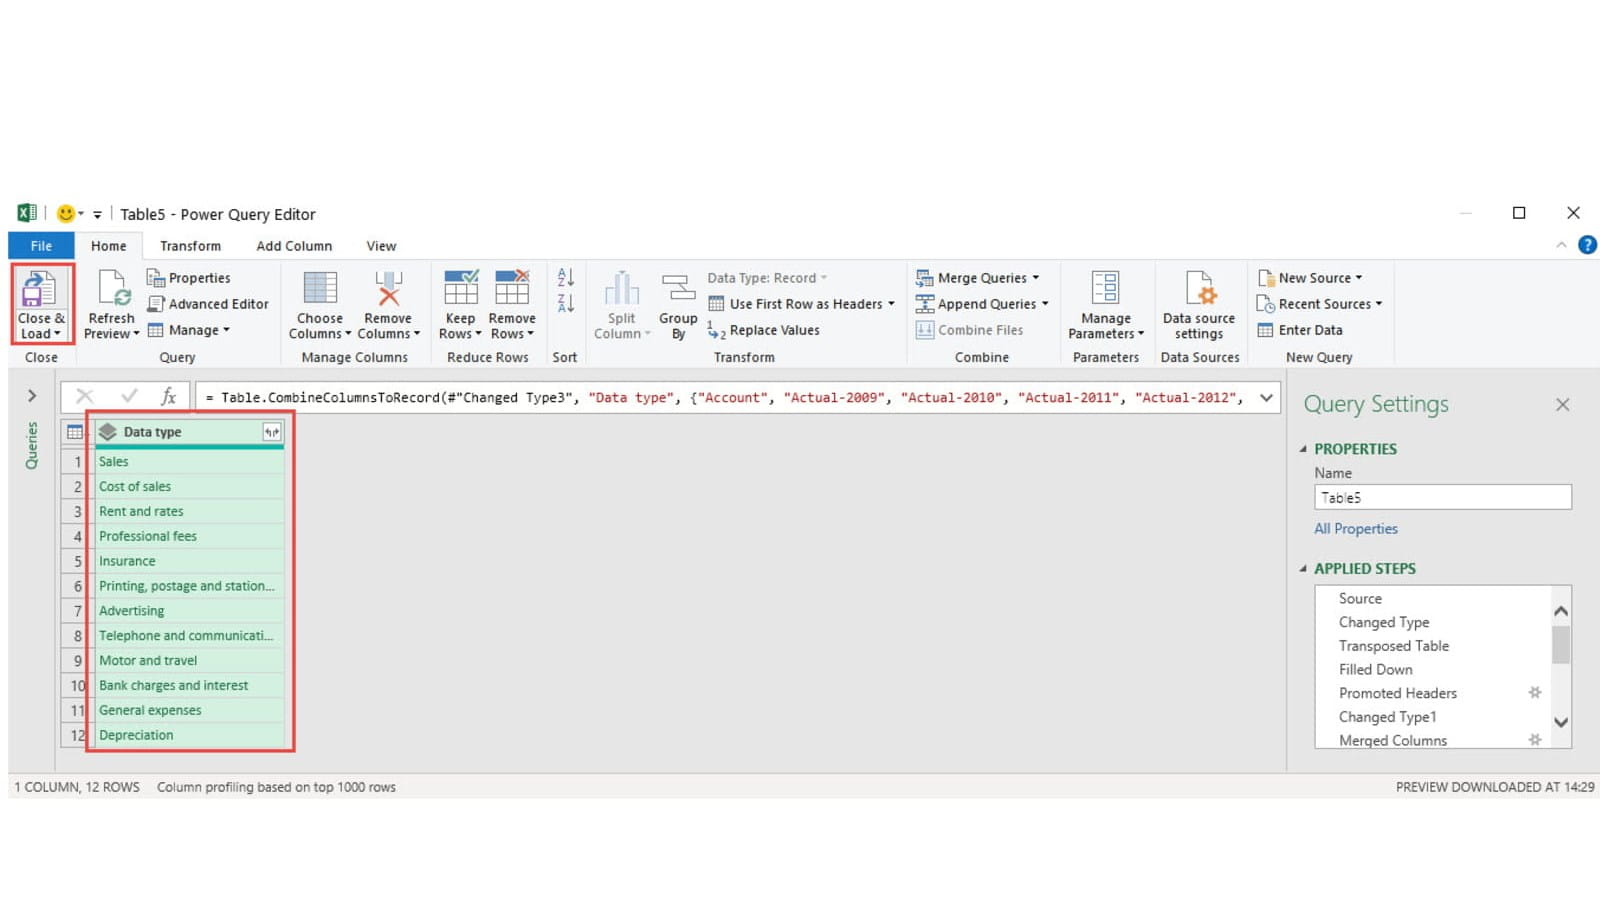
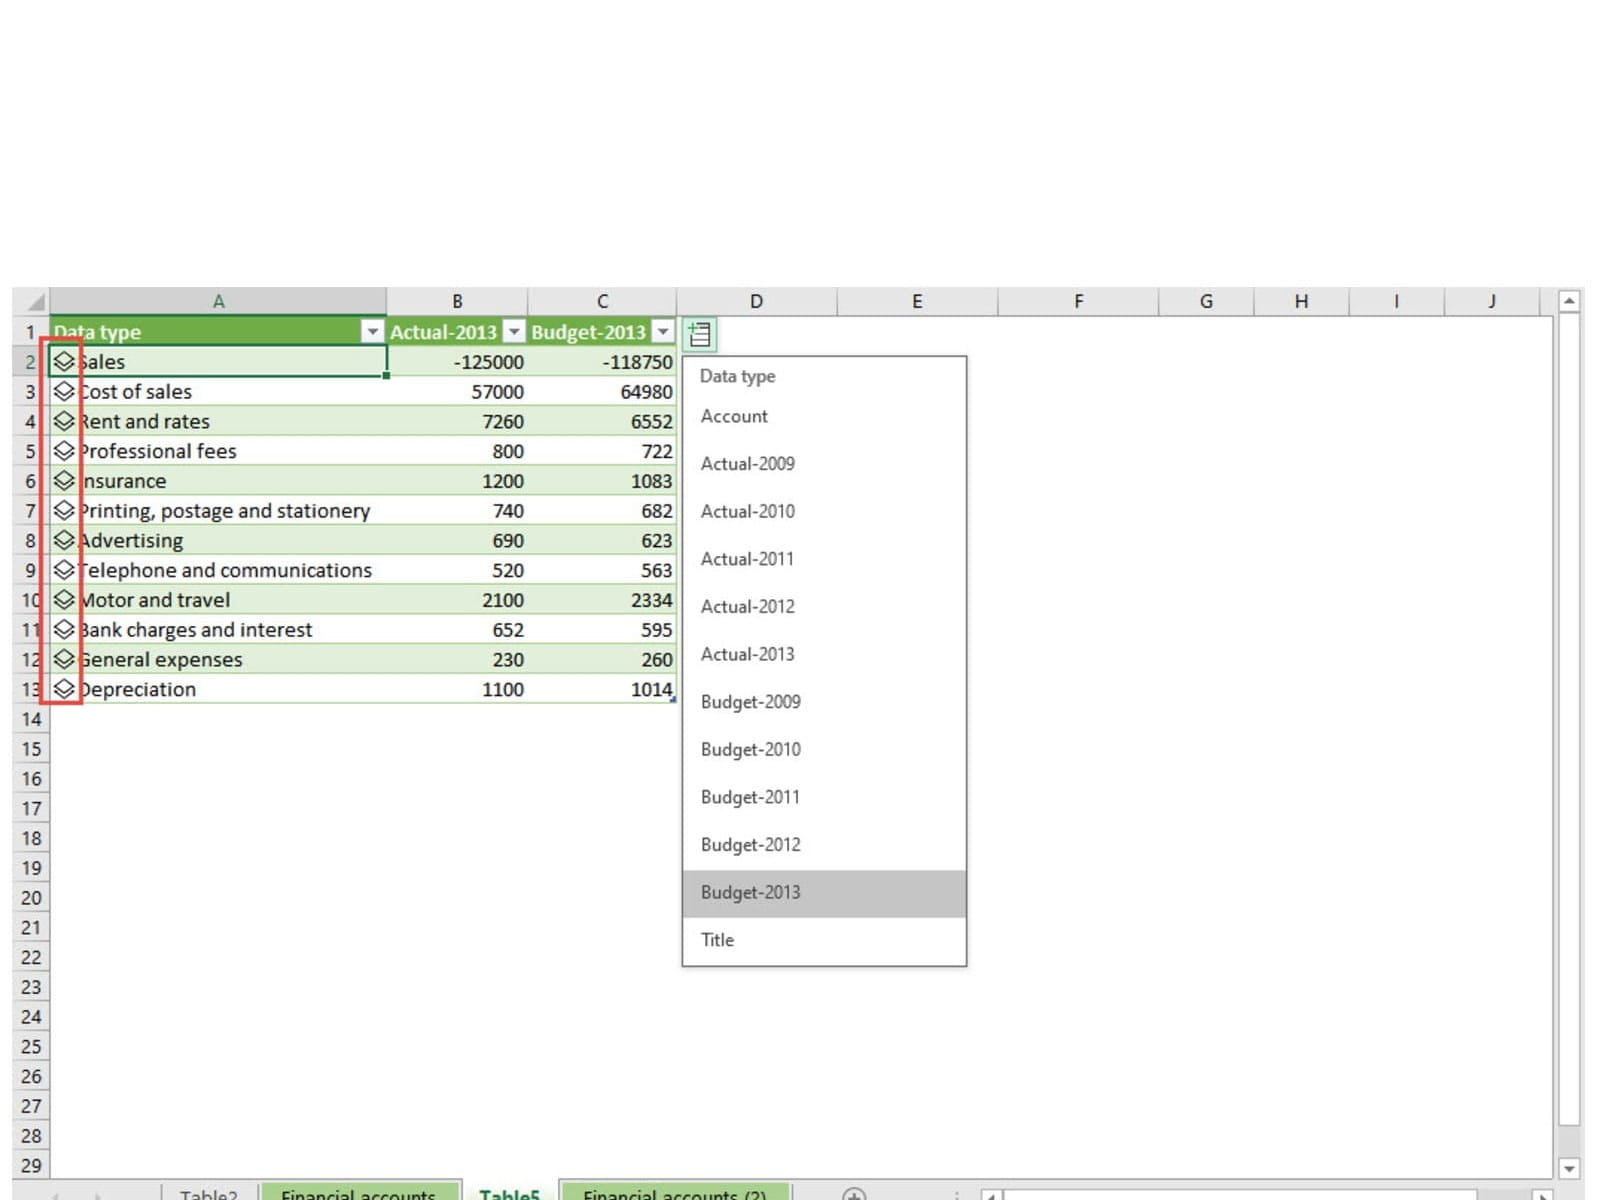
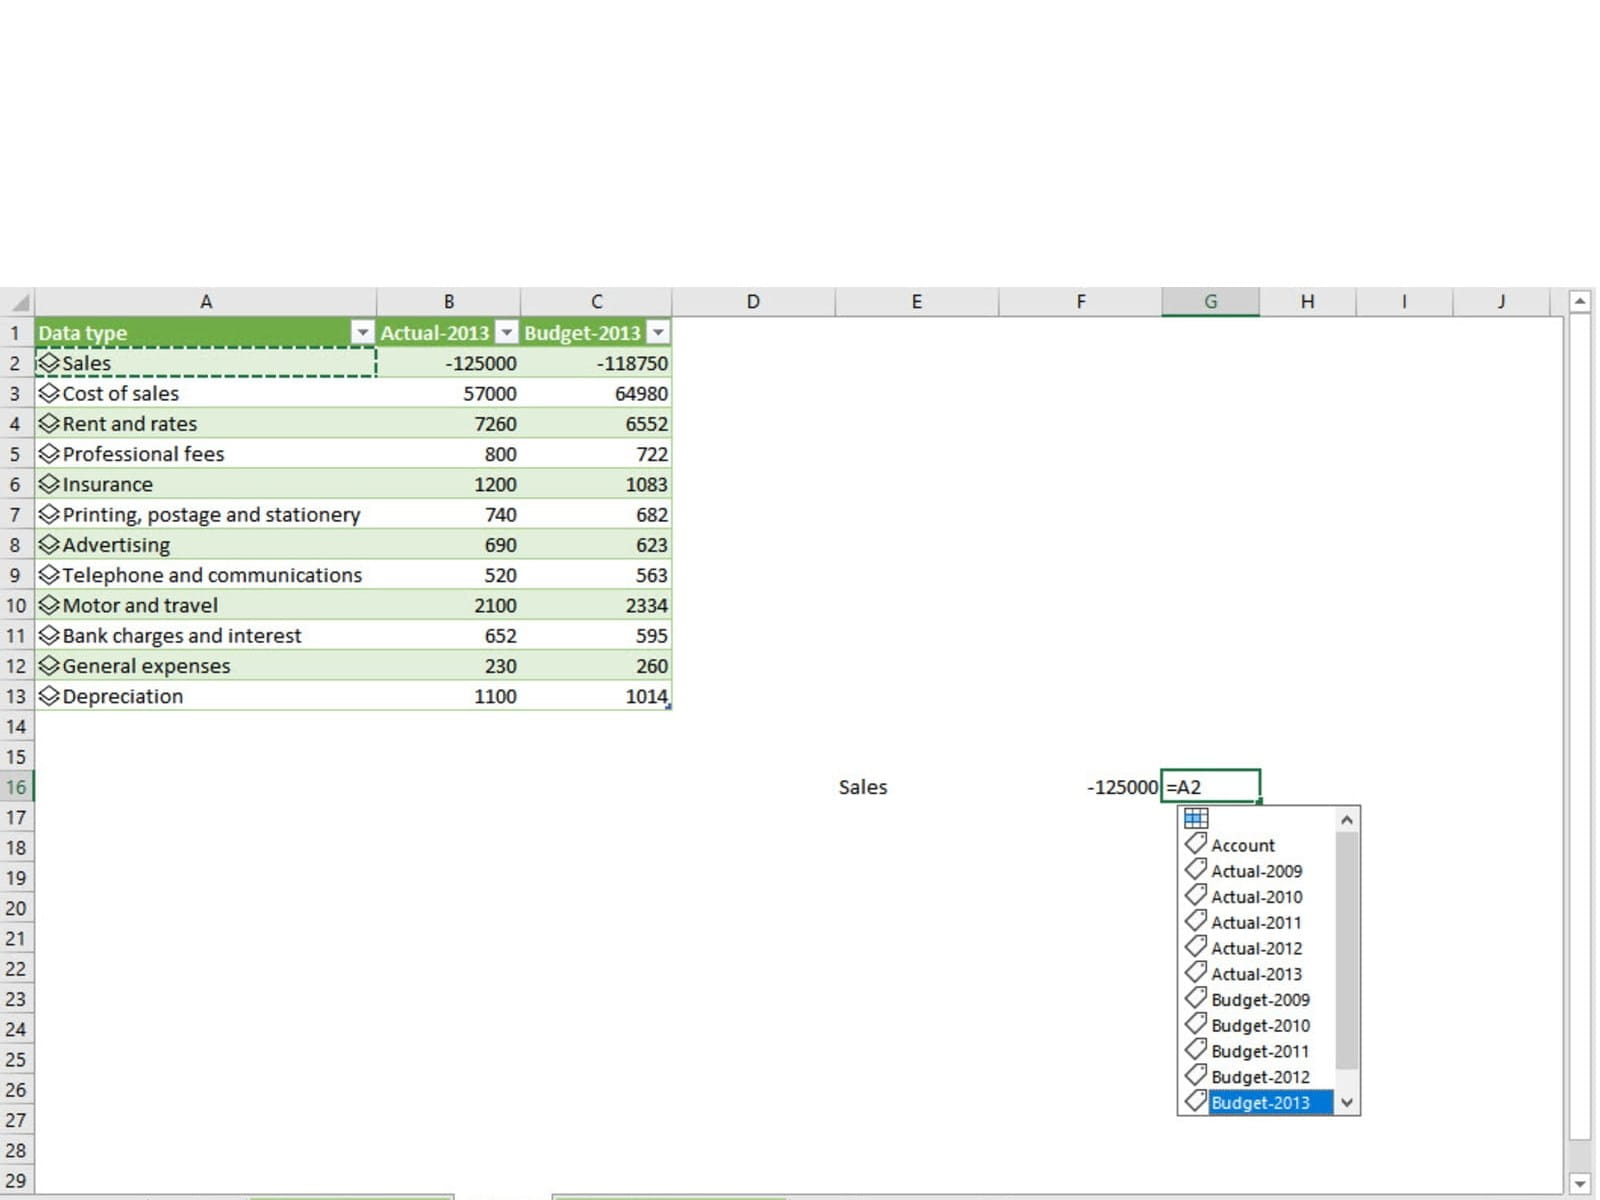
The new Data Type preview feature allows a Power Query query to be used as the source of Data Type values. The creation of such a Data Type is straightforward. Within the Power Query editor, you select multiple columns and use the Transform Ribbon tab, Structured Column group, Create Data Type option. This collapses the selected columns into a single column. Once the query with the collapsed column is loaded to a worksheet table, the column behaves in a similar way to one of the built-in Data Types allowing the user to choose which of the collapsed columns to display:
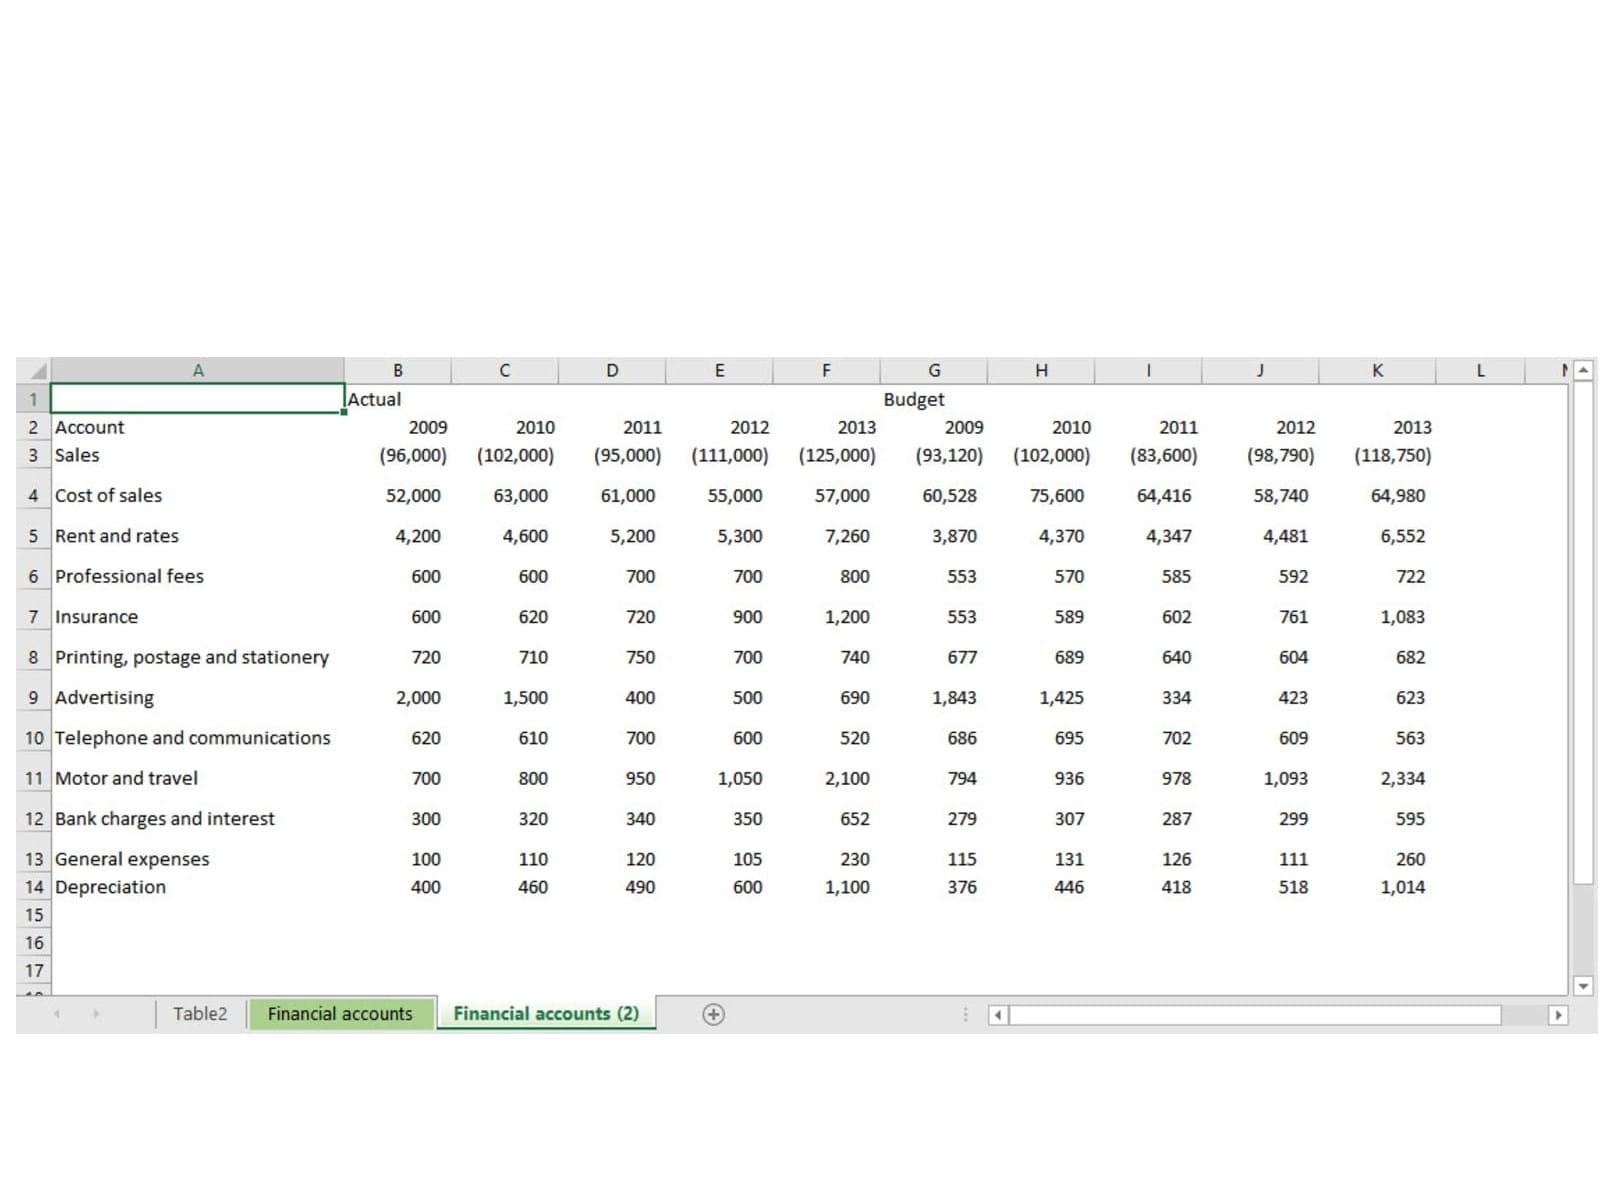
Given that the process of creating our Data Type is so straightforward, we'll also cover a couple of other useful Power Query techniques. First of all, we need to click on any cell in our data and choose the Data Ribbon tab, Get & Transform Data group, From Table/Range option. This will convert our data into an Excel Table and ask whether our Table has headers. We will leave this option set to no.
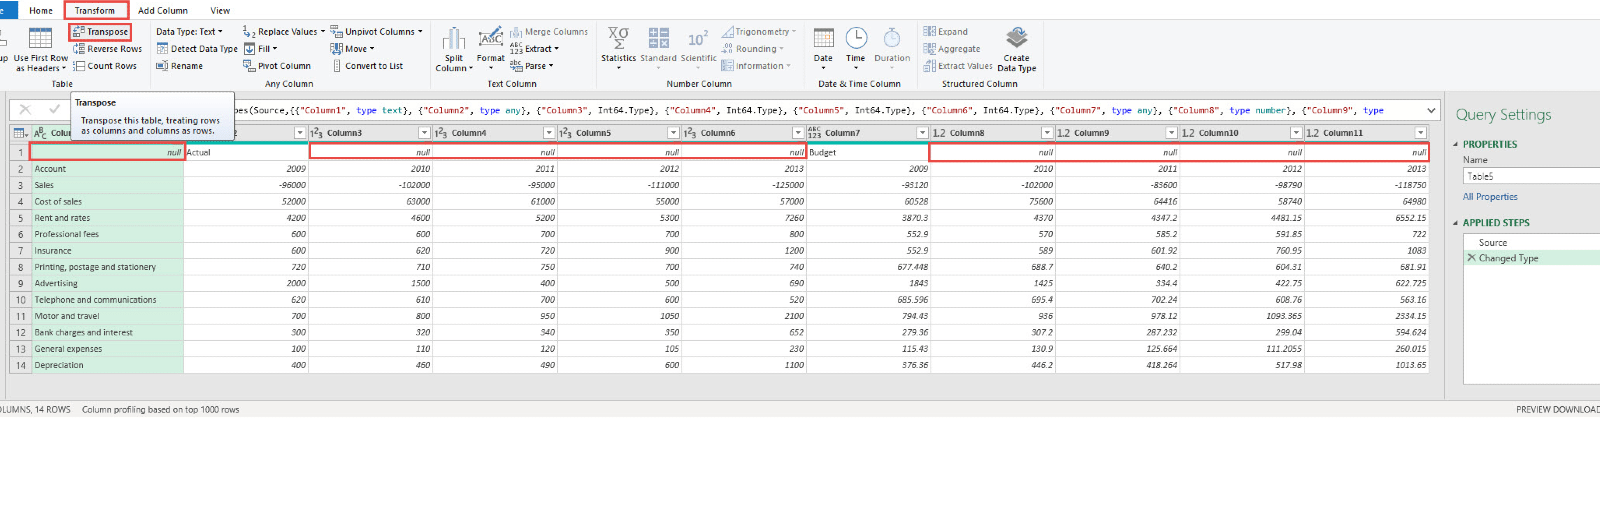
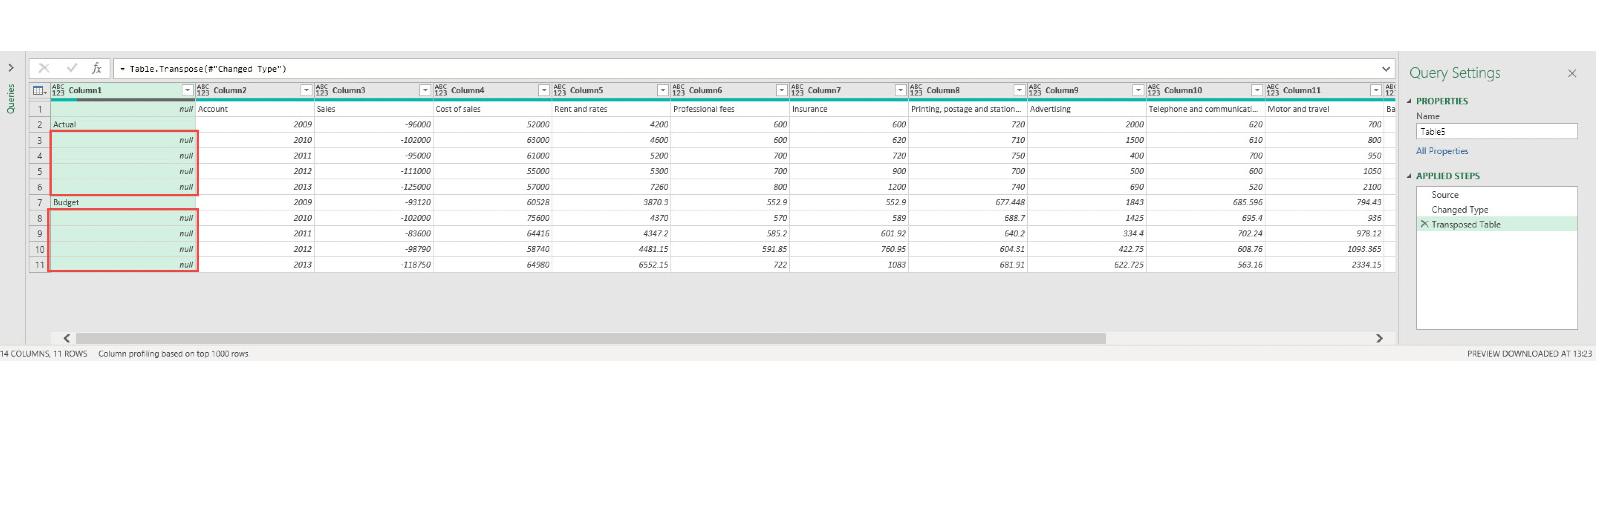
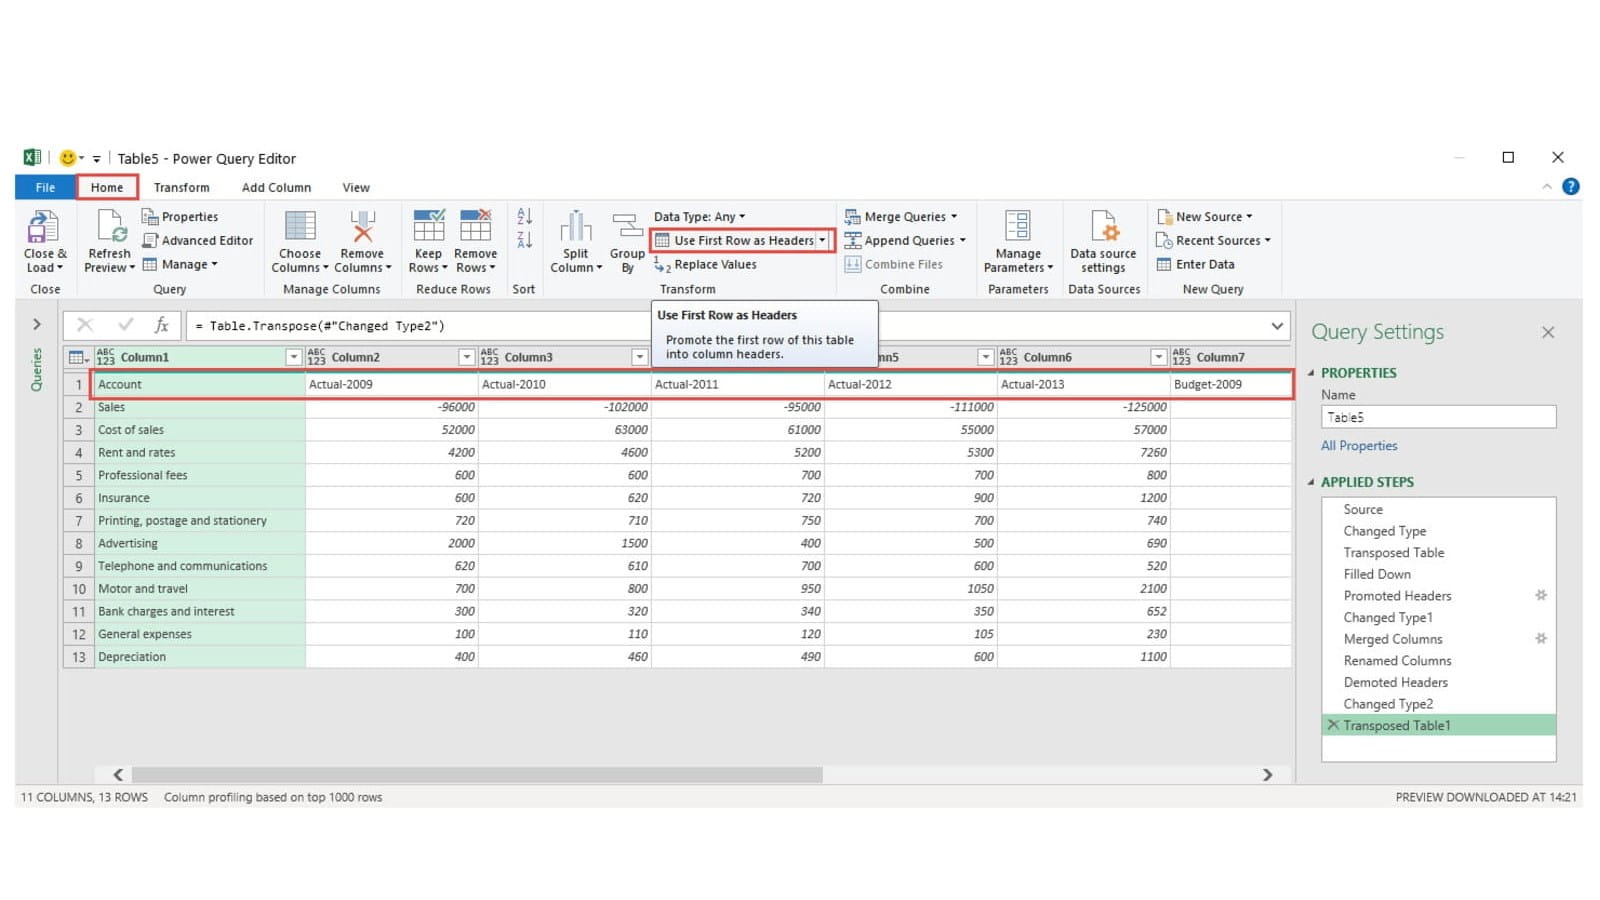
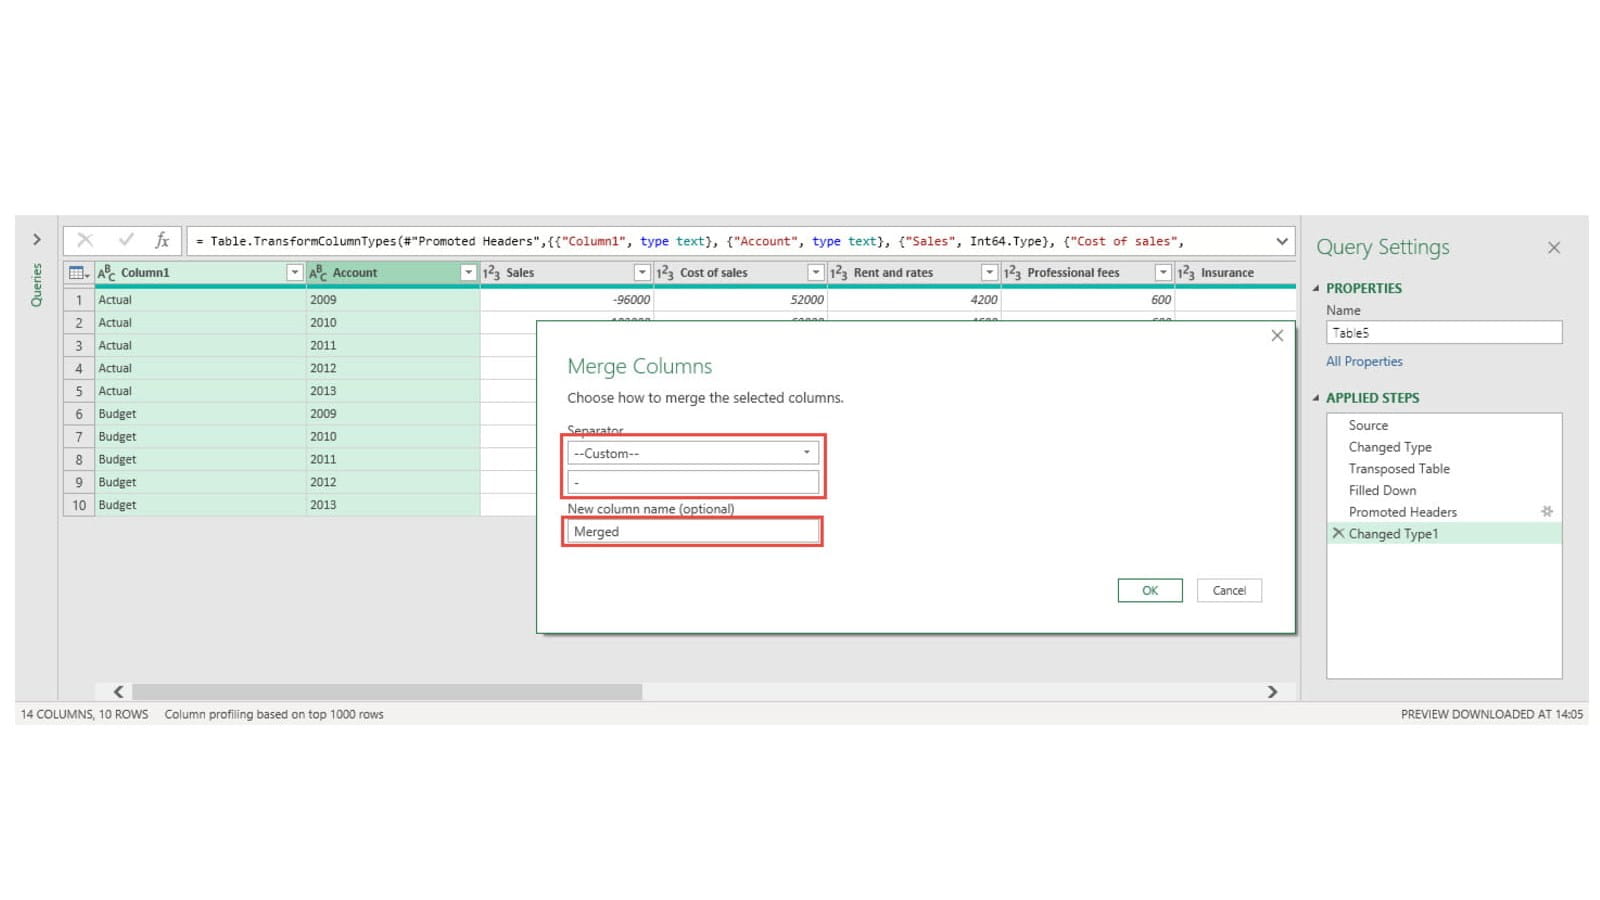
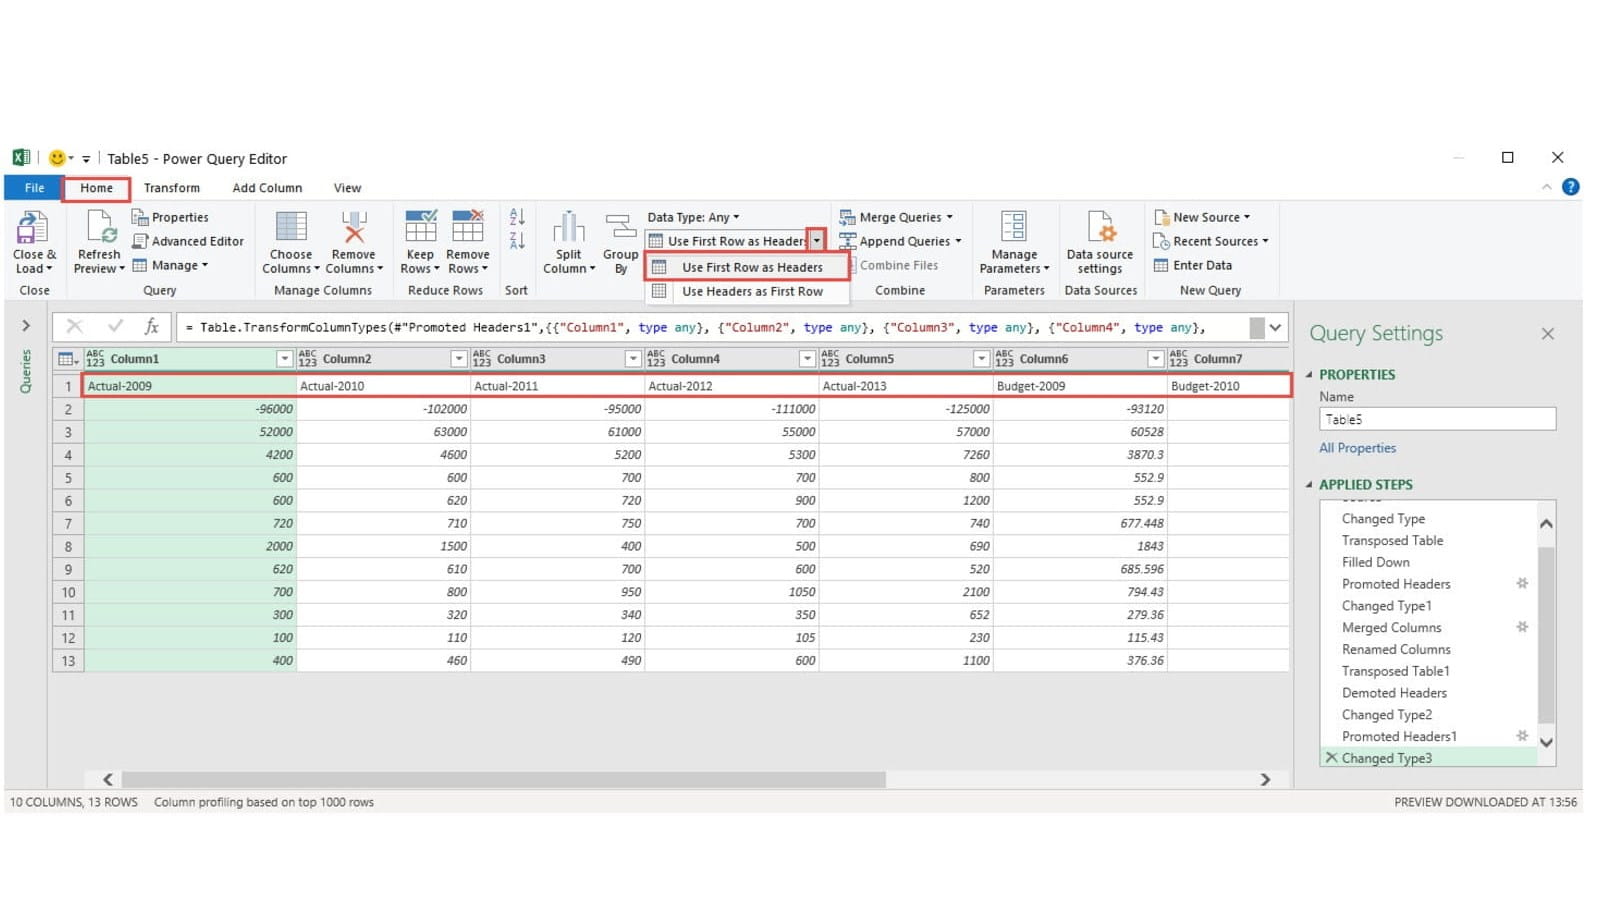
Here is our data in the query editor. Our first task is to sort out the headers which are not currently in an ideal format. We want to do this in a way that makes the process as automatic as possible, rather than just treating the first row as a header row and changing the column names manually. Accordingly, we will use the Transform Ribbon tab, Table group, Transpose option:

Excel community
This article is brought to you by the Excel Community where you can find additional extended articles and webinar recordings on a variety of Excel related topics. In addition to live training events, Excel Community members have access to a full suite of online training modules from Excel with Business.

Archive and Knowledge Base
This archive of Excel Community content from the ION platform will allow you to read the content of the articles but the functionality on the pages is limited. The ION search box, tags and navigation buttons on the archived pages will not work. Pages will load more slowly than a live website. You may be able to follow links to other articles but if this does not work, please return to the archive search. You can also search our Knowledge Base for access to all articles, new and archived, organised by topic.
