
Hello all and a very happy New Year from the Excel Tip of the Week! This week we have a General User post in which we’re revisiting and expanding on the topic of how to make the best possible view of your Excel workbook. Getting your view set up just right can do wonders for your workflow, so let’s dive in.
For a comparison, this was last covered in the Tip of the Week in post #123.
Context – screen size and shape
Most laptop and desktop monitors are landscape orientation, and so are optimised for side-by-side viewing if you want to compare two files, or two parts of the same file. We’re going to look at a variety of tools in today’s post, but when considering which is right for your workflow, think about how to make best use of your screen real estate.
If you work with a second monitor (or more!), then you might also want to think about our guide to multi-screen working with Excel in TOTW #222. In this post we will focus on how to customise your viewing within the limits of one workbook.
View options within one worksheet
Sometimes you want to keep an eye on something within a worksheet that doesn’t align to the automatic scrolling behaviour of Excel. There are a few ways to accomplish this.
Excel Table headers
If you make data into an Excel Table, then when the header row is off the screen but the Table is selected, Excel will automatically merge the Table headers into the top row:
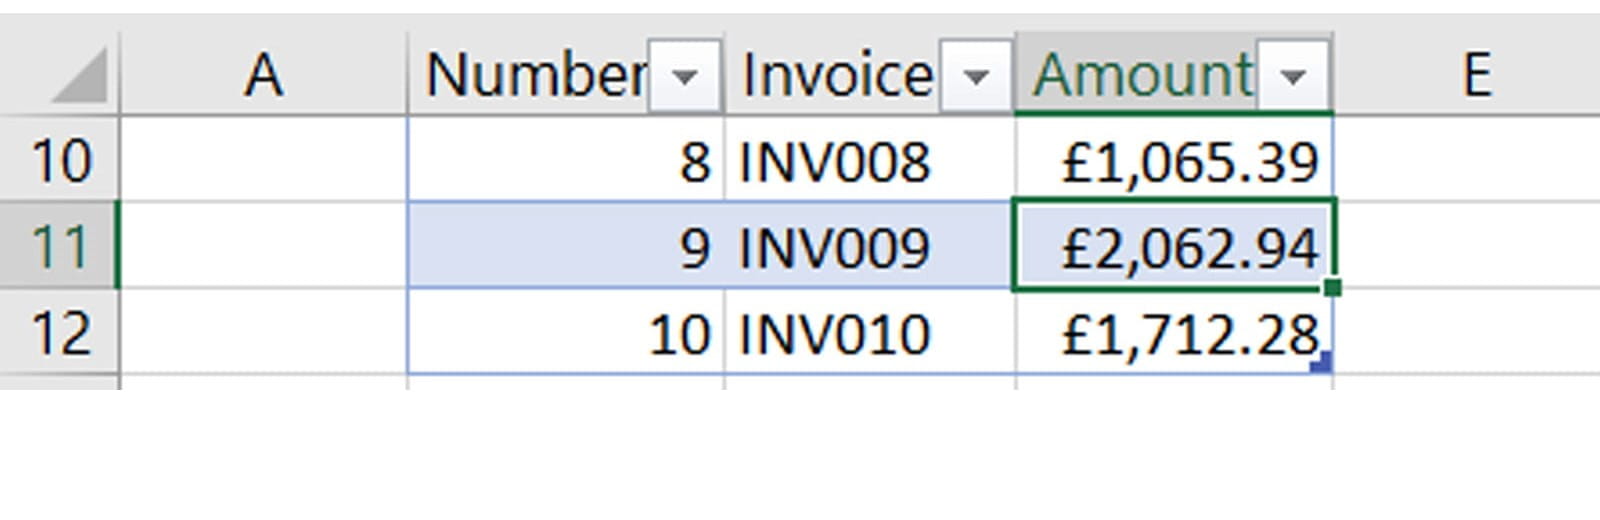
This is a nice contextual benefit to using Tables – it will stop happening once you select a cell outside the Table.
Freeze panes
A similar effect can be achieved using freeze panes. This lets you always keep one or more of the first rows/columns visible when navigating the workbook.
The option is under the View menu, as most of today’s buttons are. There’re default options for freezing the first row / column, but the usual option is the top one. This will freeze any rows above the currently selected cell and any columns to the left of it.
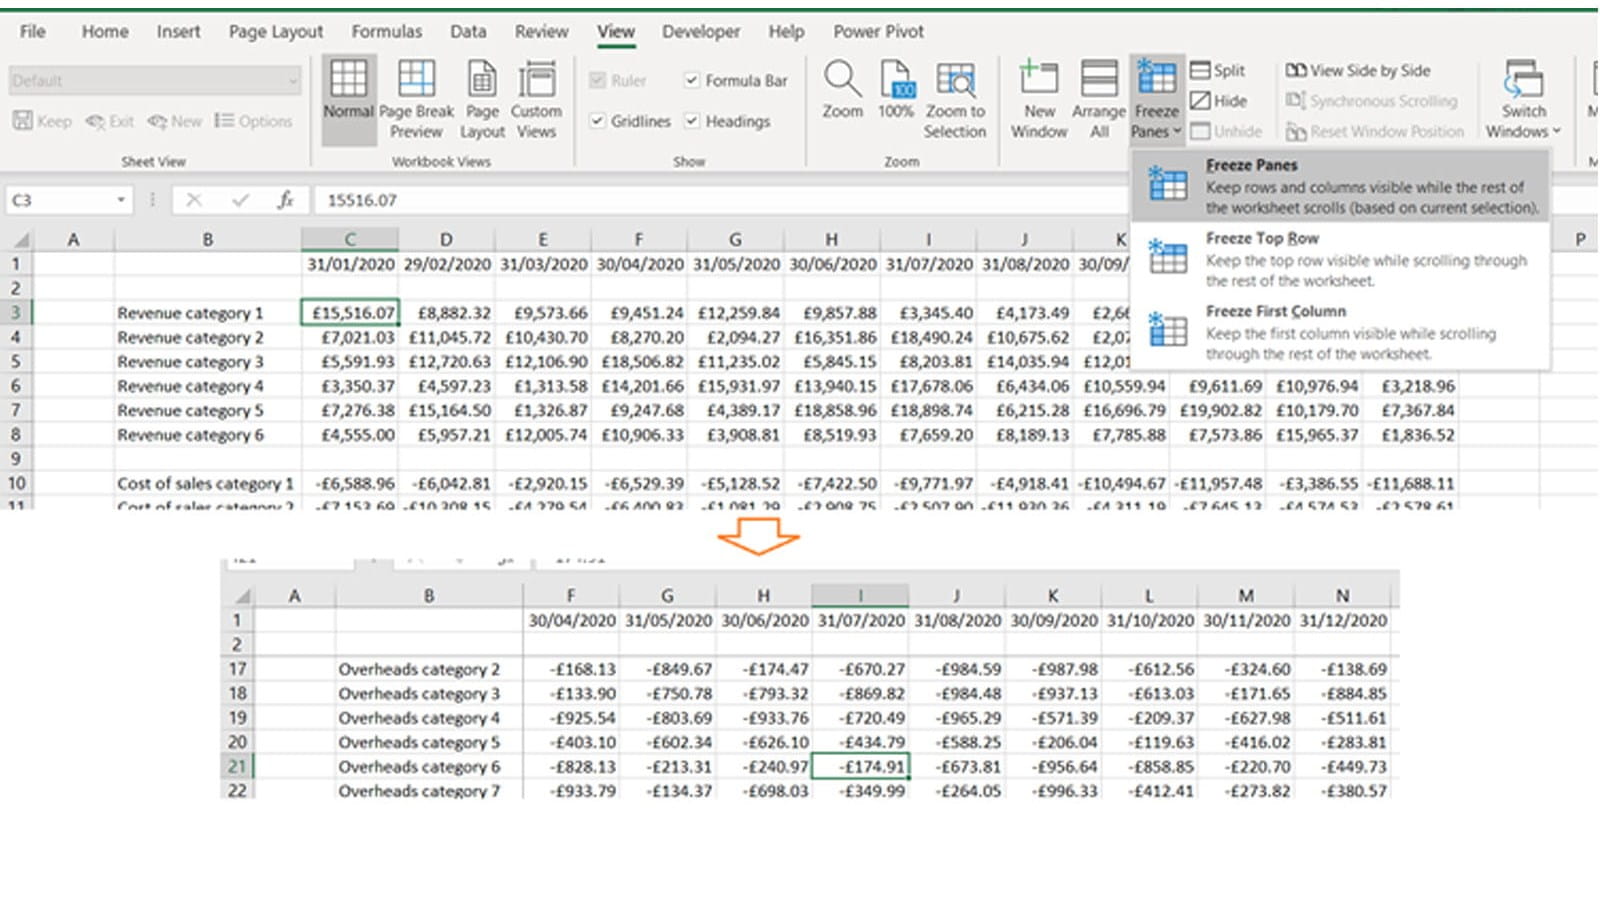
This is commonly used in modelling and other contexts where labels are usually placed at the start of rows / columns.
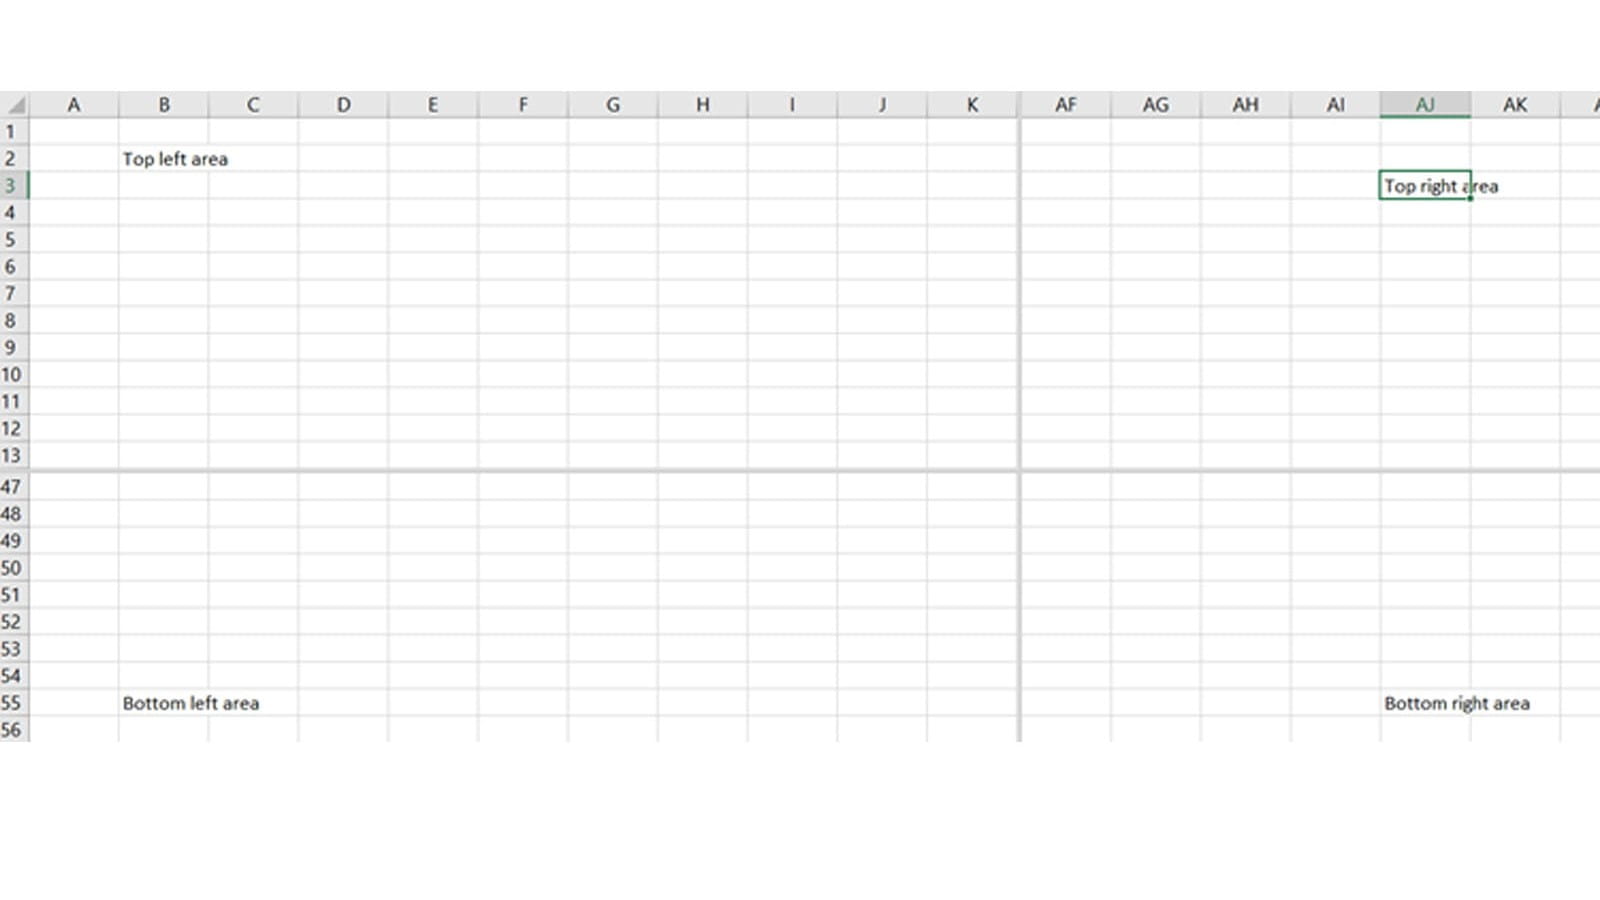
Split
If instead what you need to is navigate multiple distant areas of the same large worksheet at once, you might want to investigate the Split functionality. This can split the sheet into two or more panes, which you can then move around independently. Just like Freeze Panes, this will create the split just above & to the right of the active cell.
You can then click into any of the split areas and move around it independently. The rows and columns shown in each pane of the split are inter-related – the left and right halves of your screen will share which columns are shown, and the top and bottom halves will share which rows. But you can use this to explore distant parts of the same workbook in a more flexible (if less clean) way than Freeze Panes.
Zoom to selection
If you want to make for the most comfortable possible view of a particular area of your workbook, View => Zoom to selection lets you highlight a range and then zoom to fit that selection as tightly as possible onto your screen.
View options for two or more worksheets / workbooks
If you want to compare two different parts of the same workbook, or contrast two different files, there are a range of other options available.
New window
Even if working within one file, sometimes it’s easier to operate if you have a second window into that file. The ‘New Window’ option on the View Ribbon will open an additional window which you can then point at a different tab or location, and keep the two visible side-by-side.
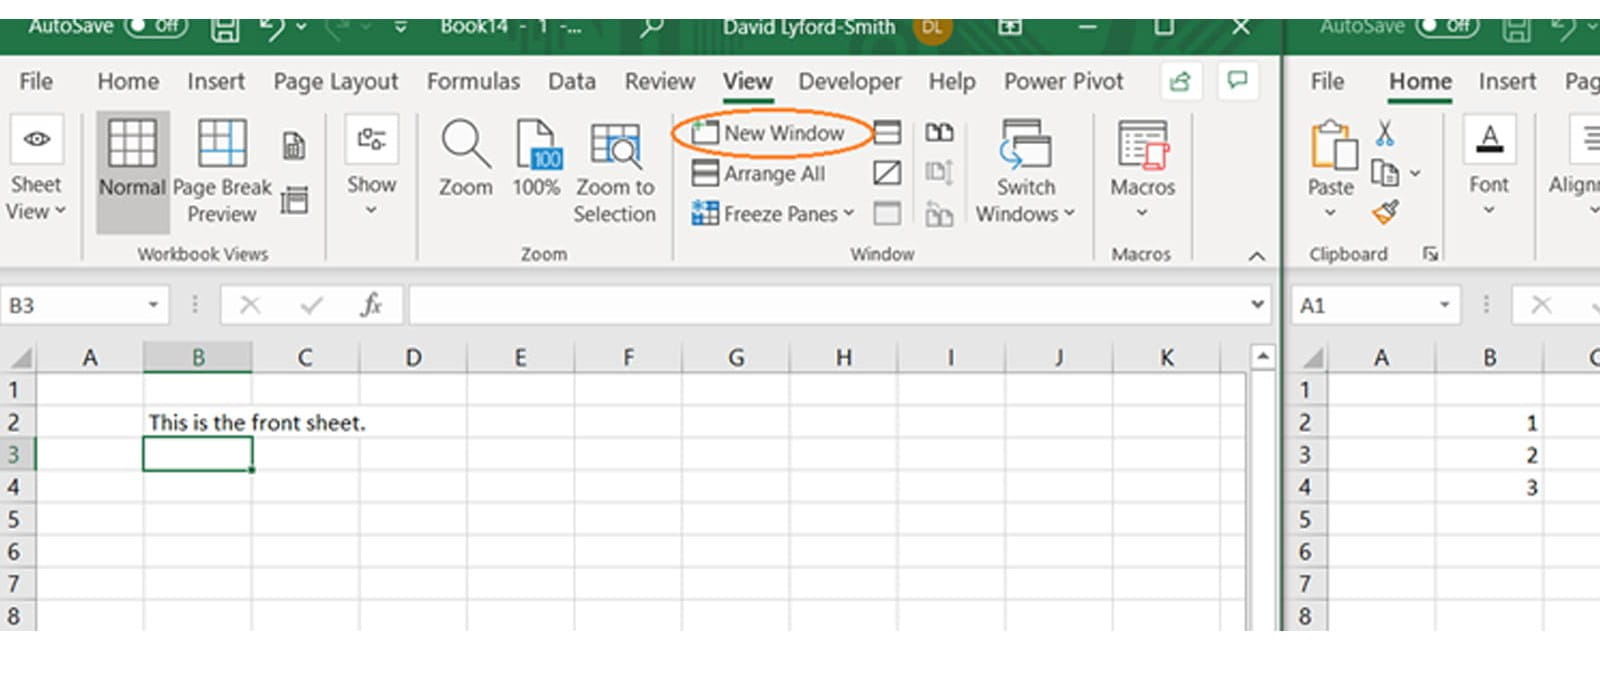
Note that this is not a second copy of the file – just a second view into it. Any changes made are visible in both windows. Save the workbook while you have two or more windows active, and it will open with that many next time.
Arrange all
Whether working with multiple files, or just multiple windows into a single file, View => Arrange all will automatically tile all windows to fit your current screen.
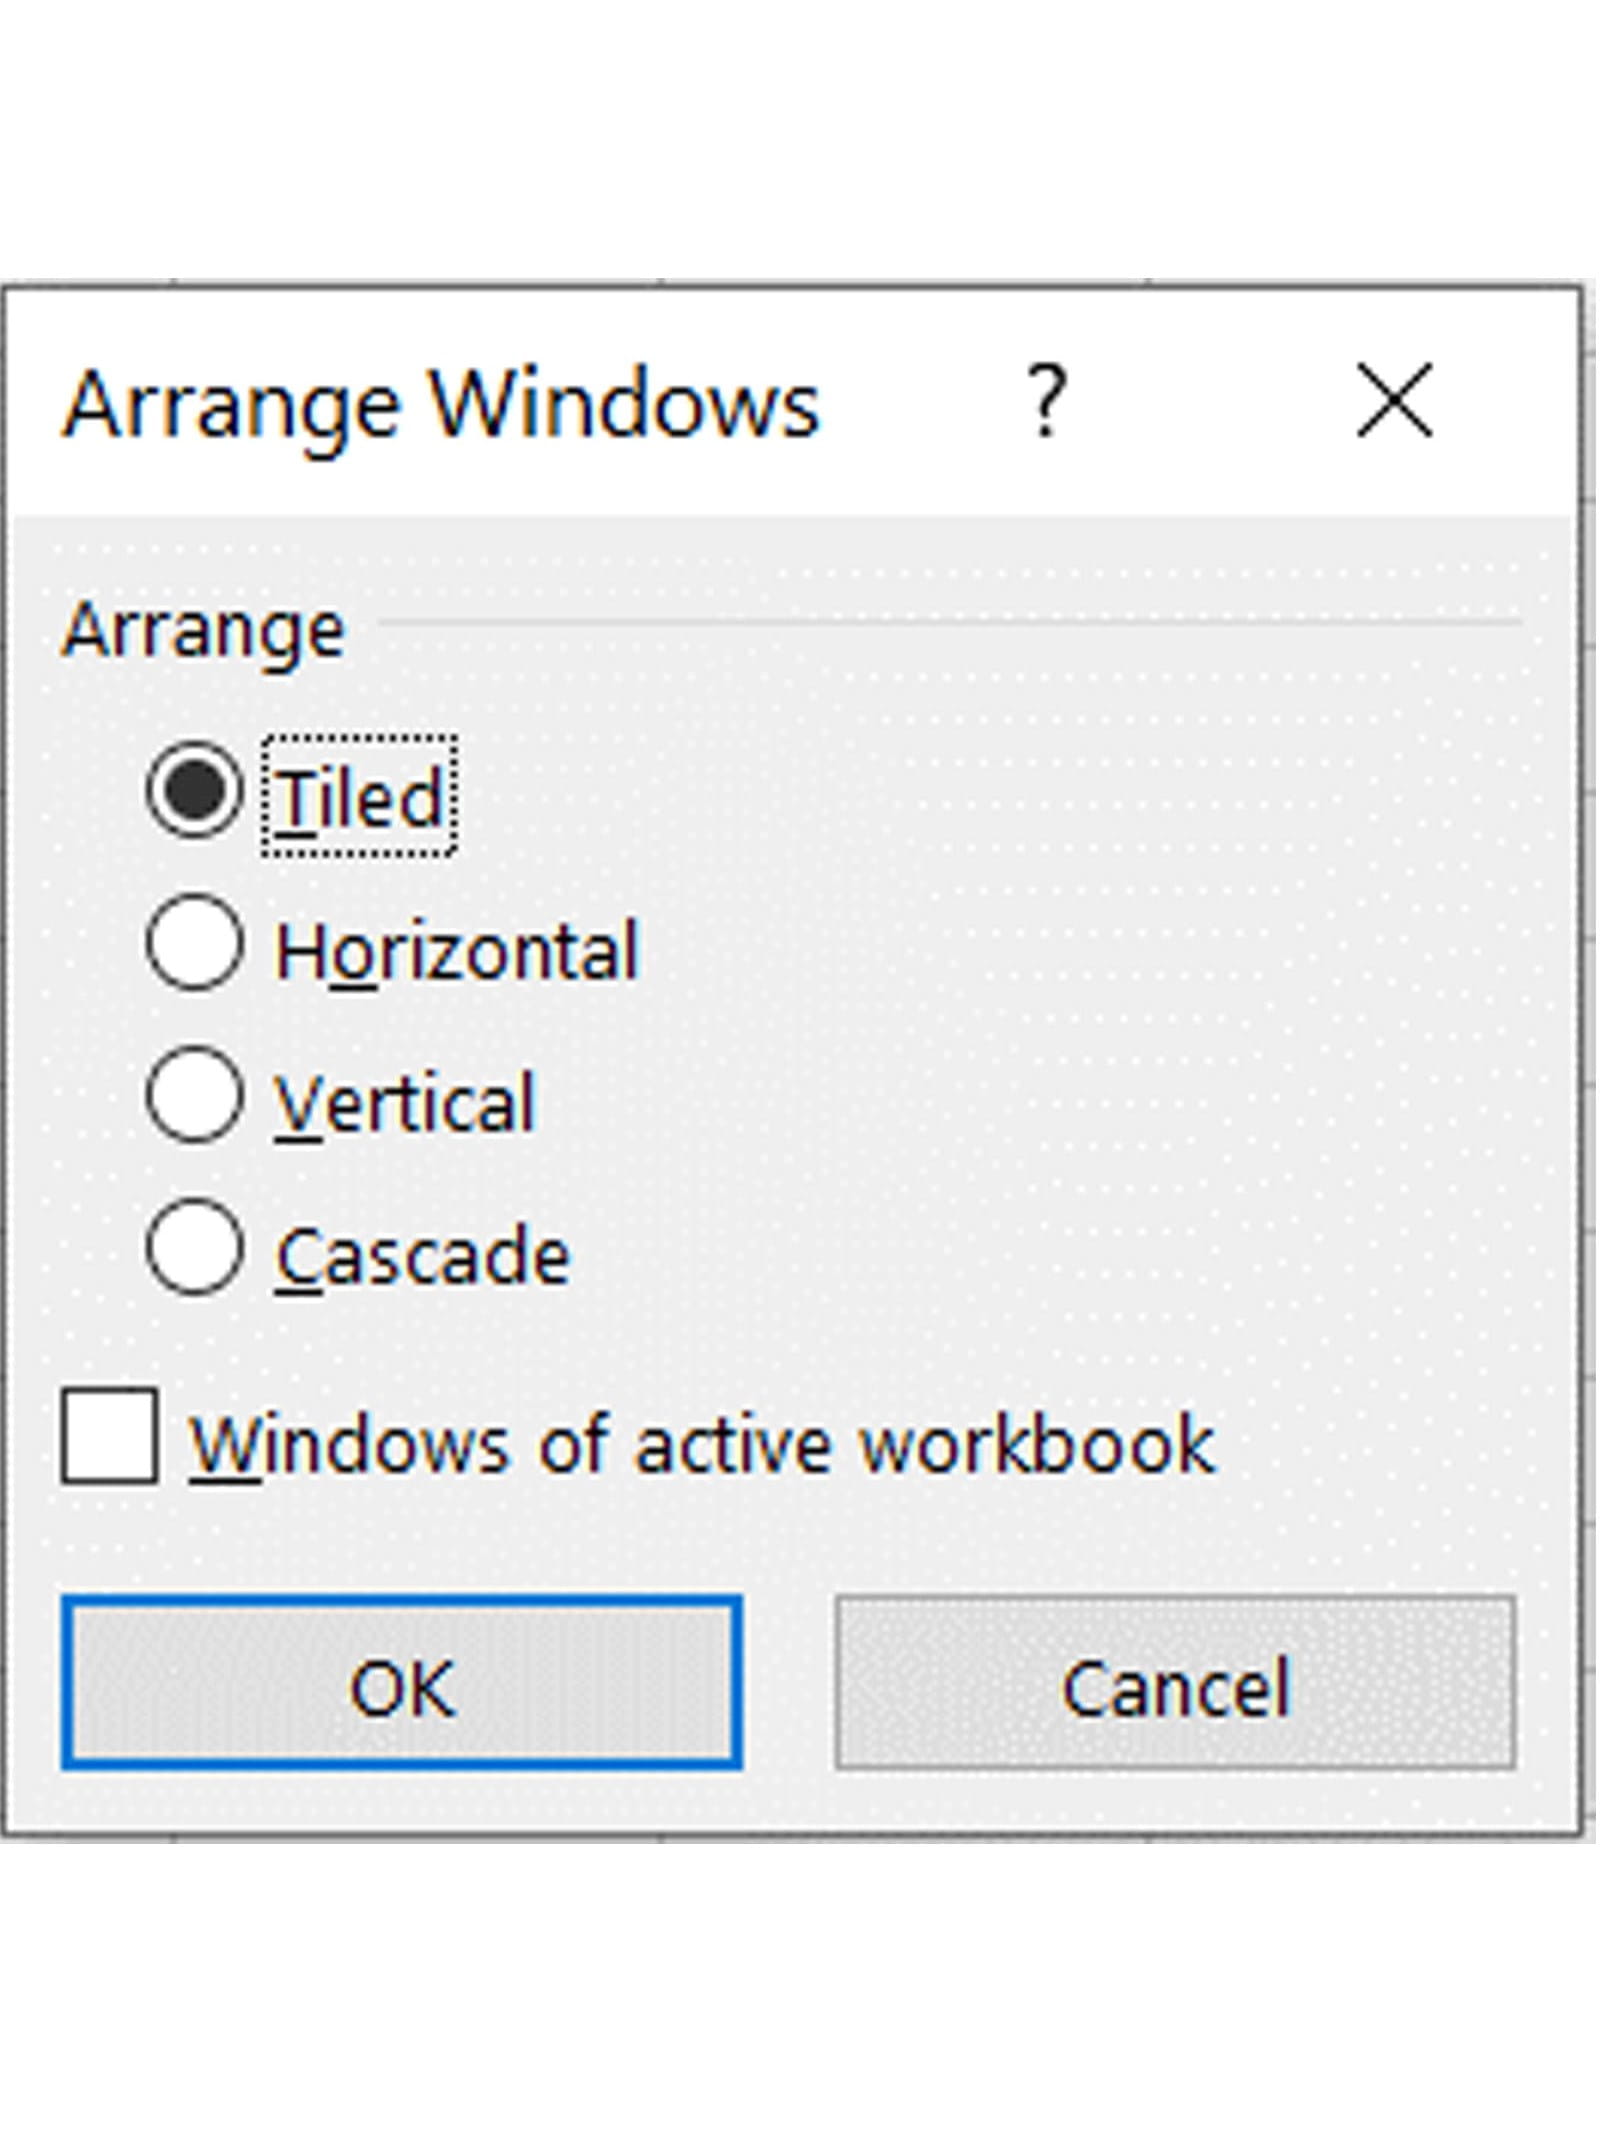
The options also allow you to decide exactly how to lay out the windows, or to arrange only windows into the active workbook instead of all Excel windows you currently have open.
View side by side
When you do have two windows set up side by side, you can use this option from the View menu to synchronise the scrolling between the two windows. This is particularly useful for comparing two versions of the same file – you can side-by-side them and then scroll in just one version to move the view in both.
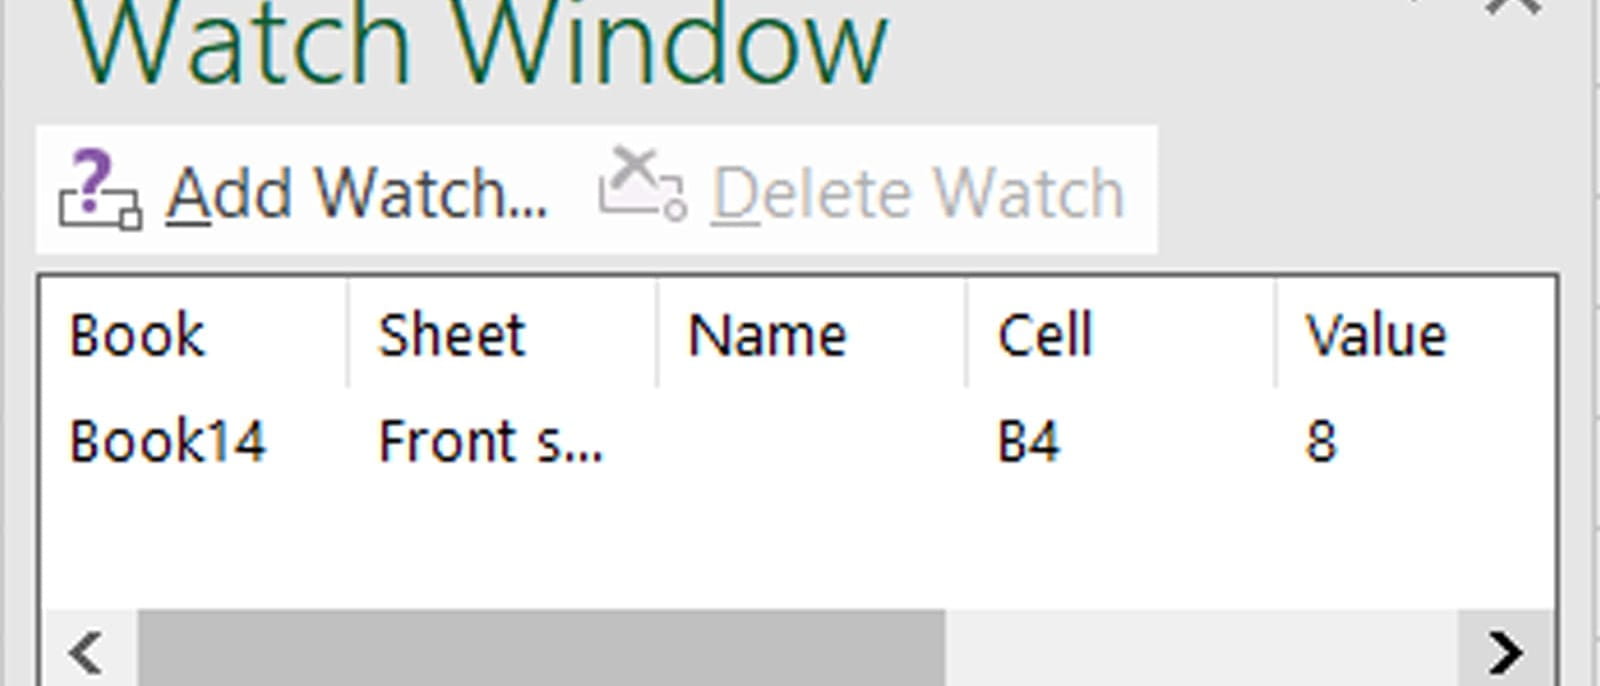
Watch window
If you just need to keep an eye on a small number of key outputs, rather than creating a whole window or frozen pane, you can use Formulas => Watch window. This is a tiny window that you can set to display the value of one or more cells; it will automatically stay visible on top of your current view and help you keep an eye on how your changes affect those values.
Getting your view set up just right can really help improve your productivity – so take the time to learn a few simple tricks and practice them.
- Excel Tips and Tricks #506: Creating a single master list after merging data
- Excel Tips and Tricks #505 – 3 ways of converting US Dates into UK formats
- Excel Tips and Tricks #504 - Accessing accessibility checkers for good spreadsheet practice
- Excel Tips and Tricks #503 – Printing under pressure, super quick presentation tips
- Excel Tips and Tricks #502
Excel community
This article is brought to you by the Excel Community where you can find additional extended articles and webinar recordings on a variety of Excel related topics. In addition to live training events, Excel Community members have access to a full suite of online training modules from Excel with Business.

Archive and Knowledge Base
This archive of Excel Community content from the ION platform will allow you to read the content of the articles but the functionality on the pages is limited. The ION search box, tags and navigation buttons on the archived pages will not work. Pages will load more slowly than a live website. You may be able to follow links to other articles but if this does not work, please return to the archive search. You can also search our Knowledge Base for access to all articles, new and archived, organised by topic.
