
Hello all and welcome back to the Excel Tip of the Week! This week we have a Creator level post in which we’re returning to the topic of using formulas to create dates.
This was last covered in TOTW #249.
A word on Excel dates
It’s important to remember how Excel understands, stores, and works with dates. Excel uses a simple system for labelling dates with numeric values: starting with 1 as 1st January 1900, and counting forward from there. Today’s date, for example, is assigned the number 44,600. Numbers are easier for Excel to store and manipulate, and so in the background that’s what all date cells are. Just convert between a date format and a number format and you can see this:
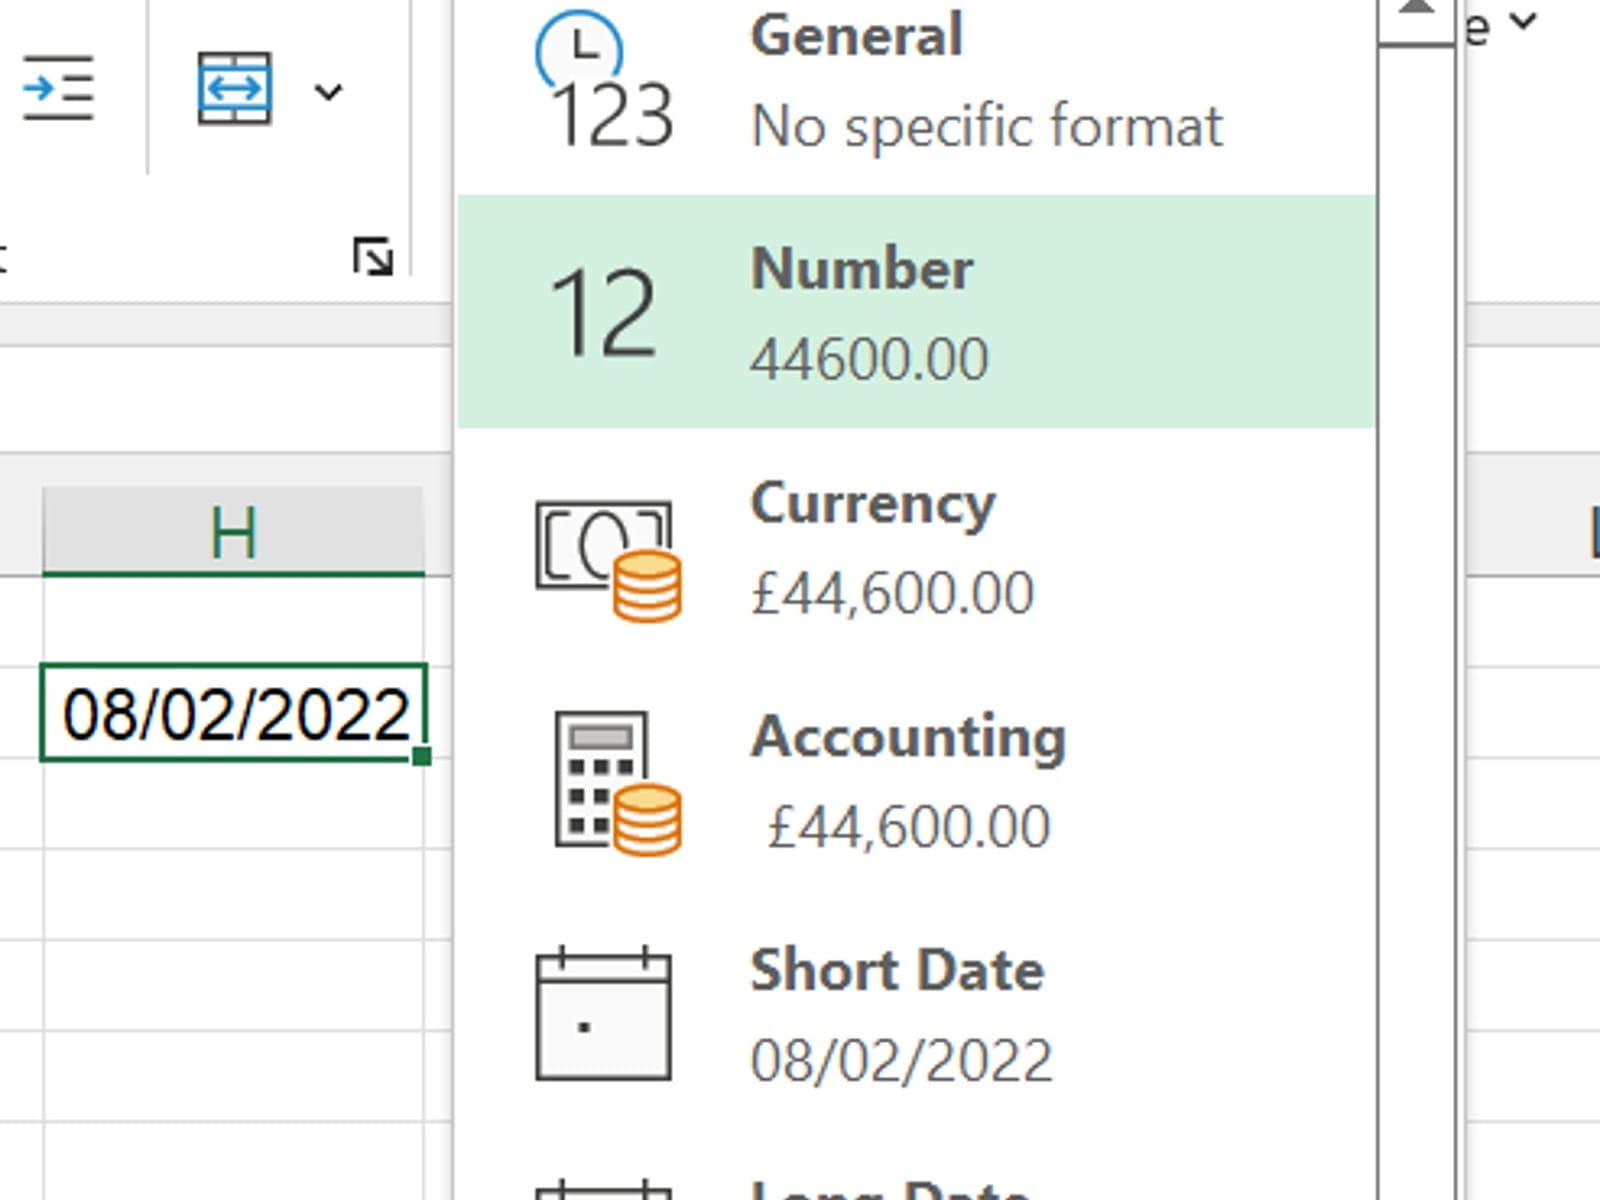
When you type something into a cell like “08/02/2022” or “08.02.2022” or “2022-02-22” – the exact formats depend on your region settings – Excel automatically recognises that as a date and converts it into the appropriate number, while using a date format to display in the familiar, human-readable format. Any formula that works with dates needs these kinds of dates, with the special number formatting, to work. You cannot type a human-readable date directly into a formula – it needs to be either typed in an external cell, entered between quotation marks “”, or computed using one of the formulas we are looking at today.
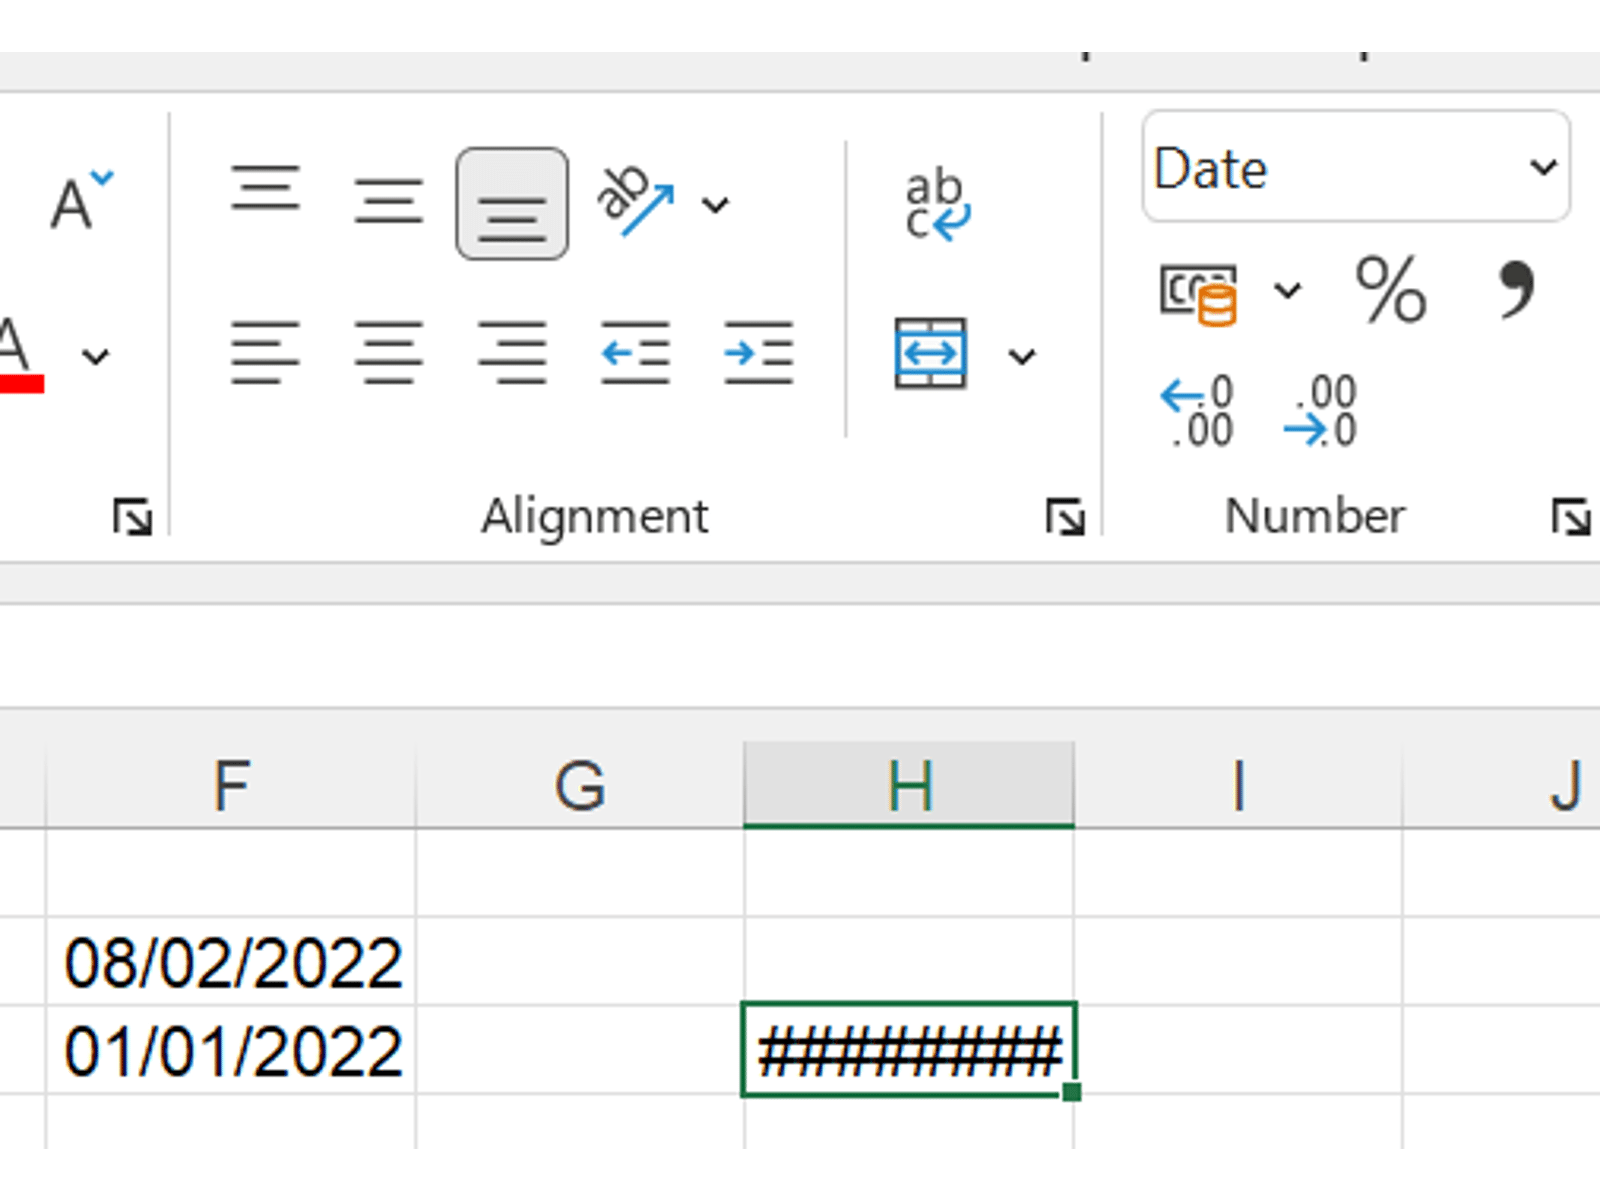
Finally, because Excel stores dates as sequential numbers, you can do simple addition/subtraction to count a number of days forward or backward from a starting date, or subtract two dates to find the difference between them. When doing these kinds of calculations always check that your output is formatted correctly as a number or as a date depending on the circumstances – for example a subtraction of two dates resulting in a negative value will not display correctly if formatted as a date, as Excel can’t handle negative dates:
Making dates with formulas
DATE
The fundamental date-making formula is, naturally,
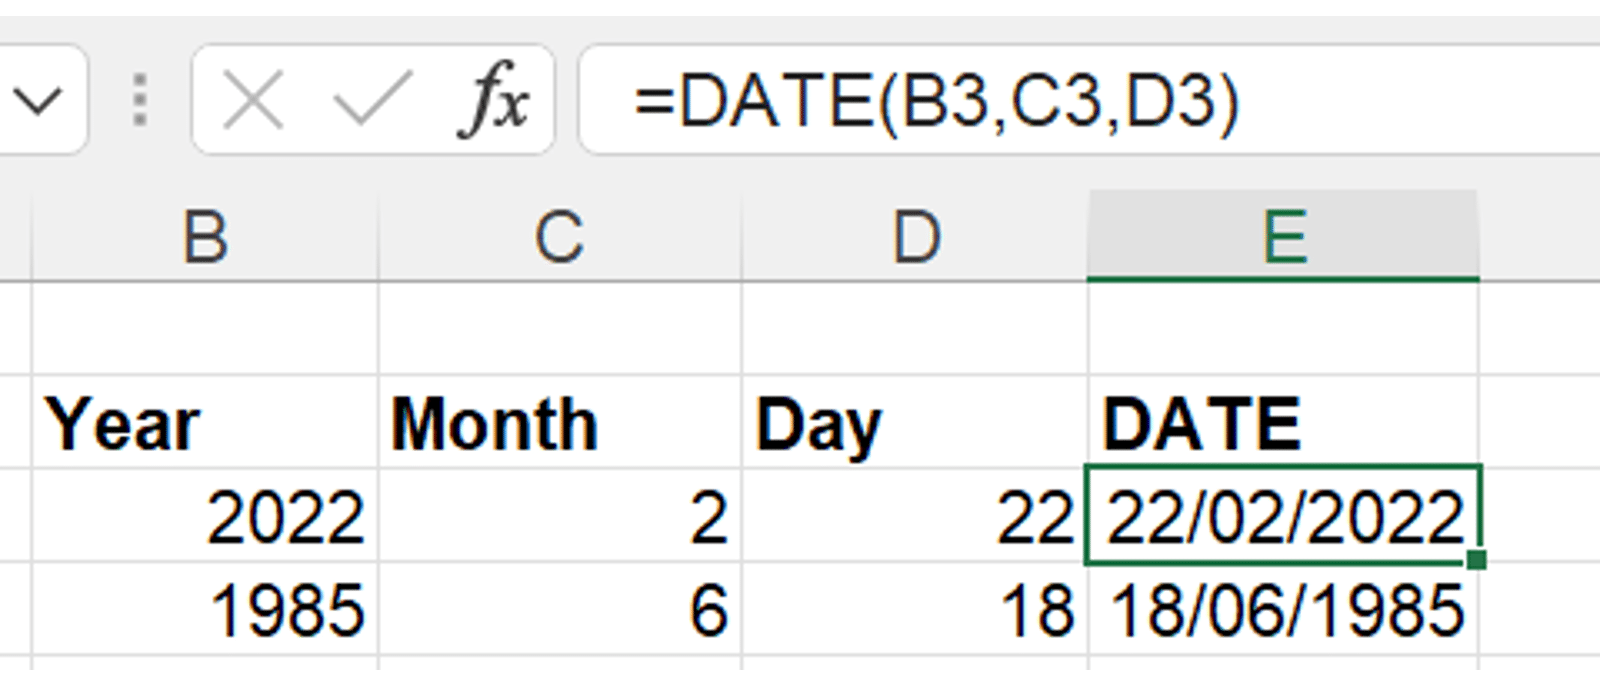
DATE:
=DATE(year, month, day)
Given a numeric value for each part of a date, the DATE function will return the appropriately formatted Excel date:
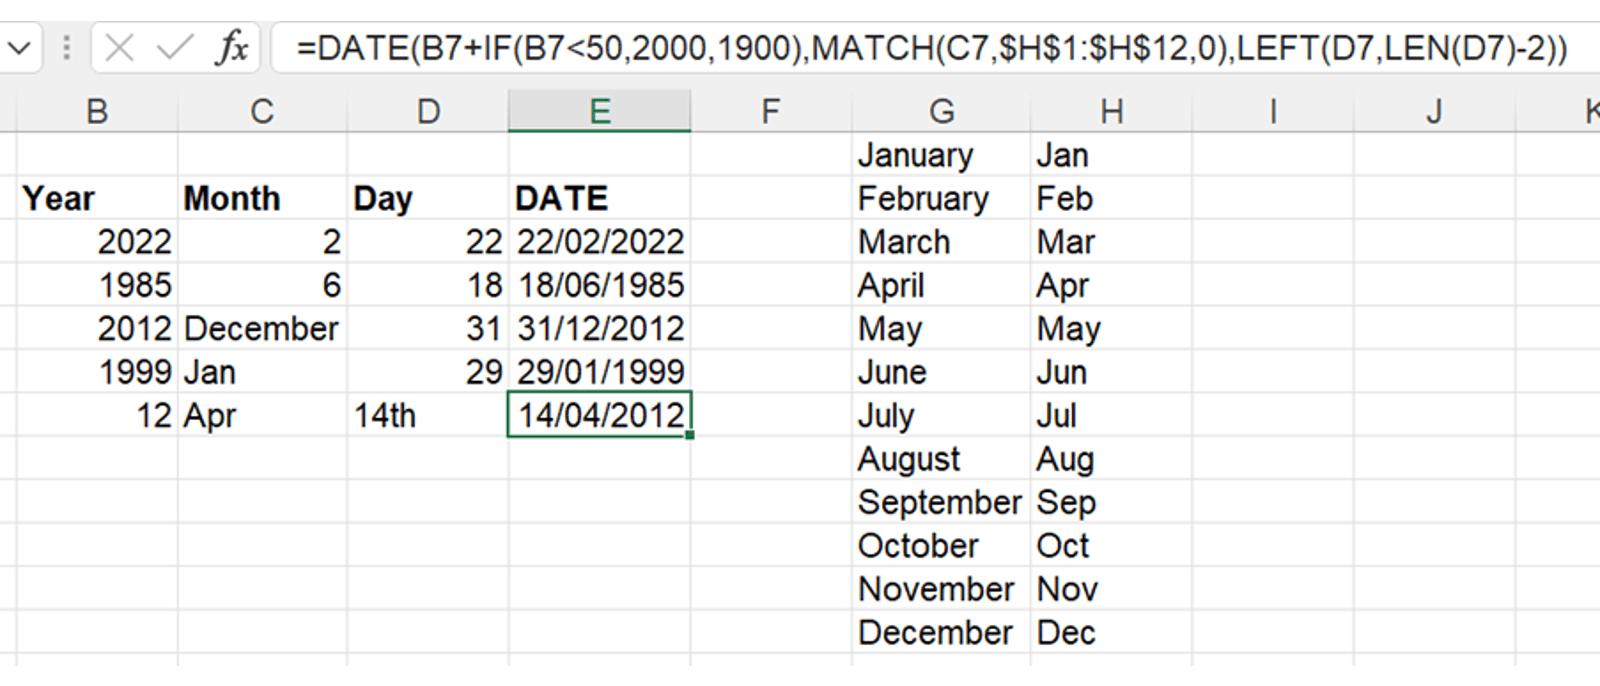
Note that this works only with numbers – no “Sept” etc. However, with a few extra formulas, you can convert other common typed date elements into the numbers needed. For example:
- Convert two-digit years by adding 1900 or 2000 – or even choosing which depending on the size of the year (e.g. 1-50 assume 2000s, 51-99 assume 1900s)
- Convert text month names by using a MATCH to look them up in an ordered list
- Convert day values with an ordinal (th, st, rd) by using LEFT and LEN to remove it
Here’s a comprehensive function that uses all three of these approaches:
DATE can also handle overflow – a month of 13 will return the January of the following year, and a day number over the current month will spill into the next. This means that creating a formula that increments dates with the row number can be as simple as:
=DATE(2022, 1, ROW())
EDATE
While you can add and subtract numbers of days easily just using + and -, adding and subtracting months or years is more complicated. This is what EDATE does:
=EDATE(start date, number of months)
Don’t forget that the start date needs to be a DATE formula, entered in its own cell, or in quote marks as explained above! You can also offset backwards by using a negative number of months. To add years, just multiply the year number by 12. Here’s what that looks like in practice:
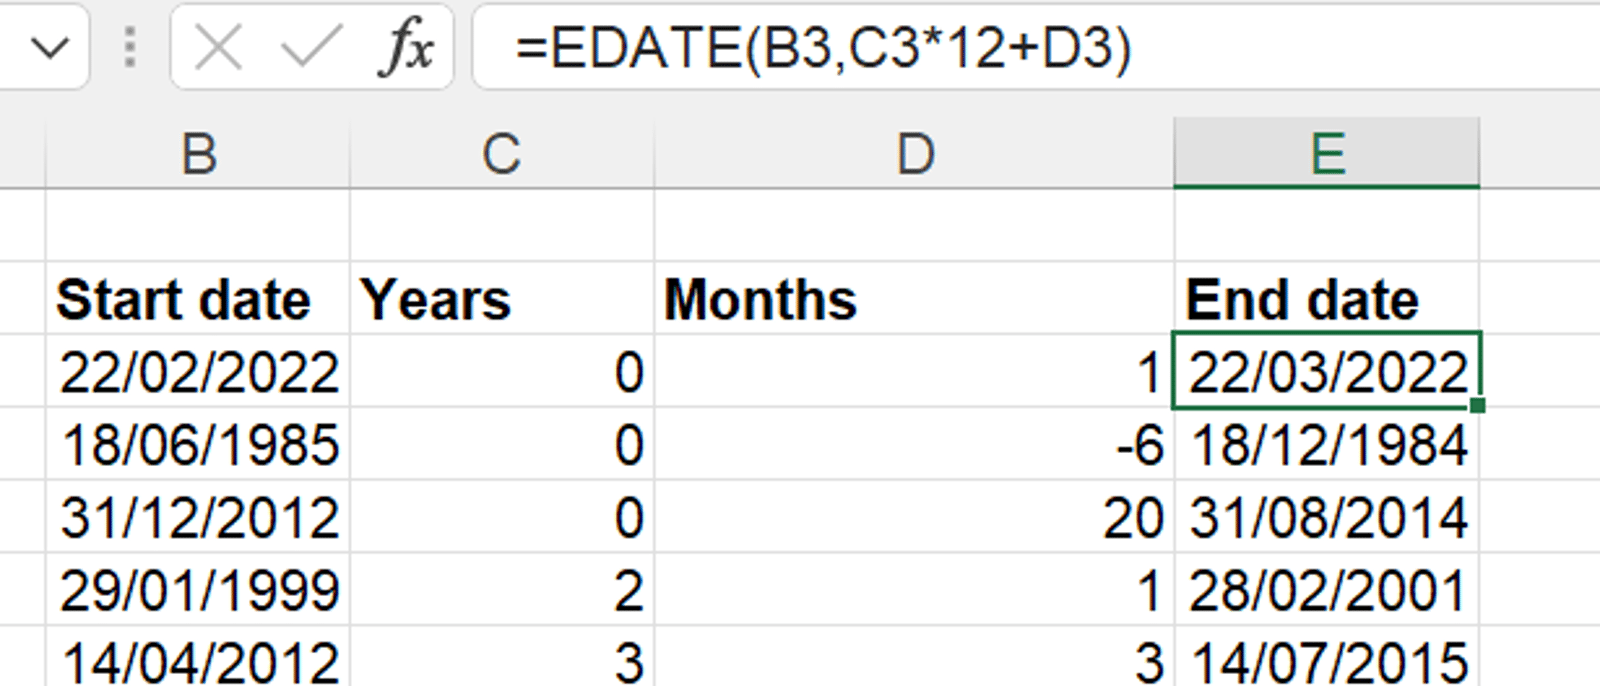
Note that the fourth formula here is trying to output the 29th February in a year where that doesn’t exist, so instead returns the 28th.
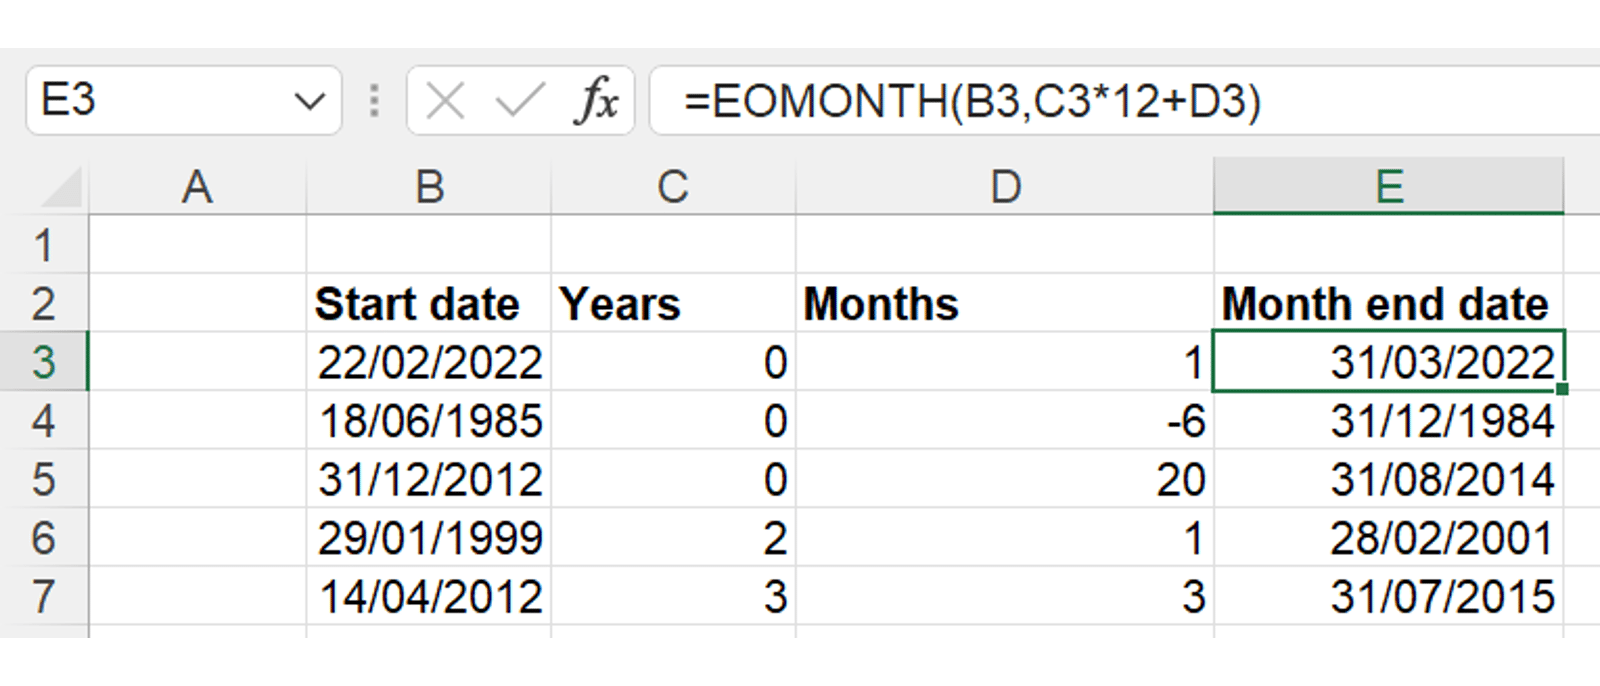
EOMONTH
Because of the rounding-down behaviour described above, EDATE can’t reliably return a series of month-end dates:

For this, or any other situation where we want specifically month-end dates, instead we use EOMONTH:
=EOMONTH(start date, number of months)
This works just like EDATE does, but it also then moves the resulting date to the next month-end date:
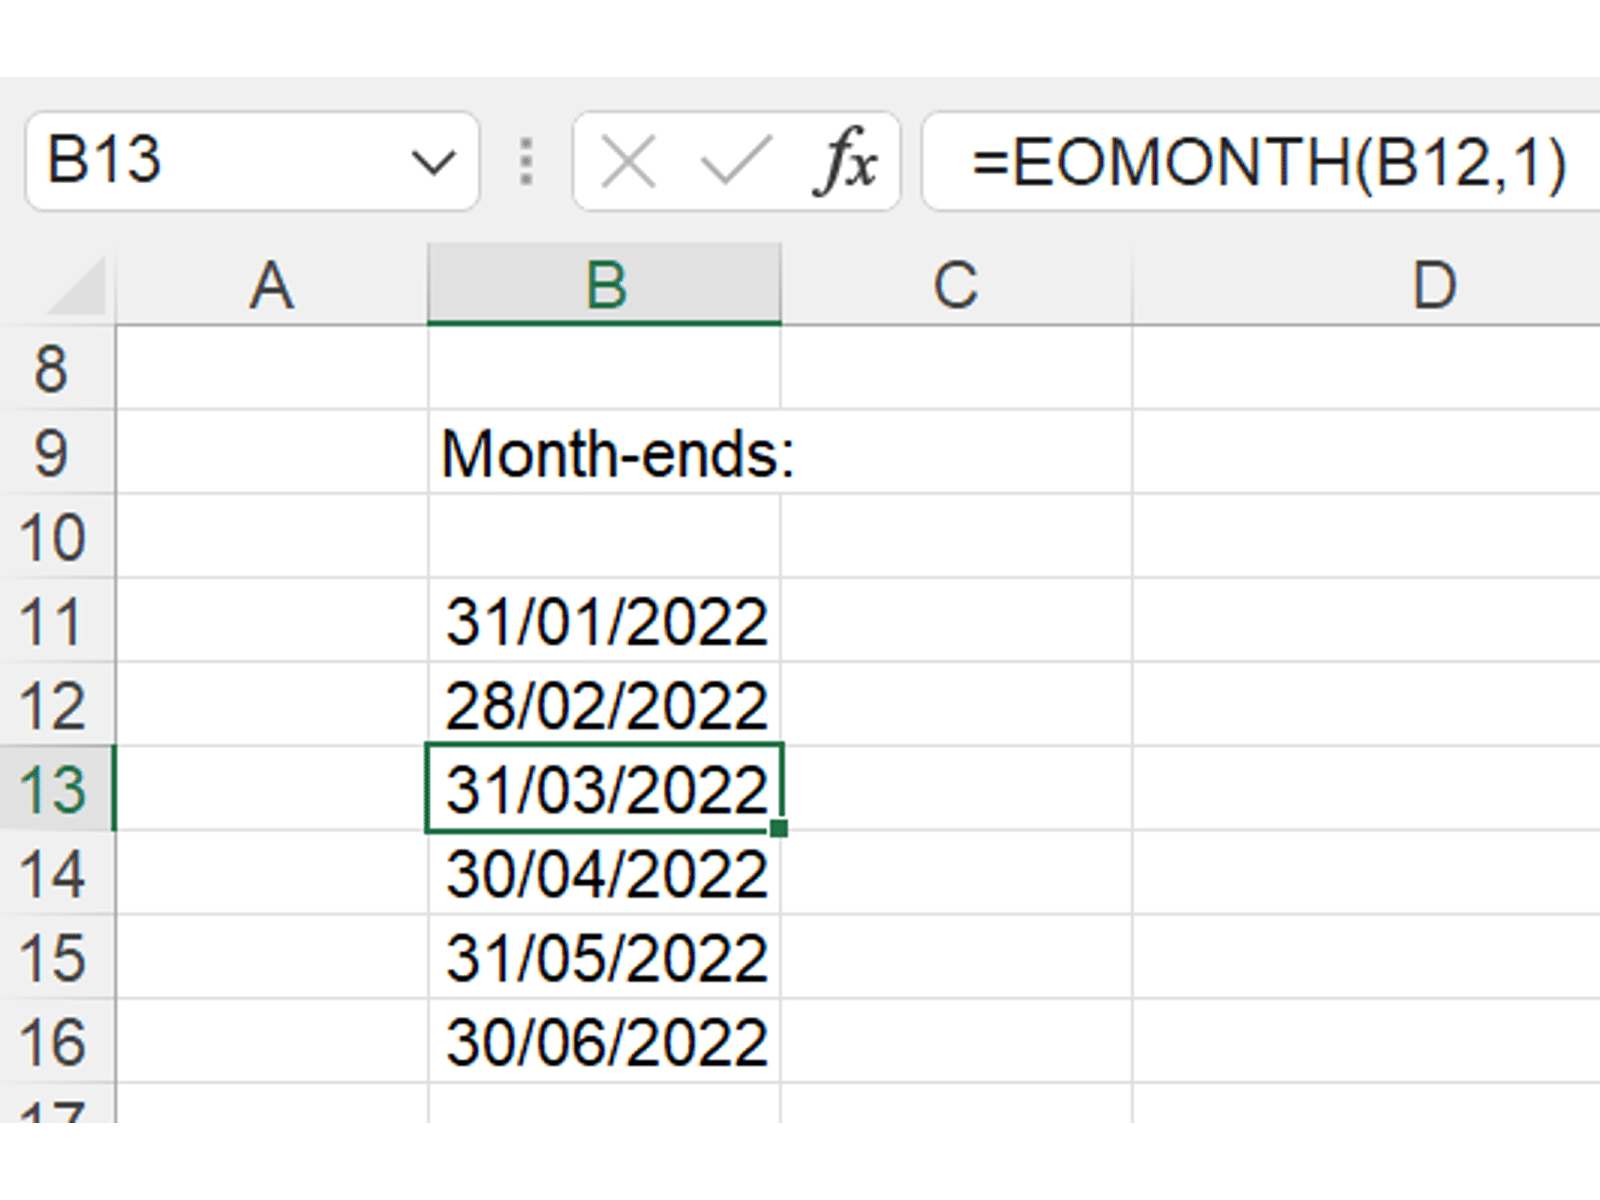
And this can easily produce a list of month-end dates:
- Check out all the examples from today’s tip in this file.
Join the Excel Community
Do you use Excel in your organisation? Are you using it to its maximum potential? Develop your skills and minimise spreadsheet risk with our Excel resources. Membership is open to everyone - non ICAEW members are also welcome to join.

Archive and Knowledge Base
This archive of Excel Community content from the ION platform will allow you to read the content of the articles but the functionality on the pages is limited. The ION search box, tags and navigation buttons on the archived pages will not work. Pages will load more slowly than a live website. You may be able to follow links to other articles but if this does not work, please return to the archive search. You can also search our Knowledge Base for access to all articles, new and archived, organised by topic.
