Excel Online is great to use when you want to work collaboratively in a dynamic spreadsheet. However, there may be instances where you want to share a spreadsheet with others but restrict changes users can make to certain cell ranges.
This is when knowing how to set up permissions on ranges can be very handy to protect your spreadsheet from accidental or deliberate unwanted changes and edits!
Manage protection in Excel Online
Let’s start with an example. I have a loan modelling template in Excel Online that I want to share with others. While I want other users to be able to change the inputs, I want to protect the modelling outputs, which are all formula-driven, from any unwanted changes.
To make this easier to follow, all my input fields are highlighted in yellow.

To get started on this, I navigate to the Review tab and select ‘Manage Protection’

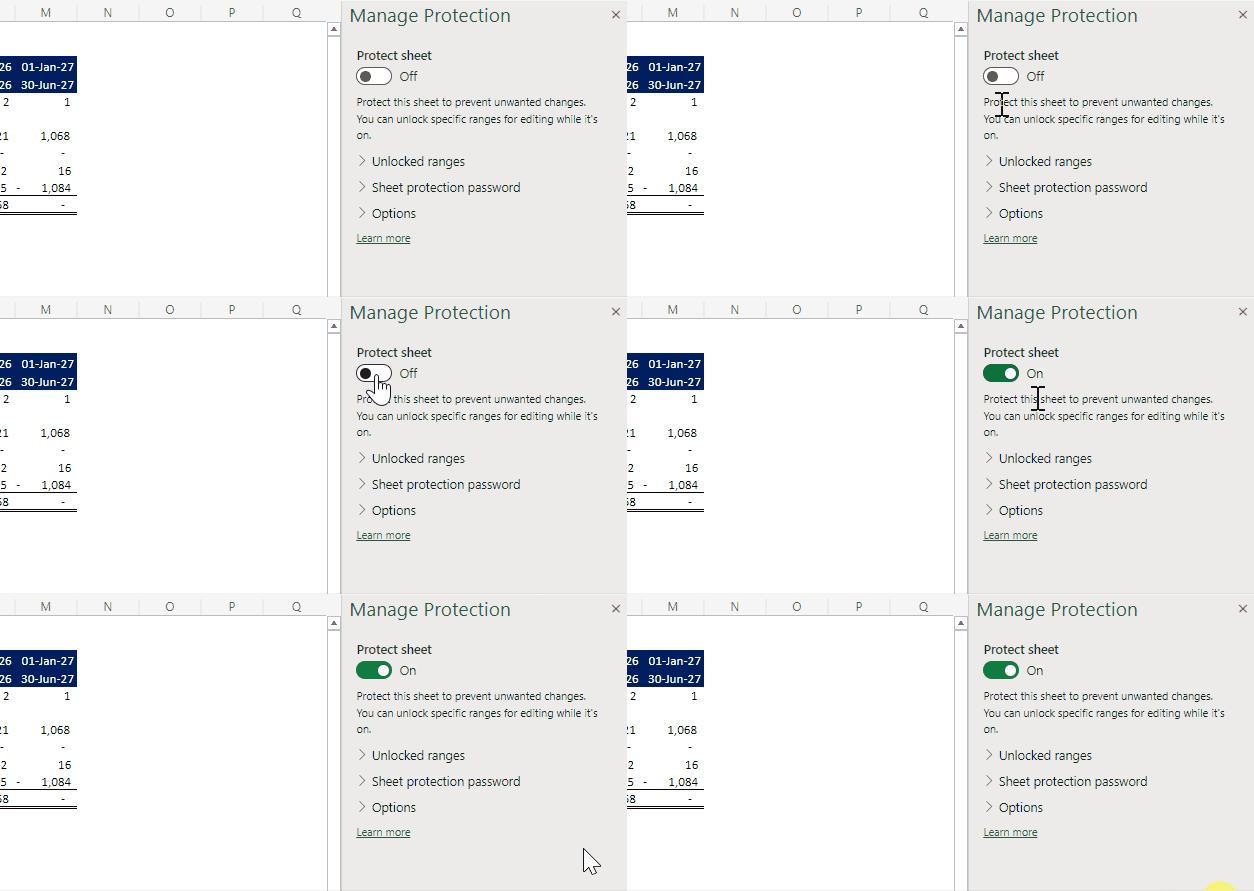
This will open a toolbar on the right-hand side. To get going with protecting the worksheet, I need to turn ‘On’ the ‘Protect sheet’ option. This will protect the whole worksheet from any unwanted changes or edits.
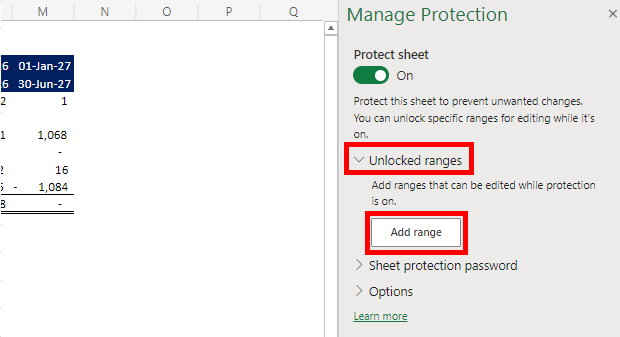
However, I want to be able to allow users to edit the input fields in my model. To do this, I will need to add ranges that can be edited while protection is on. To do this, if I expand the ‘Unlocked ranges’ dropdown, I will see an option that allows me to add these ranges.
From here I can select the range I want to protect and label it.

It’s important to note here that adding a password to the unlocked range is optional and will add another level of protection by only allowing those with the password to edit the unlocked range.
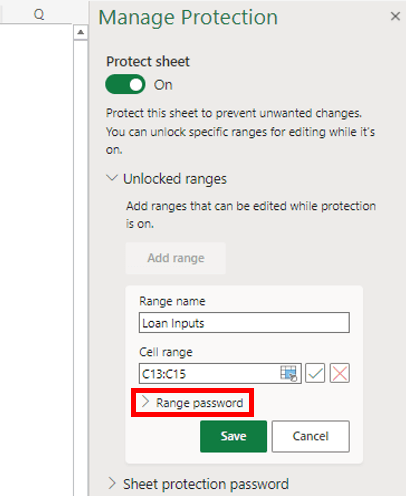
In my example, I’d like to let users to edit the unlocked ranges freely. As a result, I won’t be adding an additional range password.
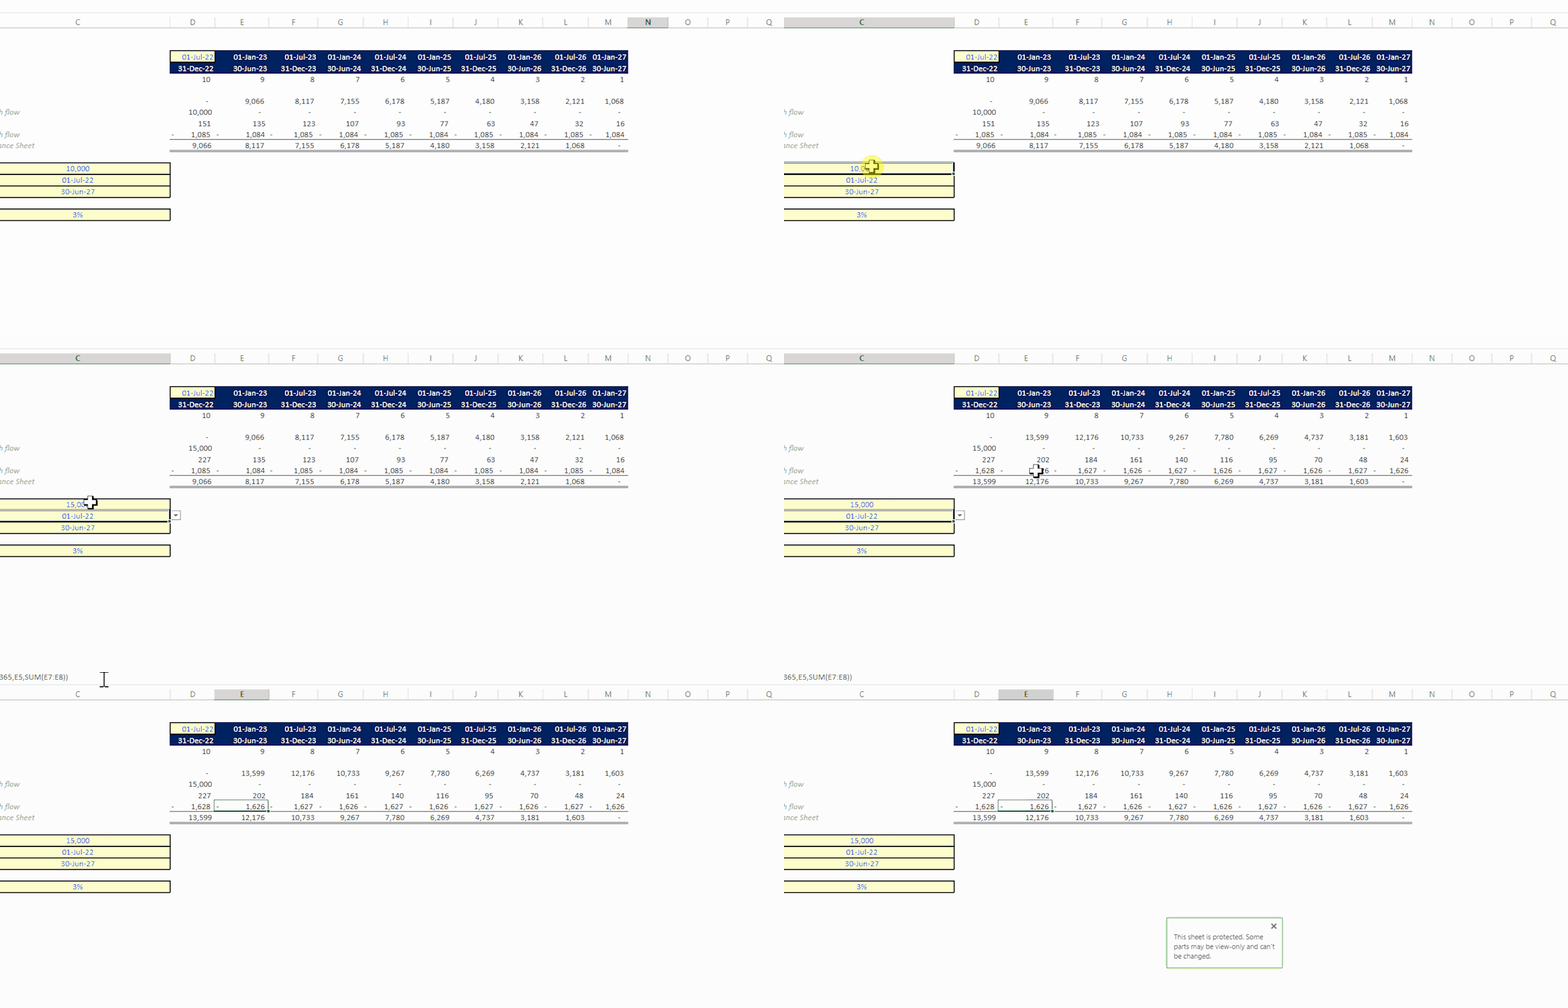
Once I’ve added all my inputs to ‘Unlocked ranges’, I can now see the permissions in action! As expected, I can change my ‘Loan amount’ input to ‘15,000’ but I can’t make any changes to the ‘Closing Balance formula’.
Once my range permissions are in place, I want to make sure that only certain users can make changes to these protections. While this is an optional field, to further restrict who can edit my permission ranges, I can add a ‘Sheet protection password’.
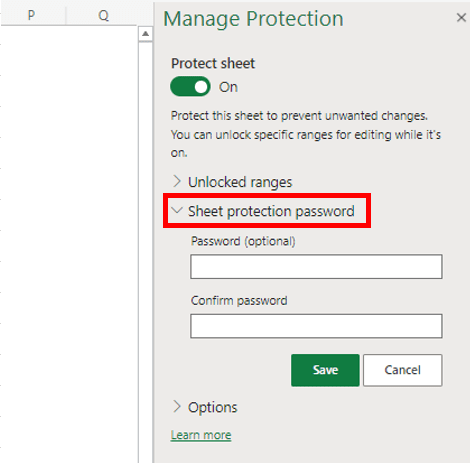
Now the password will be required to access the ‘Manage Protection’ option and make changes to the protection permissions I have set.
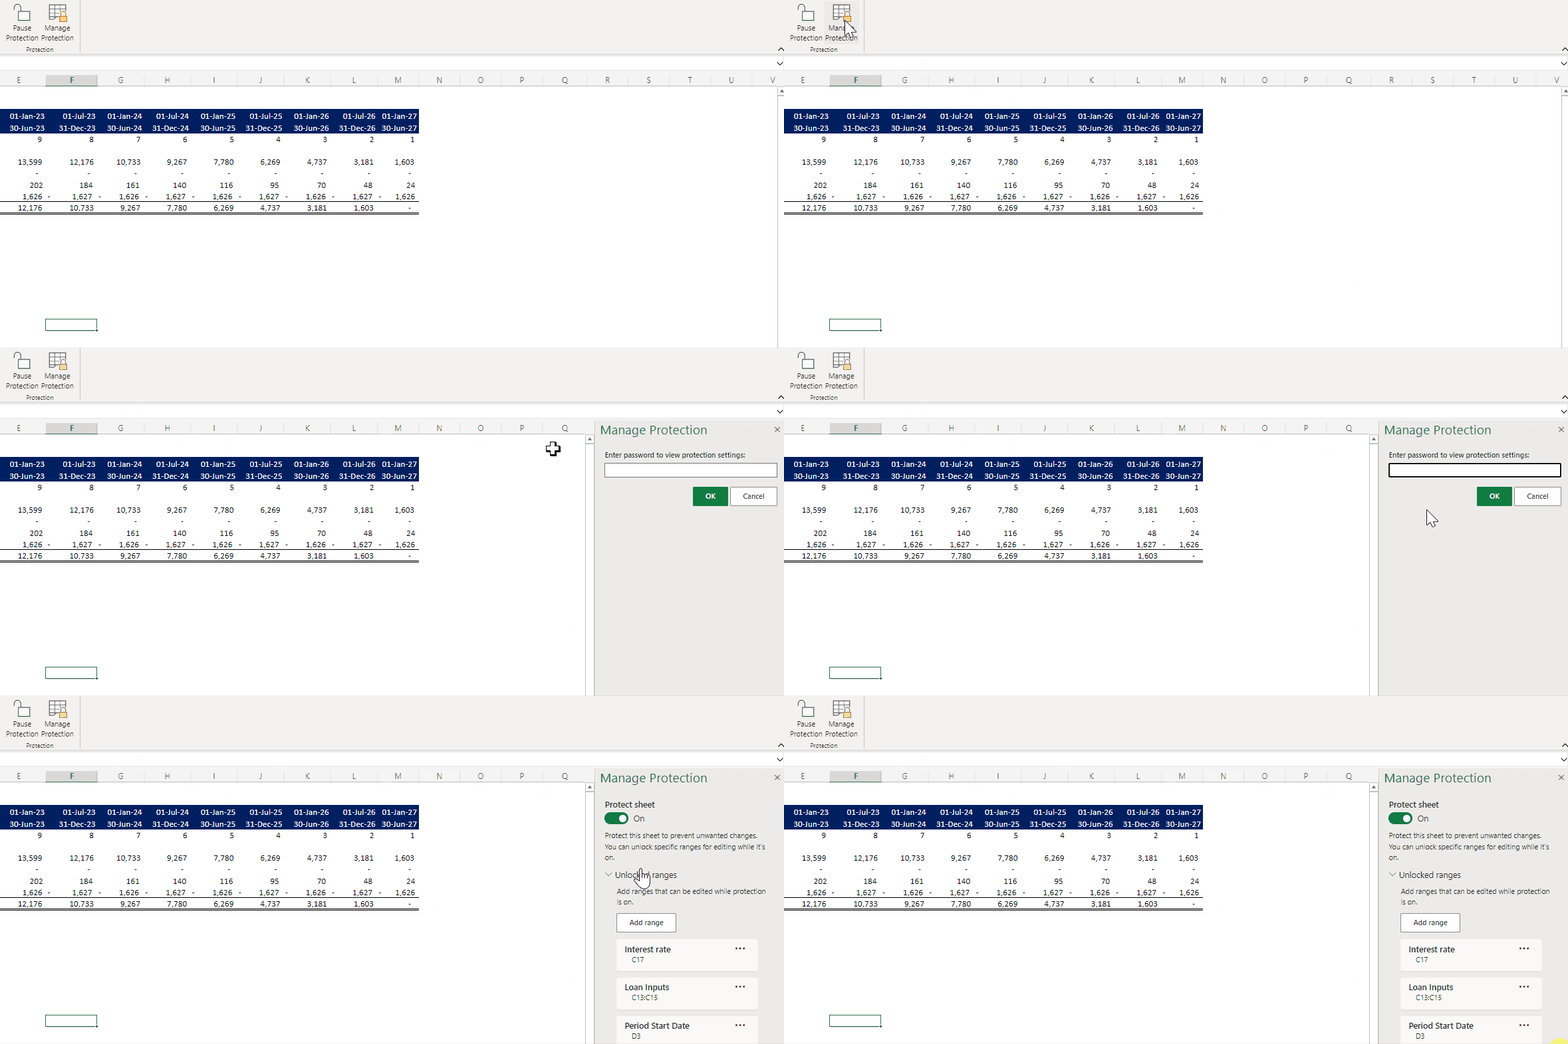
Managing protection options
From the ‘Options’ dropdown, you can select what you want to allow all users of this sheet to be able to do in your spreadsheet.
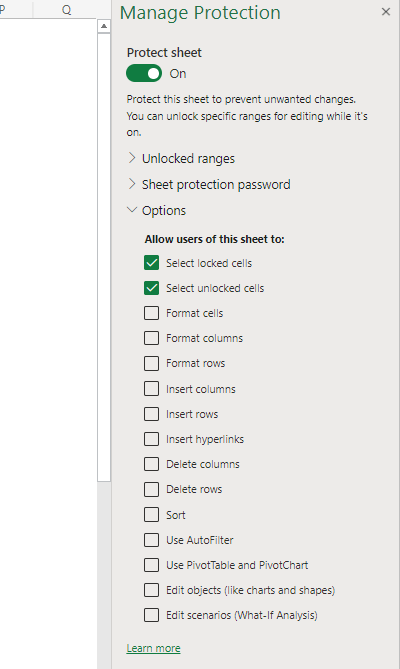
In my example, I have allowed users of my spreadsheet to only be able to select locked and unlocked cells, which is the default setting.
If I wanted to allow users to be able to make changes to the format of cells for example, then I can check this option to enable this ability.
Pause protection
There may be instances where you want to disable the protection permissions to allow you to make changes to the spreadsheet, while keeping it protected for others. Excel allows you to pause protection permissions without removing or having to delete all set permissions.
To do this, I can navigate to the Review tab and select ‘Pause Protection’.

As I set a ‘Sheet protection password’ in earlier steps, I will be prompted to enter the password to pause protection.
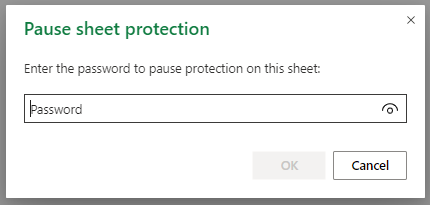
The trick here is that now, I can make all the edits to the spreadsheet that I need, but if anyone else has it open, they will still be subject to the protection permissions.
Once I’ve made my changes, to then return to my set protection permissions I can simply select the ‘Resume Protection’ option in the Review tab.

This tip covered range permissions in Excel Online. Similar (though not identical) functionality exists in Excel Desktop; more guidance on how to set permissions for different ranges in Excel Desktop has been covered in Tip #159.
Archive and Knowledge Base
This archive of Excel Community content from the ION platform will allow you to read the content of the articles but the functionality on the pages is limited. The ION search box, tags and navigation buttons on the archived pages will not work. Pages will load more slowly than a live website. You may be able to follow links to other articles but if this does not work, please return to the archive search. You can also search our Knowledge Base for access to all articles, new and archived, organised by topic.

