
Introduction
The ability to generate a TRUE or FALSE value by clicking on a check box has been available for a long time, but it can be cumbersome to implement, particularly where multiple check boxes are required, for example, for an entire table column. An enhancement is on the way which will make the use of check boxes much easier. Currently, this enhancement is only available to the ‘Insider’ update channel but will hopefully be released more generally in the near future.
Form fields
The Excel Developer Ribbon tab includes a Controls group that contains different interactive controls such as scroll bars, list boxes and check boxes. The Developer Ribbon tab is not displayed by default so you might need to display it. To do so, just right-click in the Ribbon area and choose Customize the Ribbon… You can then click the check box for the Developer tab in the right-hand list.
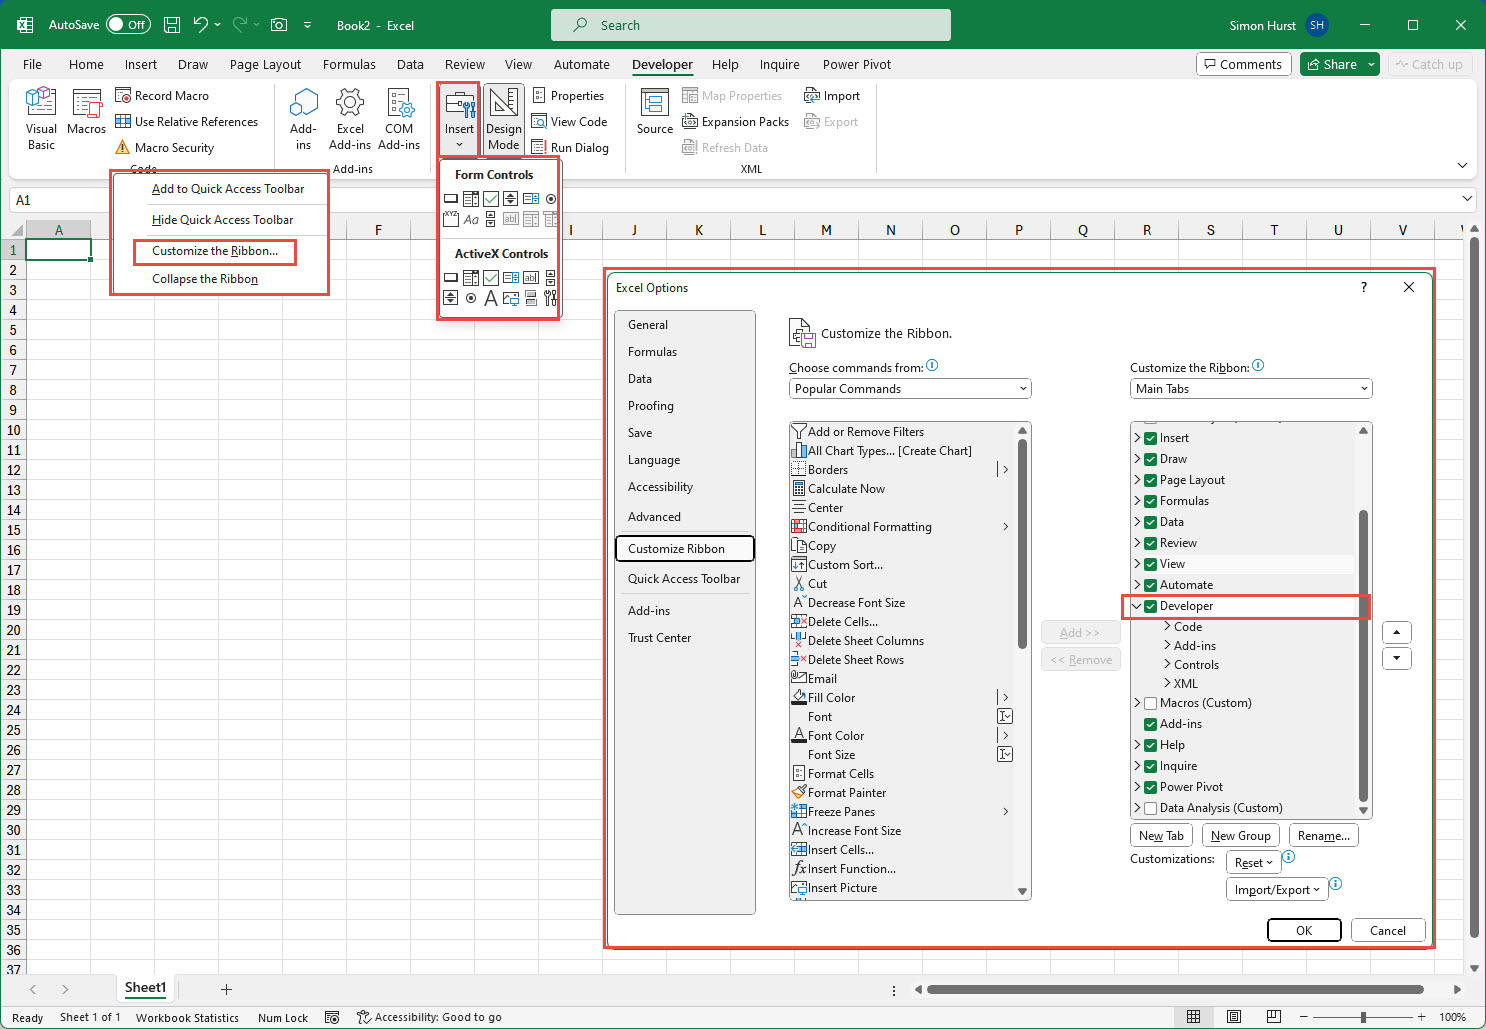
As we can see in the screenshot above, clicking on the Insert dropdown in the Controls group displays two separate sections of controls: Form Controls and ActiveX Controls. We will keep things simple and just use Form Controls. ActiveX Controls require the use of VBA code whereas we can work directly with Form Controls.
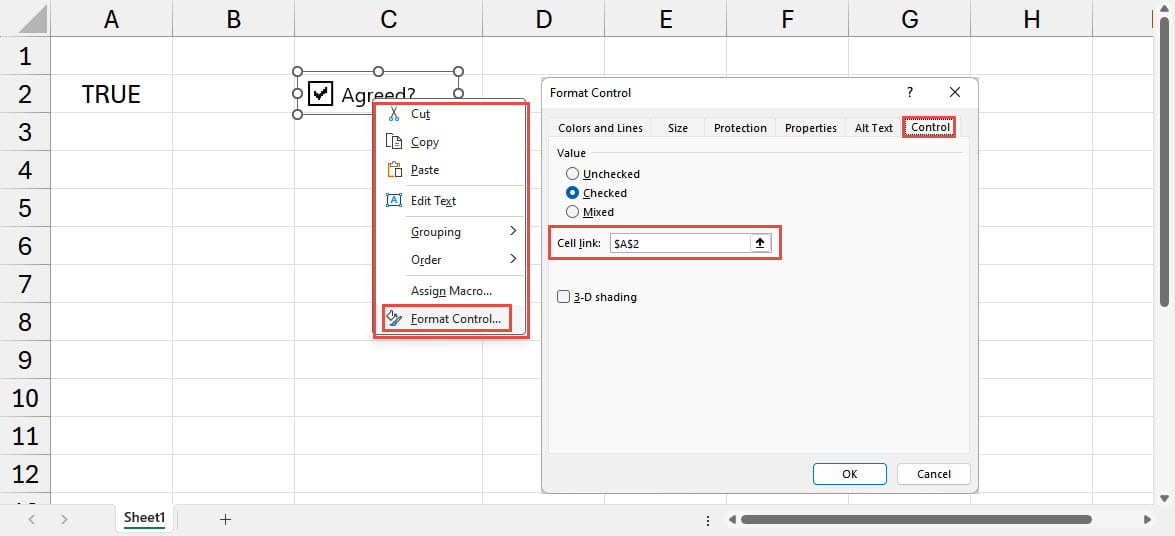
To add a check box to our worksheet, we just click on the check box icon in the list of Form Controls and then click on our worksheet where we want the check box to appear. Note that the check box is an object in the worksheet and is not part of any particular cell. The box will appear with a default text description to its right. Immediately after adding it to the worksheet, the check box will remain selected, and we can click in the text to replace it with our chosen description. If we then click outside of the check box to deselect it, it will become active, and we can click on it to switch between ticked (TRUE) and unticked (FALSE). At the moment, apart from the intense excitement of seeing the tick appear in the box, nothing else happens. To make use of the check box control, we need to link it to a cell which will then contain the TRUE or FALSE value. We do this by right-clicking on the check box control and, from the Format Control dialog box, Control tab, setting the Cell link: to our chosen cell:
As we click on our check box, the value in the nominated cell will switch between TRUE and FALSE values. These values can be used in functions that use TRUE and FALSE arguments such as IF(), or directly in mathematical calculations where TRUE will return 1 and FALSE will return 0. The relationship also works in the opposite direction, so changing the cell value to TRUE or FALSE will change the check box accordingly.
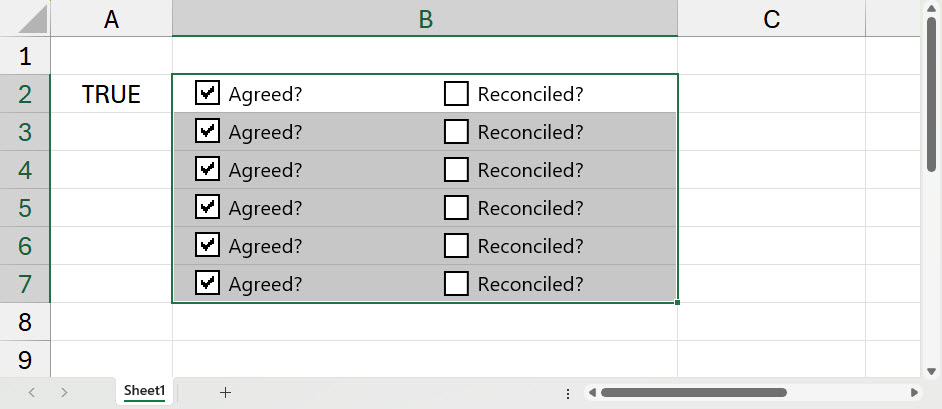
Having mentioned that the check box control doesn’t ‘live’ in a particular cell, if we change its dimensions to fit within a cell, copying that cell down using the fill handle will include copies of all the check boxes that are within that cell. However, if a control has been linked to a cell, all the copies will refer to that one cell. So, for our Agreed? check box, ticking any one of them will cause all six to change. To cause the check box to affect the cell on the same row would require us to edit each individual control property to choose the cell link:
The new check box
As mentioned in the introduction, things are about to get easier. A new Check Box group has appeared to the Insert Ribbon tab for those on the Insider Update channel. This contains a single command: Check Box. The new type of check box converts the cell or cells that were selected before clicking on the Check Box command to TRUE or FALSE values with each cell displaying a check box. Clicking on the check box directly switches the value of the cell between TRUE and FALSE. We can add check boxes to multiple cells by selecting them before using the new Check Box command, or we can just copy a check box cell to other cells. Because these check boxes are each now an integral part of a cell, rather than a worksheet object that belongs to no particular cell, we can use the TRUE or FALSE value by referring to the cell directly:

Archive and Knowledge Base
This archive of Excel Community content from the ION platform will allow you to read the content of the articles but the functionality on the pages is limited. The ION search box, tags and navigation buttons on the archived pages will not work. Pages will load more slowly than a live website. You may be able to follow links to other articles but if this does not work, please return to the archive search. You can also search our Knowledge Base for access to all articles, new and archived, organised by topic.
