
Having considered ways to speed up entering formulae in Excel in the first six posts in this series, this time we will move on to formatting and start by considering the use of Excel Styles and show how they can also help in applying several of the ICAEW Twenty principles for good spreadsheet practice.
'How to' series
In this series we will be looking at the Excel tools and techniques that help you accomplish a range of day-to-day Excel tasks more efficiently and effectively.
As part of each article, we will be scouring the extensive Excel Community archive to provide links to additional details and ideas.
This is the story of the series so far:
- Excel how to: speed up entering formulae part 1 - using the dollar signs to fix all or part of a reference
- Excel how to: speed up entering formulae part 2 - using Range Names to make formulae easier to enter and understand
- Excel how to: speed up formulae - using Excel tables – creating dynamic references by referring to Table columns and using Table structured references to make formulae easier to understand
- Excel how to: speed up formulae - using Excel tables part 2 – adding calculated columns to an Excel Table
- Excel how to: speed up entering formulae – Dynamic Arrays – how the recent introduction of Dynamic Arrays can dramatically reduce the number of formulae you need to enter in the first place
Excel Styles
The Excel Home Ribbon tab includes the Font, Alignment and Number groups to deal with formatting cell contents. However, setting formatting attributes individually for cells or ranges of cells can be time consuming and lead to inconsistent formatting. Using styles instead allows multiple formatting attributes to be applied with a single click, and makes it much easier to keep formatting consistent throughout a workbook.
Styles have their own group in the Excel Home Ribbon tab. As well as the Conditional Formatting and Format as a Table dropdowns, this group includes the Styles gallery. Depending on the amount of room available to display the Ribbon, the gallery will display visual representations of styles, allowing them to be applied by selecting the relevant cells and then just clicking on the style to be applied. The More dropdown at the bottom right of the gallery displays all the styles organised by category:
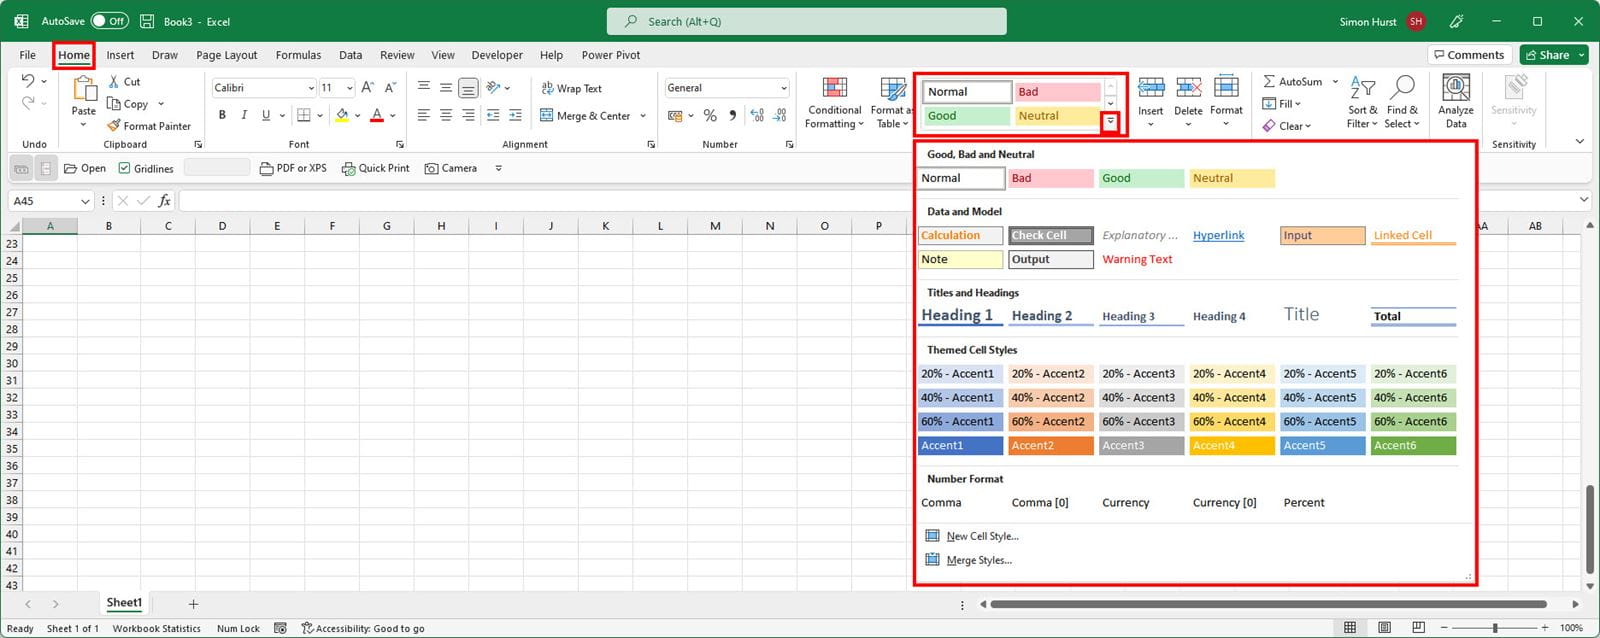
By default, styles are organised into 5 categories:
- Good, Bad and Neutral
- Data and Model
- Titles and Headings
- Themed Cell Styles
- Number Format
Most of these categories are self-explanatory, but it’s worth mentioning the Data and Model category in particular. Principle 2 of the ICAEW ‘Twenty Principles for good spreadsheet practice document recommends that you ‘adopt a standard for your organisation and stick to it’ and that ‘the standard should include, among other things, consistent conventions on use of cell formatting’. The Data and Model styles allow the purpose of different cells to be highlighted through formatting – for example differentiating cells that are intended for user input from those that contain calculations and should therefore not be changed. The use of formatting in this way also helps in applying Principle 10: Separate and clearly identify inputs, workings and outputs.
There is a major advantage in just using the built-in Data and Model styles as this saves the effort of creating your own styles and makes it more likely that colleagues and third parties will be familiar with what the style’s formatting represents. However, if you do want to create your own styles this can be done by modifying the existing styles, duplicating an existing style and then modifying it, or turning the formatting of an existing cell into a new style.
To modify an existing style, you can just right-click on the style in the gallery and choose Modify. This opens the Style dialog. As well as displaying the formatting that the style currently uses, this dialog also includes a Format… button that displays the full Format Cells dialog with separate tabs for the six formatting categories:
- Number
- Alignment
- Font
- Border
- Fill
- Protection

Once you have chosen the formatting options that you need, you can click on the OK button to allocate all of that formatting to your style.
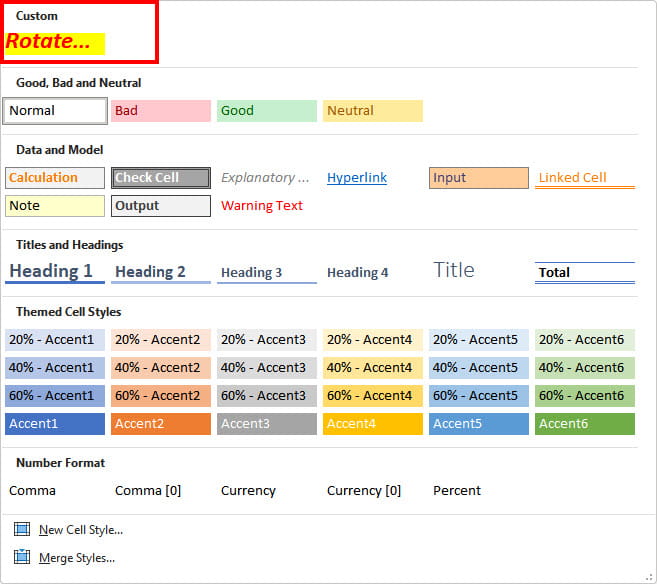
If you need to create a style from scratch, the easiest way is probably to apply all the required formatting to a cell or range of cells and then, with that cell or range of cells still selected, click on the Styles Gallery, More… dropdown and choose New Cell Style… Your formatting will be displayed in the Style dialog and you will be able to type in a name for your new style:

Once your new style has been created, it will be displayed in an additional, Custom, category:
Styles can be deleted by right-clicking on the style in the gallery and choose Delete.
Note that one of the ‘formats’ available is Protection. This controls whether cells with this style applied will be locked or unlocked. When the Review Ribbon tab, Protect group, Protect Sheet option is used to protect a worksheet, cell locking can be used to prevent users changing cells containing calculations whilst still allowing them to edit input cells. The Data and Model styles for these two cell types could be modified to format cells as locked or unlocked respectively in order to help in the application of Principle 20: Protect parts of the workbook that are not supposed to be changed by users.
Next time we will look at the importance of number formatting and how the use of some existing Excel styles can make the application of number formats quick and consistent.
Related links
Archive and Knowledge Base
This archive of Excel Community content from the ION platform will allow you to read the content of the articles but the functionality on the pages is limited. The ION search box, tags and navigation buttons on the archived pages will not work. Pages will load more slowly than a live website. You may be able to follow links to other articles but if this does not work, please return to the archive search. You can also search our Knowledge Base for access to all articles, new and archived, organised by topic.
