
Hello all and welcome back to the Excel Tip of the Week! This week, we have a General User level post in which we’re looking at how to best manage workbooks with a large number of worksheets in them. These kinds of workbooks are particularly common in some areas of accounting and modelling, and can make life pretty tricky.
There’s no one right way to handle large workbooks, so instead here we’ll present some suggestions on making navigating, understanding, and working with these monster files a bit more manageable.
Trim unnecessary worksheets
Perhaps a somewhat trite position to start with, but it’s important to mention: One important place to start in making your worksheet-heavy book easier to use is to remove some of the sheets. Check for sheets that could be combined or removed. For example, it’s common in larger financial models to separate inputs into time-based and non-time-based sheets – but for a smaller, simpler situation, that might be overkill. Or perhaps your workbook has PivotTable report sheets in it (which are created by double-clicking values in the pivot), which are not live and should normally be deleted. If you want to have multiple filtered views of the same data available, instead of creating multiple workbooks showing each view, try using a Slicer or filter to create a single reporting sheet that can easily be switched between each view.
Group like sheets together
Excel workbooks are often constructed somewhat haphazardly, with little thought given to where worksheets go beyond “to the right of the one I was working on before”. But when the development is done, grouping similar sheets together makes navigation much simpler – the user can figure out where they expect to find what they need, and then narrow their search accordingly. This also feeds into our next point…
Colour code your sheets
It’s simple to apply colours to worksheet labels with a right click – but having a colour scheme will also reinforce the distinctions between your groups. Pick simple and easily distinguishable colours and try to keep the total number of colours to a minimum.
Consider the order of your sheets
As well as grouping, consider what order your sheets go in. Again there’s no one right way, but I would suggest a good ordering might be: Landing / Welcome sheet, then results presentational / dashboard sheets, then input sheets (separated into e.g. standing and rolling data if appropriate), and then any calculation / intermediate sheets at the back.
Pick good names for your sheets
Naming files is a topic we’ve discussed before (see TOTW #111), but the same advice applies to sheets – give them simple and unambiguous names. In larger workbooks it can be tempting to resort to abbreviations and such so that more sheets fit on screen at once, but this can easily make the file very hard to follow.
Taking the above four points into account, here’s a demo of a file sheet list:

In this case we have a single blue dashboard, yellow standing data, and green rolling data.
Make use of built-in navigation
Excel comes with some simple navigation options to help you get around a larger workbook. For example, you can right click on the worksheet scroll arrows (to the left of the worksheet row) to get this quick pick menu:
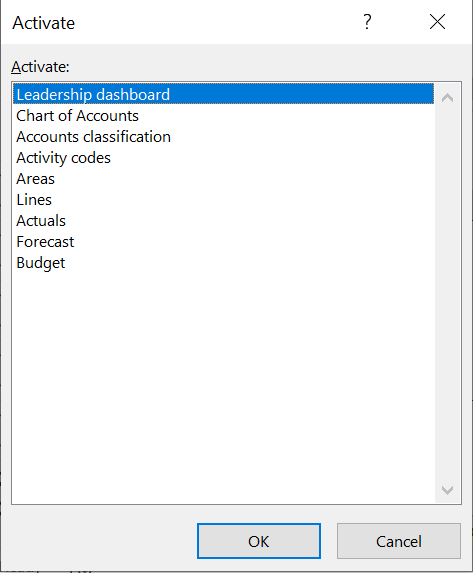
This lets you quickly hop to a particular sheet. You can also use the keyboard shortcut Ctrl PgUp / PgDn to quickly hop between sheets.
Create shortcuts for quicker navigation
As well as the built-in options, many larger workbooks benefit from creating hyperlinks between sheets. There are two common types: A specific hyperlink to a related sheet (e.g. a link between a summary chart and the data sheet that informs it), or a comprehensive table of contents approach, with a single sheet that contains a link to each other worksheet, and each of those worksheets containing a link back to the contents sheet, often in a frozen pane cell A1 so it’s always available. This in theory allows for two-click navigation between any two worksheets, by going into the table of contents and then out again.
If you want some help automating the process of creating a table of contents like this, then there’s a macro for it in TOTW #263.
Consider carefully before using hidden worksheets
One approach often taken in these situations is to hide worksheets that are rarely needed or which a non-technical reader wouldn’t need to see or shouldn’t interact with. While this can make use and navigation easier, it does come with costs – it makes truly understanding the workbook harder, and can lead to data getting lost or duplicated. It’s generally better to move these kinds of worksheets to the back of the book instead of hiding them. And the VBA “very hidden” option should never be used.
Hopefully this has given you some good ideas on how to make wrangling giant workbooks a bit simpler in the future!
Join the Excel Community
Do you use Excel in your organisation? Are you using it to its maximum potential? Develop your skills and minimise spreadsheet risk with our Excel resources. Membership is open to everyone - non ICAEW members are also welcome to join.

Archive and Knowledge Base
This archive of Excel Community content from the ION platform will allow you to read the content of the articles but the functionality on the pages is limited. The ION search box, tags and navigation buttons on the archived pages will not work. Pages will load more slowly than a live website. You may be able to follow links to other articles but if this does not work, please return to the archive search. You can also search our Knowledge Base for access to all articles, new and archived, organised by topic.
