
Data Validation can make data entry easier as well as helping to avoid the entry of incorrect values. In this series we are going to explore some of the more advanced uses of Data Validation, but we will start with a quick guide to the Data Validation basics.
Introduction
Excel’s Data Validation feature can be very useful in helping to ensure that users enter the correct information into input cells. At its simplest, Data Validation allows you to set the type of data that can be entered into the chosen cells and to set criteria for the value, or range of values, allowed. An input message and title can be entered that will be displayed whenever the cells are selected, and an error message can also be added to be displayed when the value entered does not meet the criteria specified.
Although Data Validation can be very useful in guiding users towards entering the correct information, used on its own, it does not completely guarantee that incorrect values can never be entered.
Basics
Before we start looking at some of the more advanced capabilities of Data Validation, it’s worth a quick look at the basics.
The Data Validation dropdown can be found in the Data Ribbon tab, Data Tools group. The first item in the dropdown list, Data Validation…, opens the Data Validation dialog as does clicking on the Data Validation button itself. The dialog has three tabs, with the Settings tab allowing you to choose the type of data that you want to allow the user to enter into the cell or group of cells:
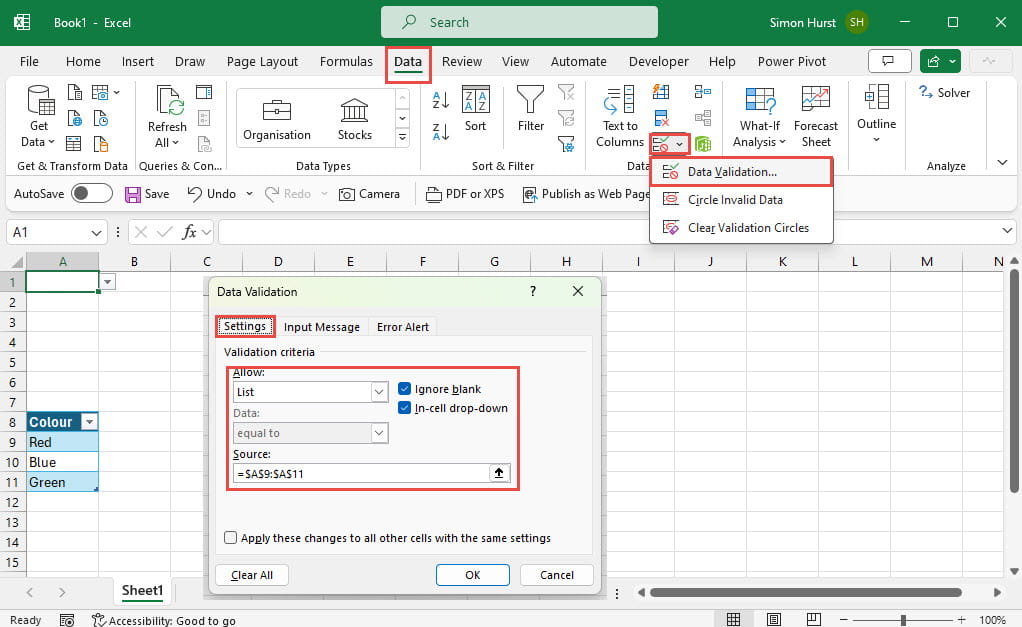
Depending on the type of data that you choose to allow, you will then be presented with further options. For numbers, dates, times and text length, you can choose from comparisons such as greater or less than, equal or between. You can then enter one or two values to set the range of values that will be accepted. The remaining Allow items are List, for which you can enter a cell range or values separated by commas, and Custom which allows the entry of a formula that evaluates to True or False.
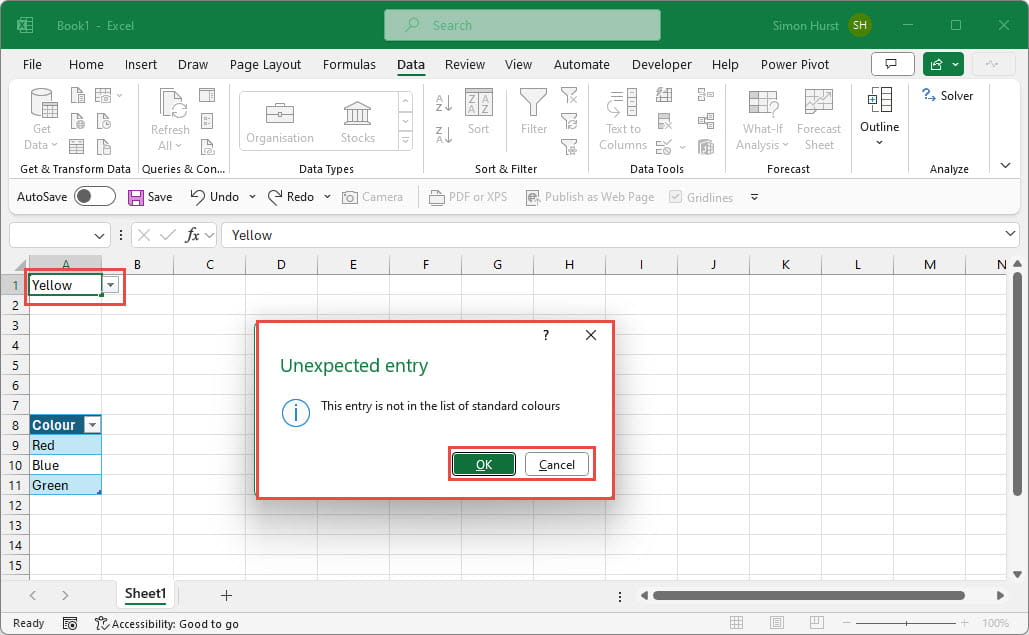
The two remaining tabs allow you to enter the Input Message the users sees when they select the cell and the Error Alert that they see if they try to accept an entry outside of the allowed criterion. It’s worth noting the effect of the three choices available in the Style dropdown. Although different icons are used for each of the Stop, Warning and Information styles, the effect of choosing a particular style goes beyond the icon shown in the alert. For Stop, the user only has the choice of Retry and Cancel, so the incorrect entry cannot be accepted. For Warning, the Error Alert message will be displayed with a Continue? prompt and Yes, No or Cancel options. For Information, the Error Alert message will be displayed with OK and Cancel options. So, both Warning and Information allow the users to accept the entry that contravenes the criterion set:
Using formulas and cell references
In the next part of this series, we will look at using the Custom option to enter a formula to create different types of criteria, but for now we will just look at using references or formulas to calculate the values used with the comparison criteria for the standard Allow options.
We’ll use the Date type as our example. If we wanted to only allow dates on or before a particular date we could choose to Allow Date, and set the comparison to ‘Less than or equal to’ and enter the End date:

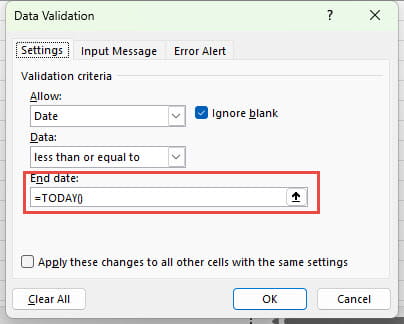
Using cell references to hold the criteria values has the advantage of making it easier to change the values than having to edit the Data Validation settings. It also means that the criteria can adapt to entries and calculations elsewhere in the spreadsheet.
Conclusion
For more articles on Data Validation, search the ICAEW Excel Community article archive.
Archive and Knowledge Base
This archive of Excel Community content from the ION platform will allow you to read the content of the articles but the functionality on the pages is limited. The ION search box, tags and navigation buttons on the archived pages will not work. Pages will load more slowly than a live website. You may be able to follow links to other articles but if this does not work, please return to the archive search. You can also search our Knowledge Base for access to all articles, new and archived, organised by topic.