
Introduction
The Excel Community is currently engaged on a top-secret new project. As part of this project, it would be useful to be able to filter the extensive archive of Excel Community articles by subject. The existing Power BI based portal includes list of keywords for each article. Ideally, we want to add another filter to the archive portal dashboard that will allow users to display a list of all the articles relevant to a particular set of those keywords.
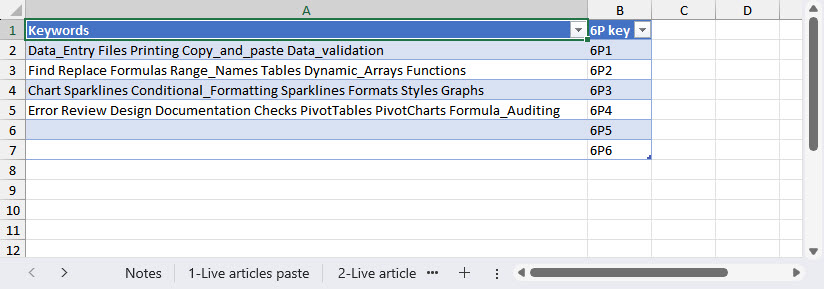
Step one is to create a new Table in the portal index workbook with one column containing each subject title and the other containing the related list of keywords:
We now need to match the list of keywords in this table with the list of keywords in the main archive portal table. Power Query includes a function to help achieve this: List.ContainsAny(). This function compares two lists and returns TRUE if any of the entries in list 1 match any of the entries in list 2.
At the moment our keywords are just text items, separate by spaces, in a single column of each table. To use List.ContainsAny() we need to convert the contents of each column into lists. This is relatively straightforward, we can just use the Add Column Ribbon tab, General group, Custom Column command to add columns to each table that use the Text.Split() function to convert our text values into lists of separate keywords. However, before doing so, it’s a good idea to consider text case. Power Query will only match terms where the case of the text matches. Transforming the text in each column to either UPPERCASE or lowercase before creating our list will ensure that keywords match even if they have been entered with different capitalisation. To do this, we just need to right-click in the column heading and choose Transform, UPPERCASE (or lowercase):

Next, we add our Custom Column using Text.Split():
The function we type in is:
= Text.Split([Keywords]," ")
This splits the text in the Keywords column with the second argument specifying the space character as the delimiter.

We can see that our new column now contains either List, or Error where there is no current content to split. If we click in the white space to the right of the word List in the new column in any of our rows, Power Query will display a preview of the contents of that ‘cell’. We can remove the rows that contain Error by right-clicking in our column heading and choosing Remove Errors.
We use the same method to add a column to our table of articles so that we have two list columns that we can compare using our List.ContainsAny() function.
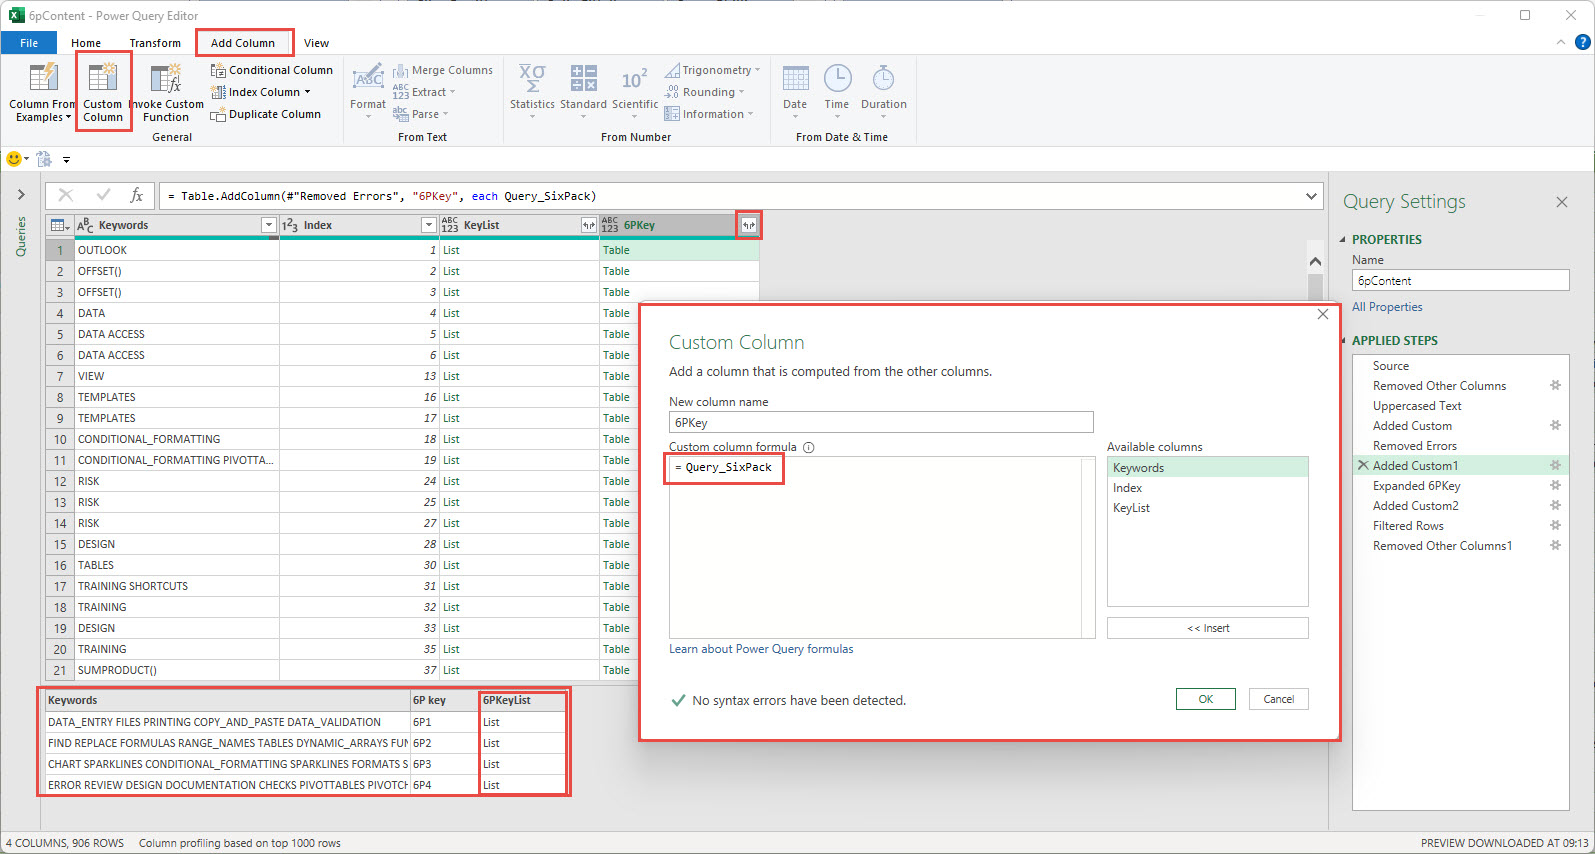
We are aiming to be able to compile a filtered list of articles for each of our six items, so we need to compare each article’s keyword list with each of our six project item’s lists. An article could match multiple project items or none. For every row in our articles table we need create up to six rows, one for each row in our project table, and each row needs to return TRUE or FALSE depending on whether there is a keyword match. To achieve this, we first add another Custom Column to our articles table, this time including our full projects table for each row. We can so this just by entering the name of our projects table as the formula for our new column:
=Query_SixPack
Instead of List objects, we now have Table objects and, just as we did with our column of Lists, we can click in the white space in our column of Tables to see a preview showing multiple rows and columns, including a column of Lists. So, our column contains a List column within our column of Tables:
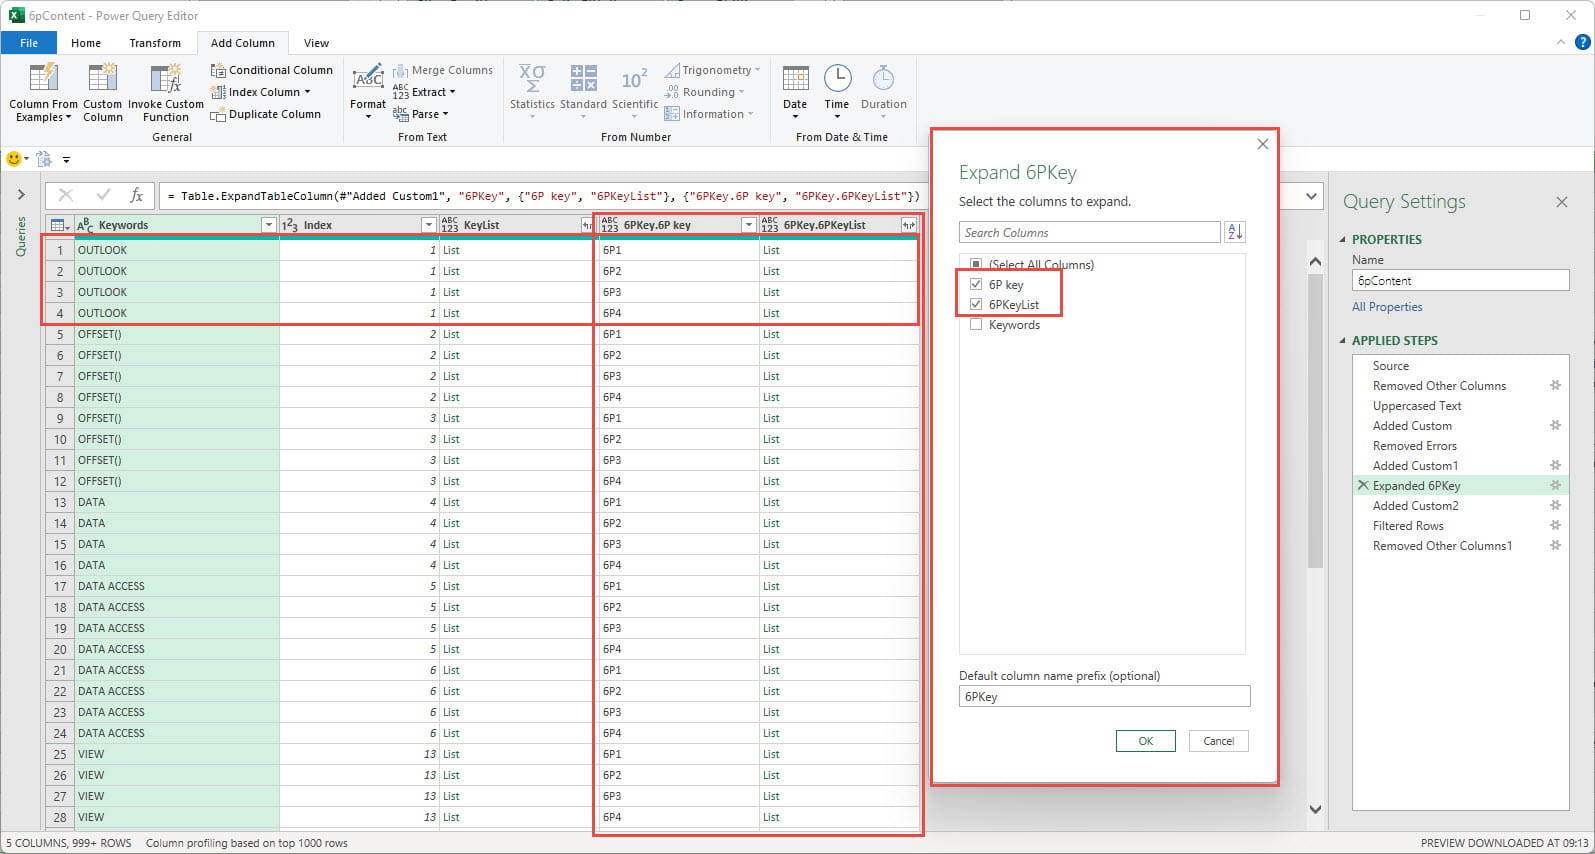
For our comparison, we need two columns of lists, so we need to click the Expand icon at the right of our new column header and choose to expand each table to include the key column and the list column into multiple rows. For each of our original article rows, we now have rows for each project item that has keywords and, importantly, we now have two columns containing Lists of keywords:
We add another Custom Column, this time using the List.ContainsAny() function, to compare the two columns:
List.ContainsAny([KeyList],[6PKey.6PKeyList])
This will return either TRUE or FALSE for each row, so we could then filter our new column to just show the rows where there is a match, and the column therefore contains TRUE:
Conclusion
We now have an article table that includes a row for each project item where one or more keywords match. As is usual with Power Query, there are multiple ways to achieve our chosen objective and there is always the possibility that we have overlooked a much more straightforward approach. If we have, please let us know at excel@icaew.com
In part two, we will see how to add our new filter to our archive portal:
The 'Open in full-screen mode' icon in the bottom right-hand corner of the embedded report should show the contents at a more readable size with the Escape key returning you to the post.
The archive portal has now also been included in the Excel Community archive page.
