
Hello all and welcome back to Excel Tips and Tricks!
For this Creator post we have a refresher on Named Ranges in Excel, last covered way back in TOTW #188, and discuss their use and practical tips for working with them.
What’s in a Name?
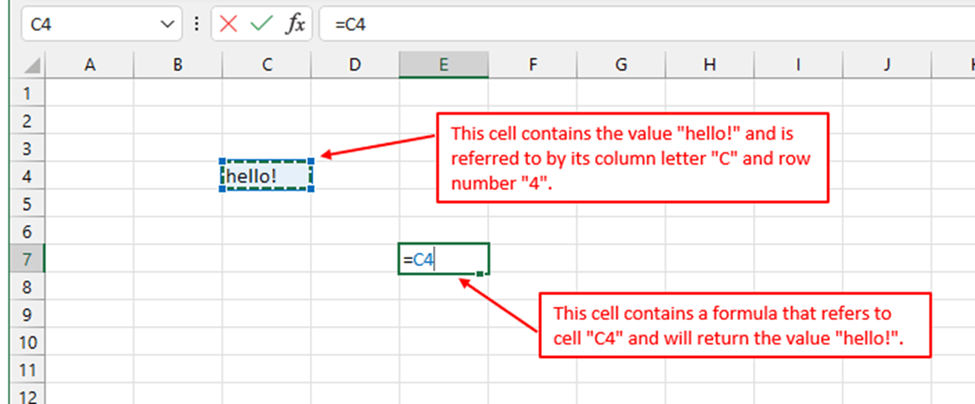
The most common way of referring to a cell in a spreadsheet is by reference to its column letter and row number (e.g. “A1”). Being able to identify cells in this way allows us to “look up” the value of any cell in our spreadsheet.
So then what is the purpose of having additional “Names” to refer to cells that can already be identified by their A1-style reference?
While A1-style cell references impart a clear physical location within our spreadsheet they are not particularly meaningful or memorable. This becomes more of an issue if we build formulas that are long or complex, or contain many different cell references or ranges of cells.
One approach we can adopt to help formula readability is to assign human-friendly names to cells and use these names in place of standard cell references.
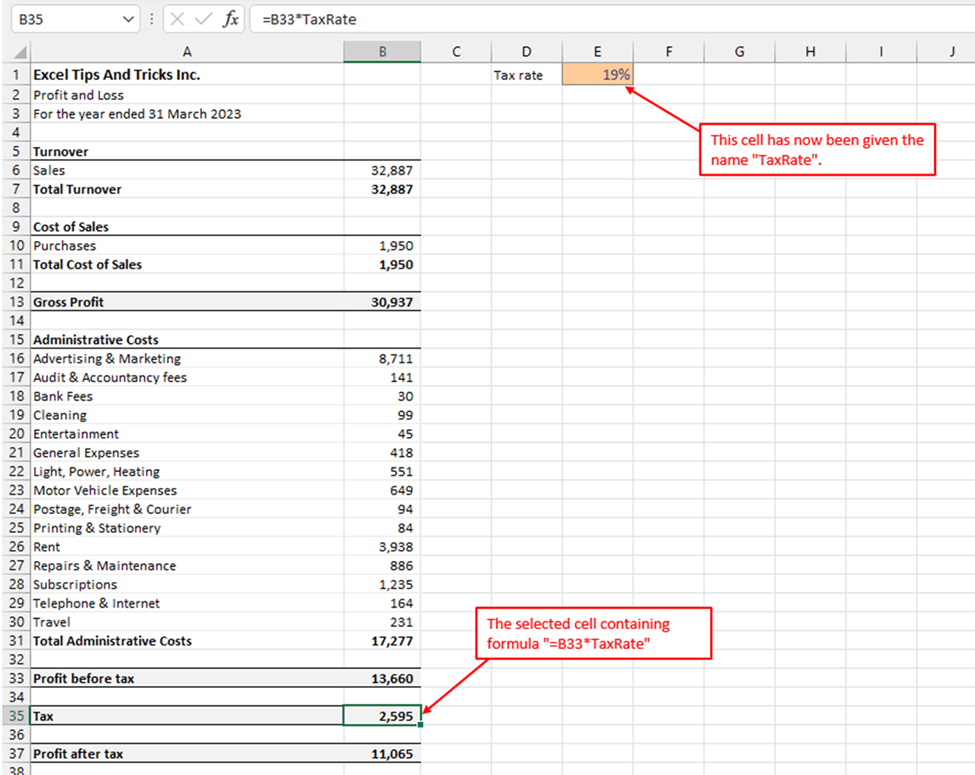
For example we may have an input cell for a tax rate that flows through to numerous other calculations within our spreadsheet. We can call this cell “TaxRate” and use that name rather than the cell reference where we need to access this value.
Here we have a worksheet with a profit and loss account where the tax is calculated based on the tax rate contained in an input cell.

If we give a more descriptive name to our input cell our formula becomes far more readable.
Working with Named Ranges
Defining Named Ranges in your worksheet
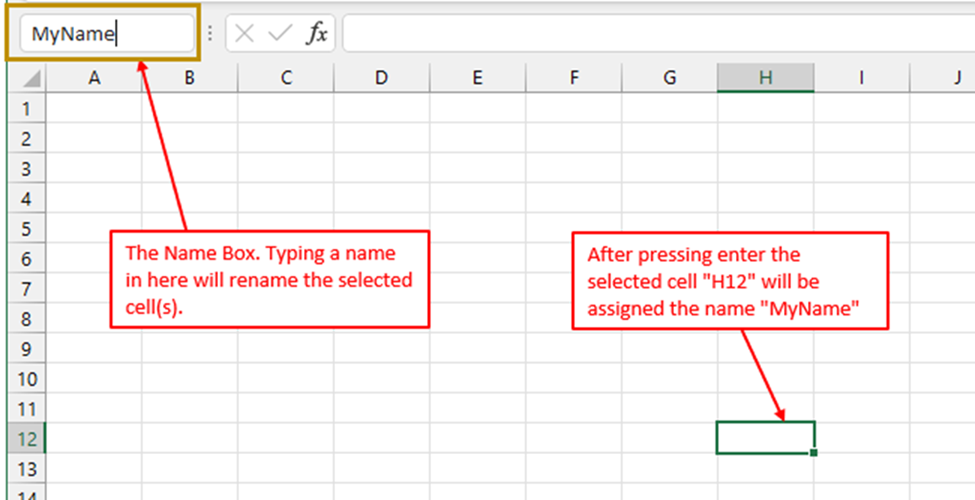
The Name Box to the left of the formula bar is your super quick shortcut to creating Named Ranges. Simply select any cell, or range of cells, and then type over the cell reference in the Name Box with your chosen name and press Enter.
Finding Named Ranges in your worksheet
Once the name is defined it will appear in the Name Box drop down alongside any other Named Ranges already defined.
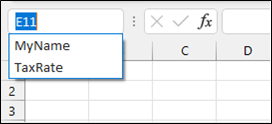
Clicking on any of these Named Ranges within the drop down is a quick way to navigate to their location with the spreadsheet.
Using Named Ranges within formulas
Once a name is defined it will appear in the intellisense drop down if we type the first few letters of the name into a formula.
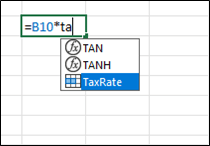
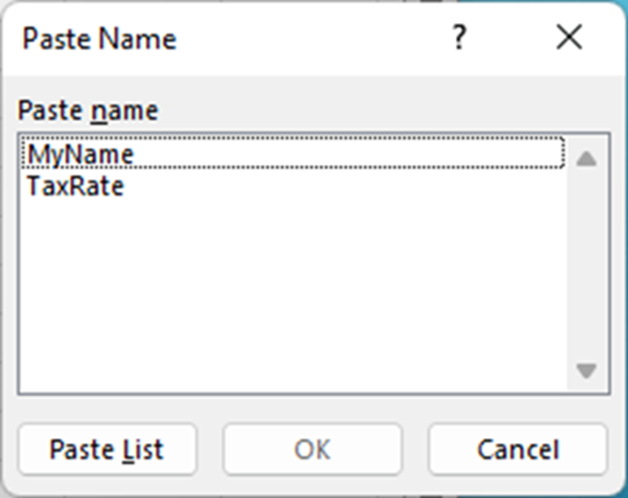
Alternatively to see a list of available names at any point try the keyboard shortcut F3. This is a handy way to paste defined names into your formula.
If you want to update formulas to include newly-defined names, the “Apply Names” feature can be used to automatically swap out any cell or range references for their associated names - you can find this in the “Defined Names” section of the Formulas ribbon.

The Name Manager
If you are looking for more precise control over Named Ranges, the Name Manager provides a view of all defined names within your spreadsheet and offers the facility to create, edit, delete, etc.
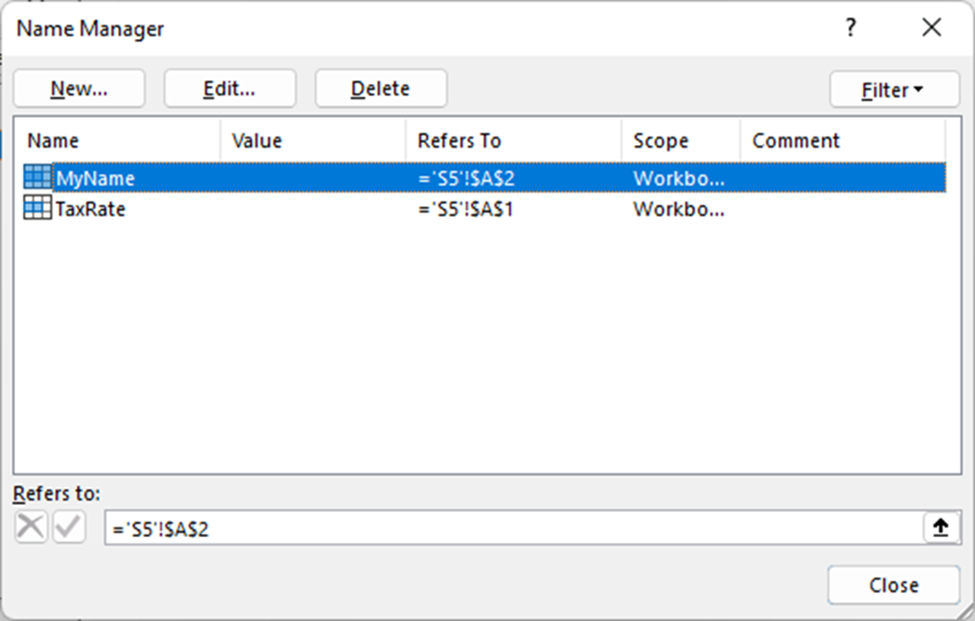
This can be found in the Formulas tab on the ribbon as shown below, or can be accessed directly with the keyboard shortcut Ctrl + F3.
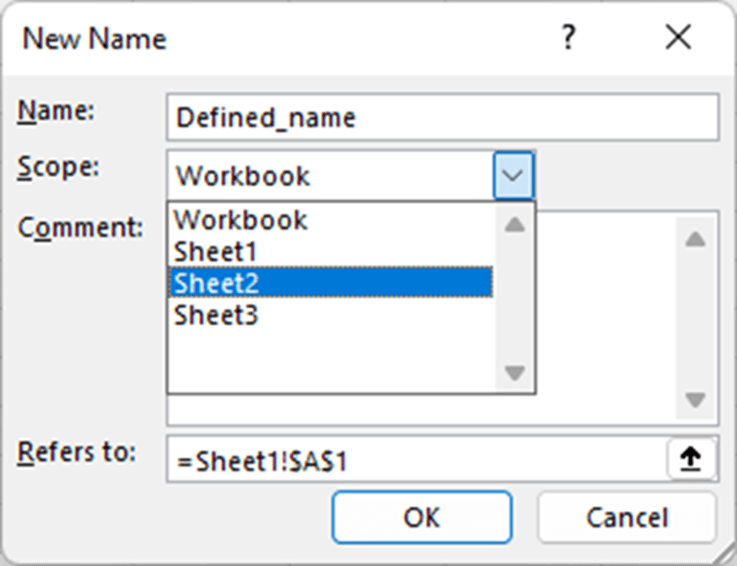
The “New Name” dialog allows us to choose the Name’s scope (this cannot be changed once set). By default the scope is set to the whole worksheet - meaning the name can be accessed from any worksheet - but we can choose to limit the scope to a given worksheet if we want more control over how it is accessed.
Note that while named ranges work in Excel Online and can be found using the Name Box drop down, there is not yet the facility to define new names, and there is no Name Manager. Here’s hoping these UI features appear in the near future.
Name pitfalls… and how to avoid them
What happens if we have defined names in our workbook and we move or copy a worksheet to another workbook?
In most cases, the defined names used in that worksheet will be persisted in the new workbook. This can lead to name conflict issues and unnecessary External Links between workbooks.
If any defined names exist in both source and destination workbooks, we will see the Name Conflict dialog:

When working with named ranges, it is also easy to forget to update the range to which the name applies, if we add rows or columns to the range. When rows/columns are inserted in the middle of a range, the named range will adjust, but for appended rows/columns it will not. While this isn’t necessarily different to when we use cell range references in formulas, it’s a very common pitfall (and one to be alert to when reviewing spreadsheets).
To prevent issues like this arising it is advisable to periodically review the Name Manager to ensure that our spreadsheet only contains defined names that are in use, delete those that are not, and ensure the referenced cells or ranges remain correct.
Other practical uses for Named Ranges
Names are such a useful concept in Excel that they complement many other existing features. For example names can be used:
- Excel Tips and Tricks #506: Creating a single master list after merging data
- Excel Tips and Tricks #505 – 3 ways of converting US Dates into UK formats
- Excel Tips and Tricks #504 - Accessing accessibility checkers for good spreadsheet practice
- Excel Tips and Tricks #503 – Printing under pressure, super quick presentation tips
- Excel Tips and Tricks #502
Archive and Knowledge Base
This archive of Excel Community content from the ION platform will allow you to read the content of the articles but the functionality on the pages is limited. The ION search box, tags and navigation buttons on the archived pages will not work. Pages will load more slowly than a live website. You may be able to follow links to other articles but if this does not work, please return to the archive search. You can also search our Knowledge Base for access to all articles, new and archived, organised by topic.
