
Hello and welcome back to Excel Tips and Tricks! This week we have a General User post where we take a look at how to insert and deal with objects including images, charts, or files in Excel.
What is an object?
An object is anything that floats free of the cells in Excel and can be moved or resized independently. They exist in an "object layer" - floating above the cells. It's important to remember that this is different to the way "object" is used in VBA - where it means any element of Excel - to how they work within a worksheet.
Some examples of objects include:
- Images
- Charts
- Word or PowerPoint files
- PDFs
- Form controls
- Text boxes
- SmartArt, shapes, icons, or other visual elements
How can I insert an object into my spreadsheet?
Toolbar
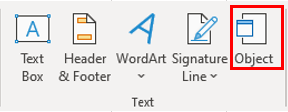
You can use the Insert tab in the toolbar to insert various types of objects including images, text boxes, files, and shapes.

Link and embed objects
Excel also allows you to link or embed files from other programs, such as Word or PowerPoint, into your spreadsheets. This can be handy if you want to link and reference to other supporting documents or incorporate detailed written text in your spreadsheet.
You can do this via the ‘Object’ option in the Insert tab of the toolbar.
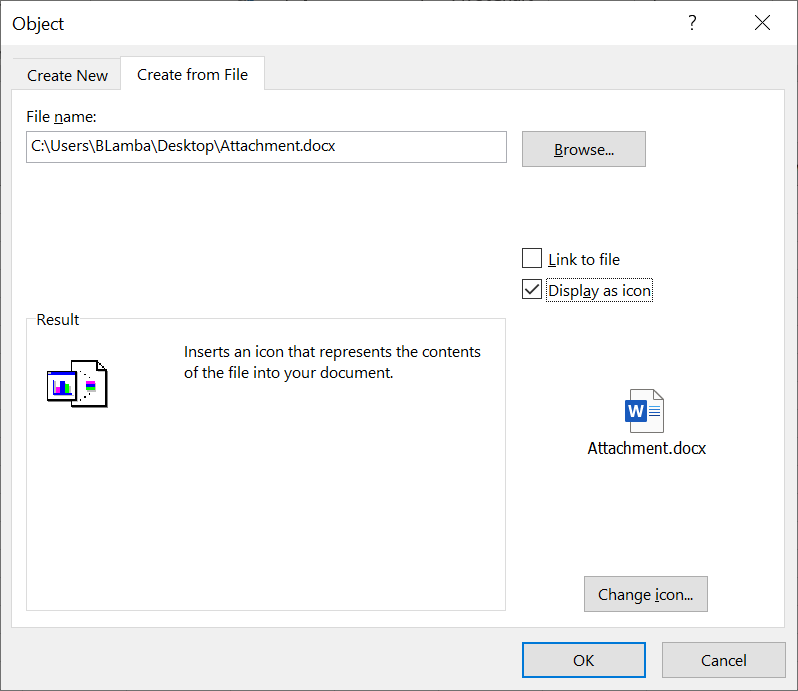
What differs between linked objects and embedded objects is where the data is stored and how the object is updated after you place it in the spreadsheet. For example, embedded objects are stored in the workbook that they are inserted in and aren’t updated. Linked objects on the other hand remain as separate files and can be updated.
So, if you want the inserted file in your spreadsheet to be updated when the data in the source file changes, it’s recommended that you use linked objects.
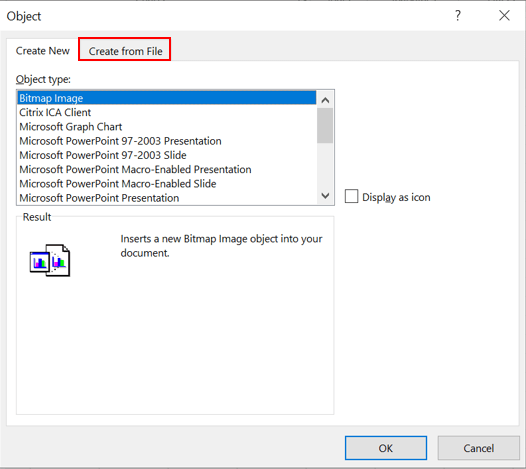
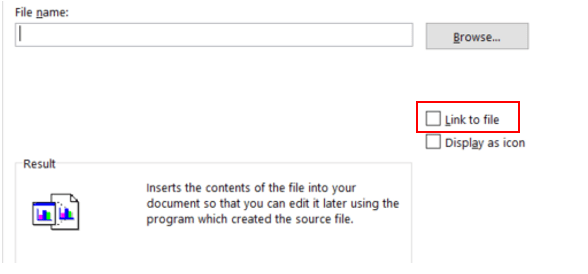
To link an object, from the Insert tab in the toolbar, click on the ‘Object’ option. This will open up a menu where you can click on the ‘Create from File’ tab.
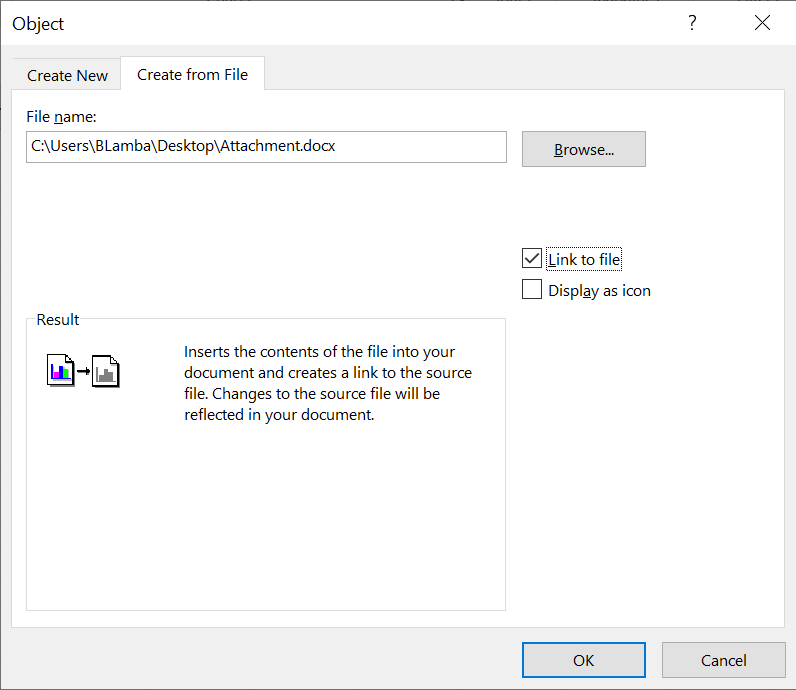
The steps are the same as above, however the difference is the ‘Link to file’ option should be left unchecked.
Create new object in Excel
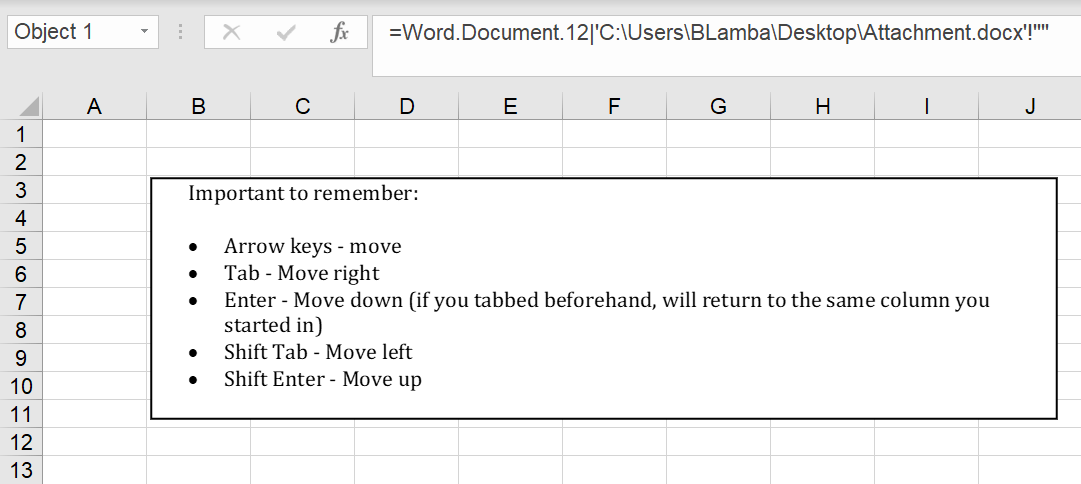
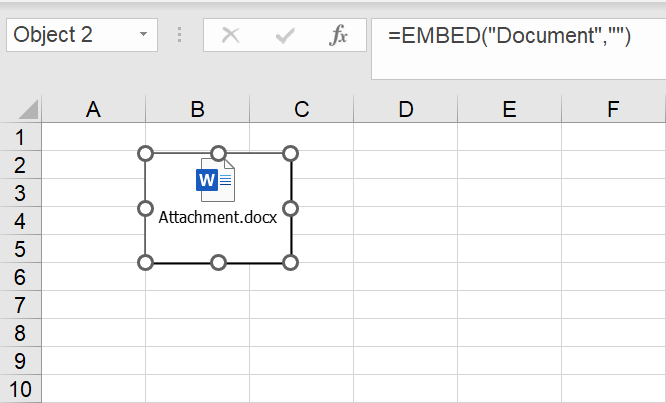
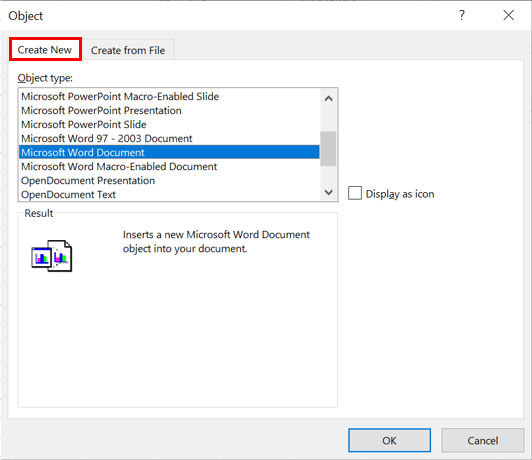
Excel also allows you to create a new object from inside the spreadsheet. For example, you can create an embedded document, such as a Word or PowerPoint file, in Excel. To do this, from the Insert tab in the toolbar, click on the ‘Object’ option. This will open up a menu where you can click on ‘Create New’ tab.
In this tab, you will see a list of the programs you can use to create a new object. For this example, we will create an object using Word.
The result is this! An object created using Word that I can work in and edit in my spreadsheet.

How can I tidy up objects?
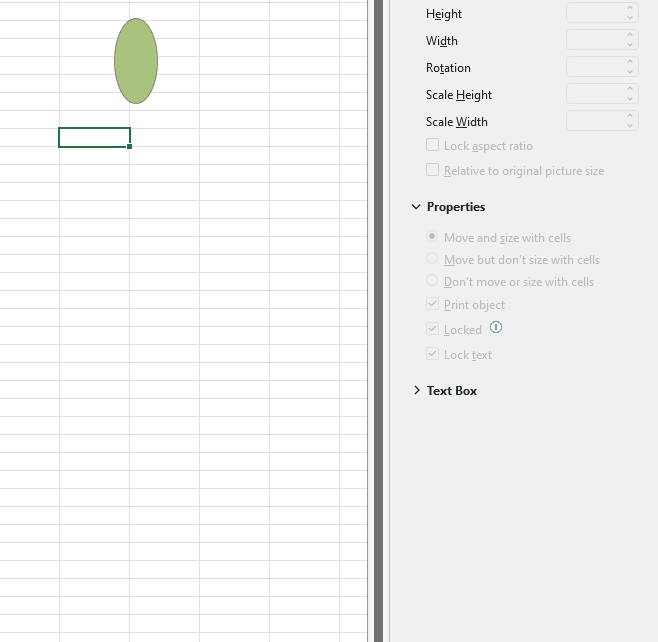
When inserted, objects aren't bound to cells by default so they can end up being in the wrong place or be tricky to make visually appealing. However, there are ways to adjust how the object is moved and sized in relation to cells via the object properties which you can access by clicking on the object and using CTRL + 1 to open up the ‘Format’ menu.
From this menu, the ‘Size and Properties’ tab will display the following options:
- Move and size with cells: If you resize the cells around the object, or insert rows or columns, the object will move along with the cells. When you resize cells that the object covers (or insert rows/columns in that range of cells), the object’s size will also change. For most shapes, this is the default option.
- Move but don’t size with cells: The object will move if the cells around it move, but its size won’t change regardless of resizing or insertion of cells in the range that it covers. For pictures and other objects, this is the default.
- Don’t move or size with cells: The object will remain the same size and in the same position, unaffected by any changes to cells on the worksheet.

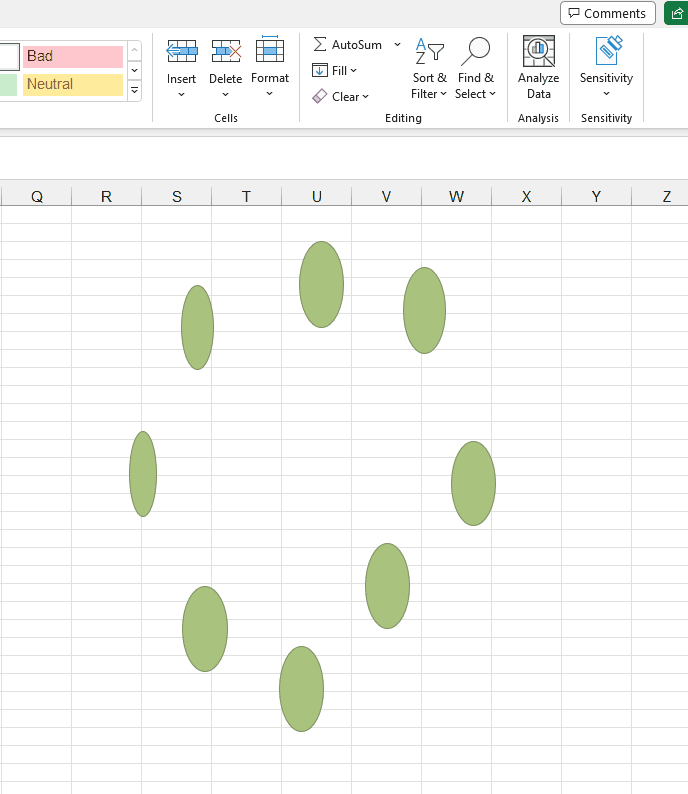
What is not made clear is that this setting also controls the behaviour of the objects when using the cut/copy and paste functions or moving a block of highlighted cells. If objects are set to move with cells (either of the top two options), then when you cut or copy the cells that the object sits in front of, the object is copied too:
In some situations, there can be too many objects, or they can be too small, to select one by one. To select multiple objects, on the Home tab of the toolbar you can go to ‘Find & Select’ and choose ‘Select Objects’ to change the cursor into a tool to select all objects in an area of the screen by clicking and dragging. Once done hit the escape key to return to the normal cursor mode.
In some cases, you may want to control a number of individual objects – for this we can use ‘Selection Pane’ in the Page Layout tab of the toolbar to open up this menu.
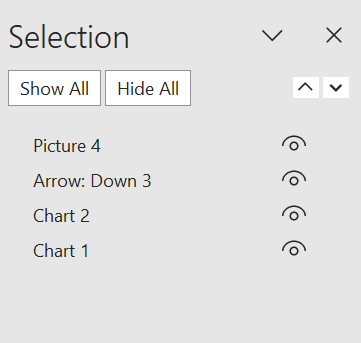
From here we can easily select the items, choose their stacking order within the objects layer, or hide them. We can also rename the objects which may help with object management.
It’s also important to know how to get different objects properly lined up. To do this, we can select two or more of the objects, then use the ‘Align’ option in the Page Layout tab of the toolbar. There are also other options including ‘Snap to Shape’ and ‘Group’ that make it easier to align multiple objects. More on this has been covered in Tip #335.
- Excel Tips and Tricks #506: Creating a single master list after merging data
- Excel Tips and Tricks #505 – 3 ways of converting US Dates into UK formats
- Excel Tips and Tricks #504 - Accessing accessibility checkers for good spreadsheet practice
- Excel Tips and Tricks #503 – Printing under pressure, super quick presentation tips
- Excel Tips and Tricks #502
Archive and Knowledge Base
This archive of Excel Community content from the ION platform will allow you to read the content of the articles but the functionality on the pages is limited. The ION search box, tags and navigation buttons on the archived pages will not work. Pages will load more slowly than a live website. You may be able to follow links to other articles but if this does not work, please return to the archive search. You can also search our Knowledge Base for access to all articles, new and archived, organised by topic.