
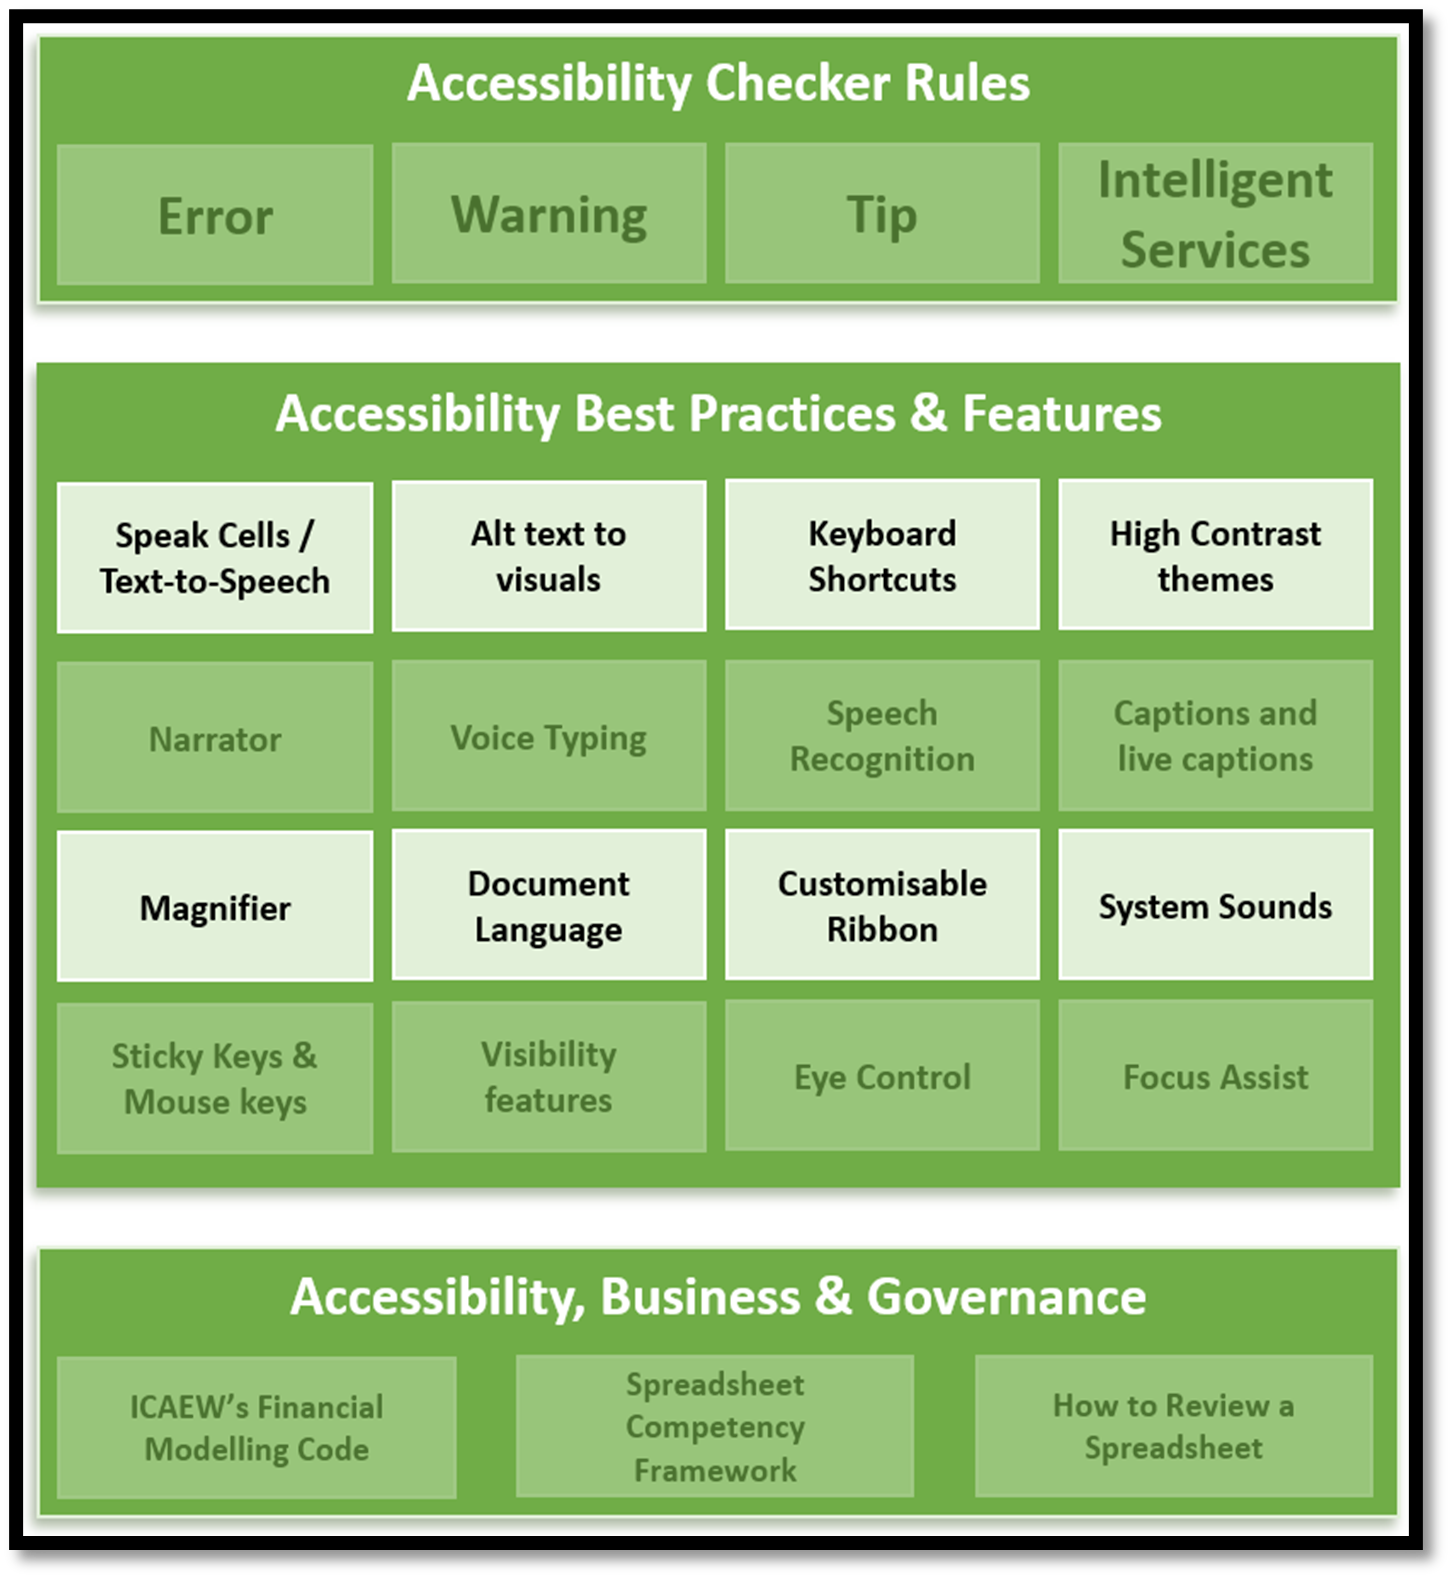
Welcome to the second part of this blog series on Excel’s Accessibility features where Andrew Paw dives deeper into building accessible spreadsheets and using the features offered by Windows.
With these advancements in mind, this blog aims to offer practical guidance on leveraging these features to ensure accessibility and achieve best practices. Additionally, in future part of this series, I will explore the intersection of accessibility with the business world and delve into its connection to spreadsheet design and development.
Speak Cells / Text-to-Speech.
Speak cells is a tool within Excel that uses text-to-speech technology to convert text into natural-sounding speech. This feature enables users to have the contents of a cell, range of cells, or worksheet read aloud, benefiting individuals with visual impairments or those who prefer auditory input. Microsoft Office uses this technology in a variety of its applications such as Word, PowerPoint, and Excel.How to use Speak cells?
Speak cells.
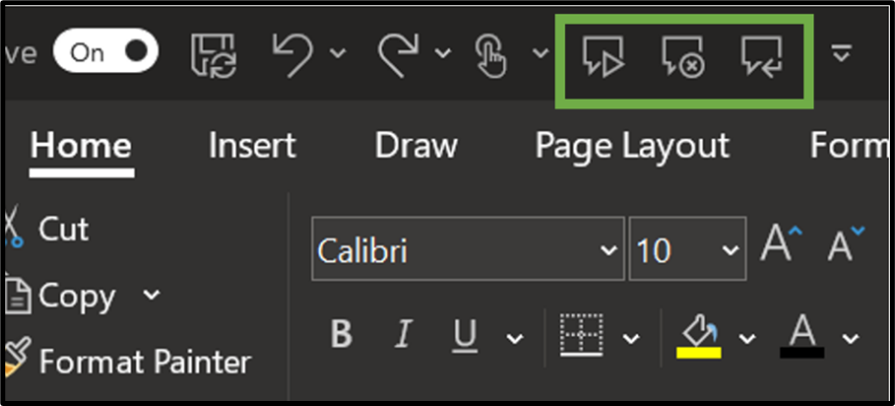
To utilise the Speak cells feature, users can choose a specific cell, a range of cells, or even the entire worksheet. By simply clicking on the Speak cells button, the selection will automatically expand to include neighbouring cells with values.Stop Speaking cells.
To halt the speech function, users can either select the stop speaking button located in the toolbar above, or they can simply click on any cell within the worksheet.Speak on Enter
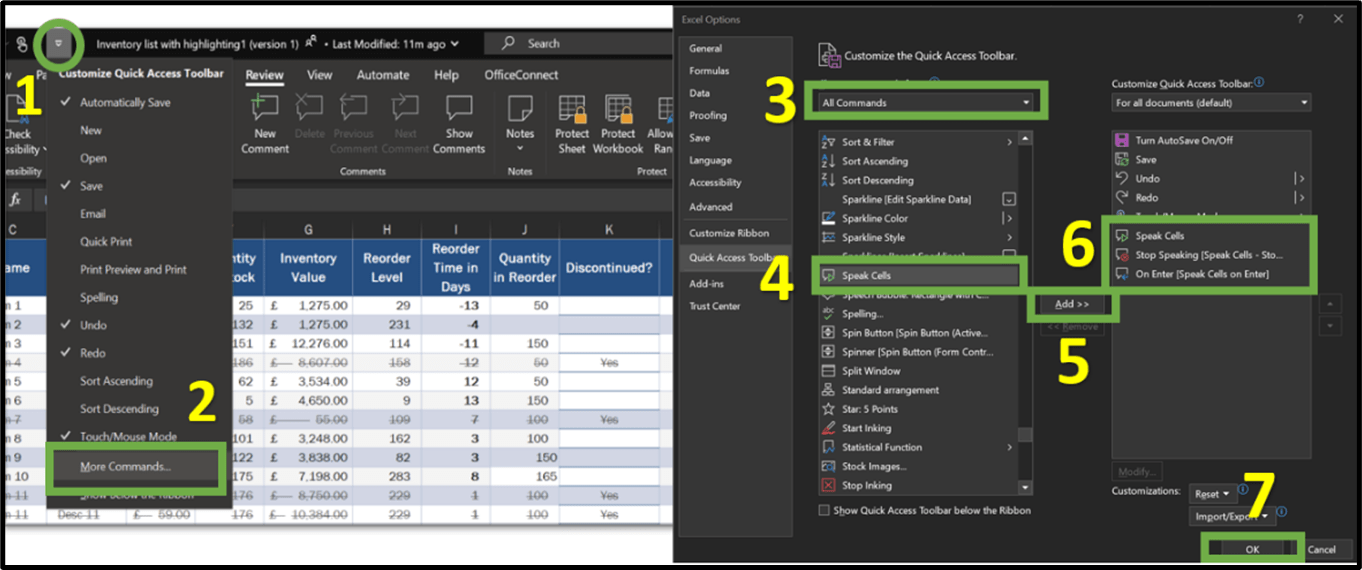
The Speak on enter feature, reads out every data entry made when the Enter key is used. It’s important to note that this functionality is not limited solely to the Enter key; It can also be triggered by cursor movements such as arrow keys, tab, or page down. To disable this speaking mode, users can simply click the Speak on Enter button again. Upon clicking the button for the second time, the text-to-speech feature will announce “Turn off Speak to Enter”.How to add text-to speech features in the Excel Quick Access Toolbar?
Alternative text (Alt Text).
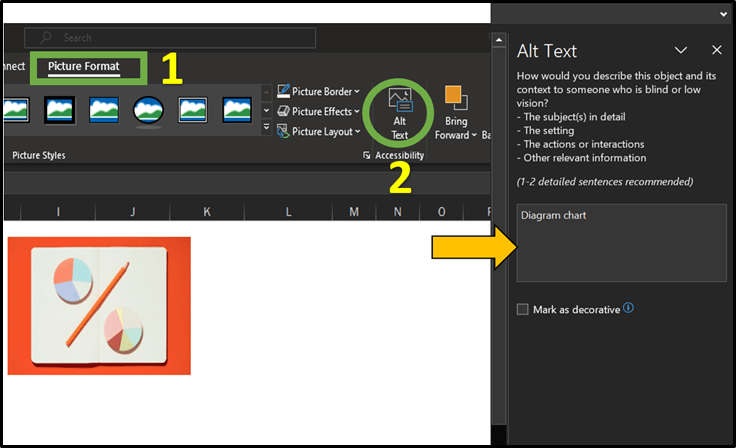
Alt Text is a feature within Excel which enables users to provide description for shapes, pictures, charts, SmartArt graphics, or other objects. This functionality is beneficial for users who are visually impaired and rely on screen readers. By utilising Alt Text, users can ensure that the content of visual elements is conveyed effectively through descriptive text.It is important to note that, currently, the Speak cells tool cannot be used in conjunction with Alt Text. However, screen readers like the Narrator are able to read the alt text aloud. Ensuring accessibility for visually impaired users. To identify any missing alt text, users can utilise the Accessibility Checker discussed in Part 1 of this blog series.
Keyboard Shortcuts
Keyboard shortcuts in Excel are key or key combinations that allow users to perform actions in Excel without relying on mouse or touchpad interactions. This functionality serves as an alternative input method, particularly beneficial for individuals who prefer navigating, selecting, and interacting with Excel using the keyboard. It proves especially useful for users with mobility or vision disabilities.By utilising keyboard shortcuts, users can swiftly access specific commands, carry out calculations, navigate between cells and worksheets, and execute various formatting and editing tasks, all without the need for a mouse or touchpad. Additionally, Microsoft allows users to create additional keyboard shortcuts, if they are not already available, by recording a macro.
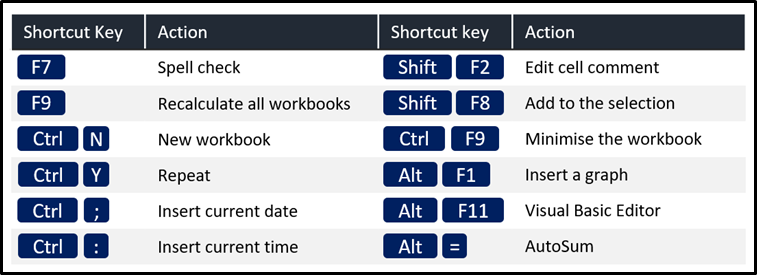
The image below illustrates a selection of keyboard shortcuts available in Excel. Microsoft support also offers for a more comprehensive list of keyboard shortcuts in Excel.
Customisable Ribbon
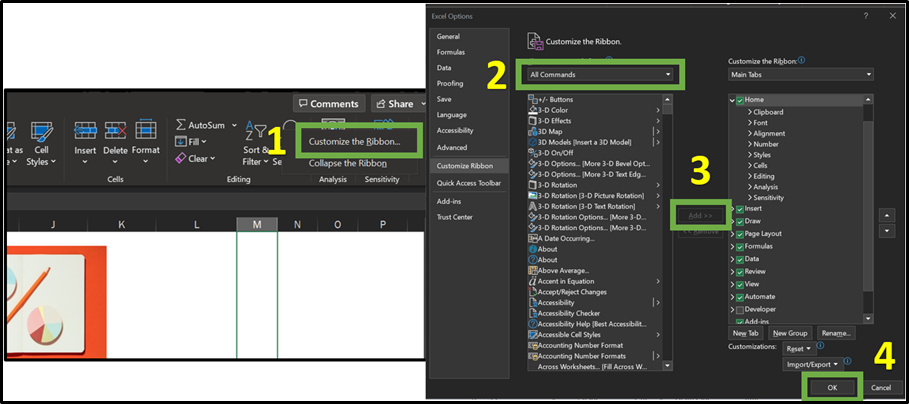
In Excel users have the flexibility to customise their ribbon to suit their preferences. The ribbon refers to the toolbar located at the top of the Excel window, featuring tabs like Home, Insert, Formulas, etc. Each tab contains a collection of related commands and functions. This customisation feature enhances the user experience by facilitating efficient access to frequently used features, simplifying navigation and workflow, and enabling seamless integration with assistive technologies. Through this tool, users can arrange tabs and commands in their preferred order and choose to hide or unhide commands used less frequently. Users can hide or unhide the ribbon but cannot customise its size, text, or icons. To adjust these aspects, users would need to change their display resolution which affects the size of everything on the page.It’s worth mentioning that customising the Excel ribbon does not extend the same changes to other Microsoft applications, such as PowerPoint or Word. While customisations cannot be shared between apps, users can export their personalised settings and share them with others, allowing the customised ribbon to be used on different devices. The image below shows how the ribbon within Excel can be personalised.
Document Language
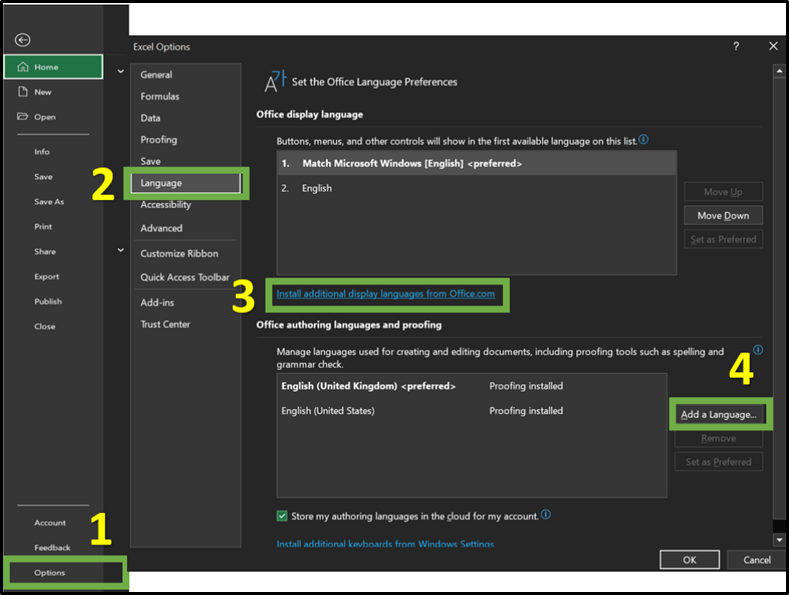
Document Language is a tool that enables assistive and adaptive technologies, like screen readers to accurately interpret and read the content of the document. By specifying the language used within a document, assistive technologies can understand the text, apply correct pronunciation rules, and provide the necessary reading assistance to users to engage with the content effectively.To ensure assistive technologies can accurately navigate through Excel spreadsheets by pronouncing words, interpret grammar and sentence structures accurately, users need to set the appropriate language declaration. For guidance on how to set a language declaration please refer to the image below.
High Contrast themes
The High Contrast themes feature in both Windows 10 and Windows 11 have serve as an accessibility tool that allows users to modify their user interface. By enabling the high contrast feature users can maximise the distinction between text, links, buttons, and backgrounds. While the default colour scheme provided by Windows 10/11 suits most users, Microsoft’s provision of high contrast themes enhances the usability of the interface for individuals with visual impairments, including those with low vision, colour blindness and sensitivity to light. By providing this feature, Microsoft ensures a more inclusive computing experience for users with diverse visual needs.Microsoft received feedback regarding the high contrast themes in Windows 10, with some users expressing a sense of “otherness” while using these themes. In response to this feedback and to better serve their customers, Microsoft involved people with disabilities into the design process by, incorporating their insights and utilising their feedback to shape the colour contrast designs. By involving users with disabilities, Microsoft ensured that the high contrast themes in Windows 11 addressed their specific needs and delivered an improved user experience.
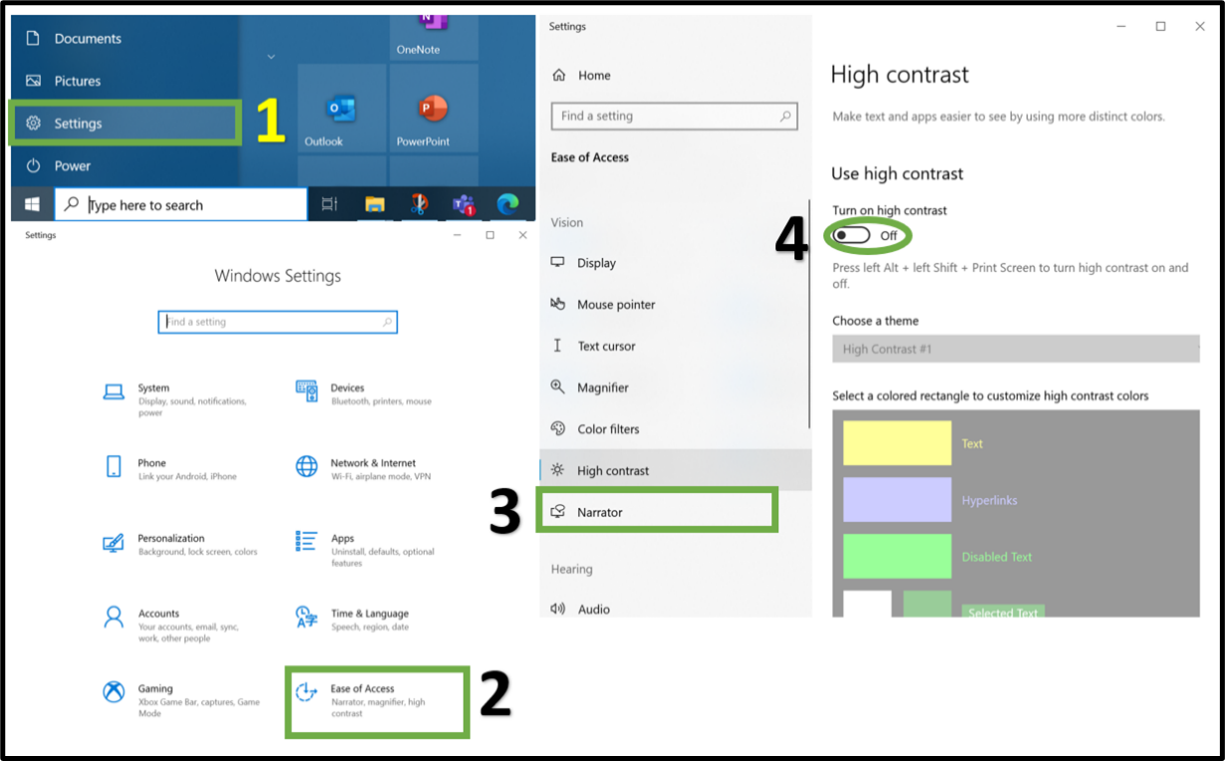
Windows 11, introduces four new high contrast themes that not only prioritise accessibility, while offering an enhanced aesthetic appeal. These high contrast themes can be customised by users, allowing them to create their own personalised high contrast themes that work best for their needs. To turn on and off high contrast press: Alt, Shift, PrtScn keys.
The image below shows how users can enable high contrast themes in Windows. Users can access any accessibility/ease of access setting via the following keyboard shortcut: Windows key, U.
High contrast themes in Excel.
Microsoft offers Office users the ability to personalise the appearance of its applications (e.g., PowerPoint, Word, Excel). In Excel users can choose from various modes such as dark, grey, or white to customise the visual presentation. Enabling these different modes in Excel, as shown in the image below, can enhance the overall user experience and productivity. This reduces visual discomfort and creates a more visually appealing environment for working with Excel spreadsheets.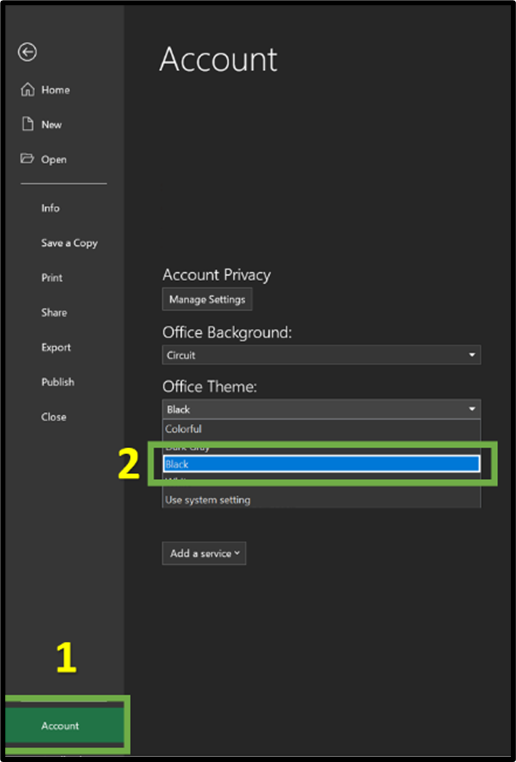
System Sounds
By default, Windows generates notification sounds to provide feedback to users when significant actions occur, such as low battery, error notifications, or calendar reminders. This feature allows individuals with visual impairments to effectively navigate and engage with their devices.
Users have the flexibility to personalise their sound settings according to their preferences by being able to change sound effects or disable sound effects for specific actions including the option to mute all sounds entirely.
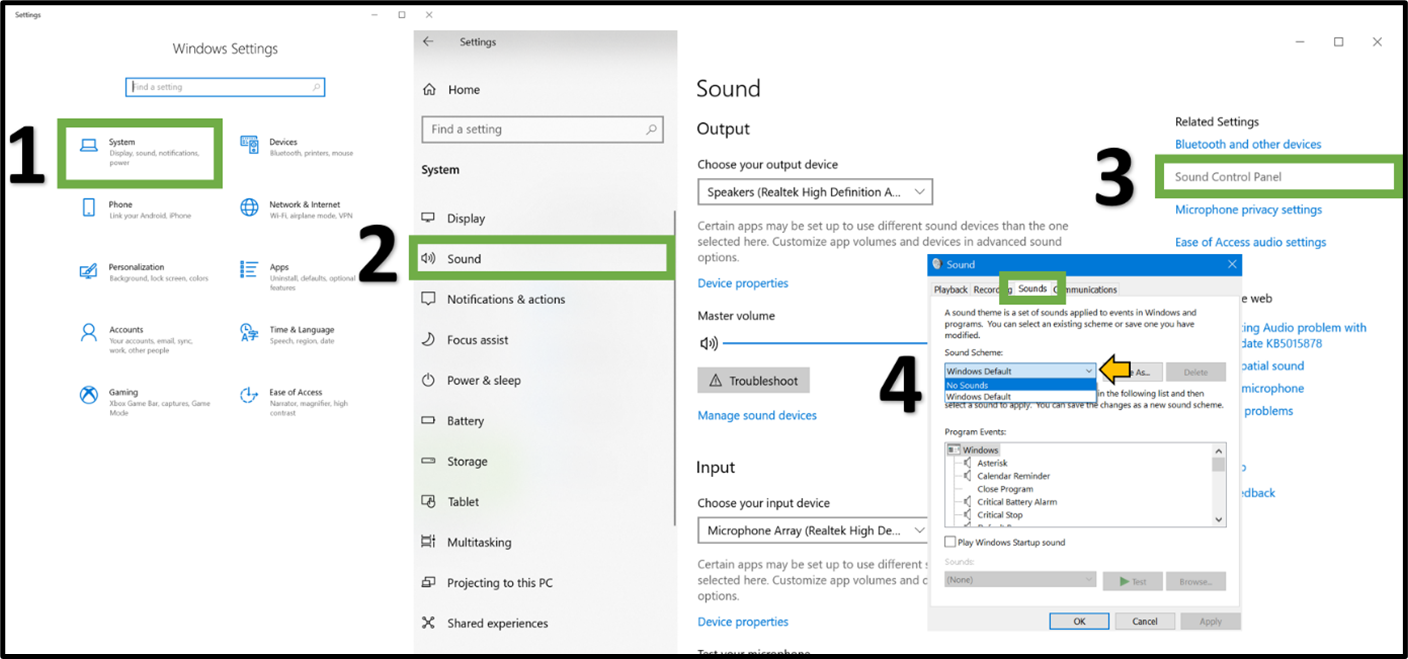
The image below provides a visual guide on accessing sound settings in Windows 10 through steps 1-2. Alternatively, users can access sound settings via the keyboard shortcut below:
- To open the tool: Windows key, I
By navigating to the Sounds Control panel within sound settings, users can disable all system notification sounds, selectively turn off certain sounds or modify sound effects for specific events. These actions are illustrated in the images below.
How to disable all notification sounds?
How to disable specific notification sounds?
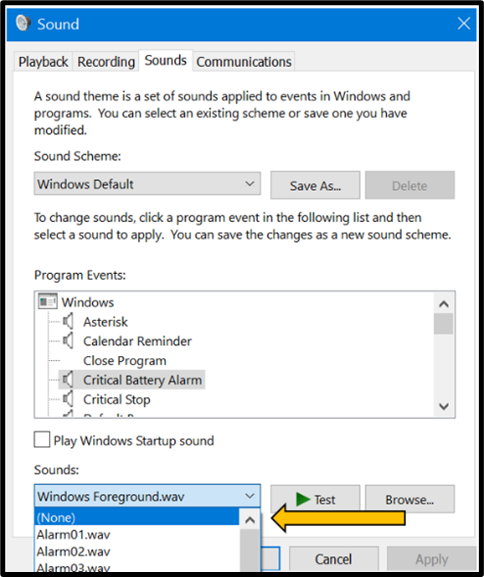
How to customise notification sounds?
Following the selection of a sound effect as shown below, users can select test for a preview prior to applying the sound effect.
System sounds in Excel.
When performing specific actions in Excel, by default Windows generates notification sounds to provide feedback to the user. Specific actions can include error messages, completion of tasks or confirmation of actions that help individuals navigate with their spreadsheets. The image below, provides guidance on how to enable sounds within Excel.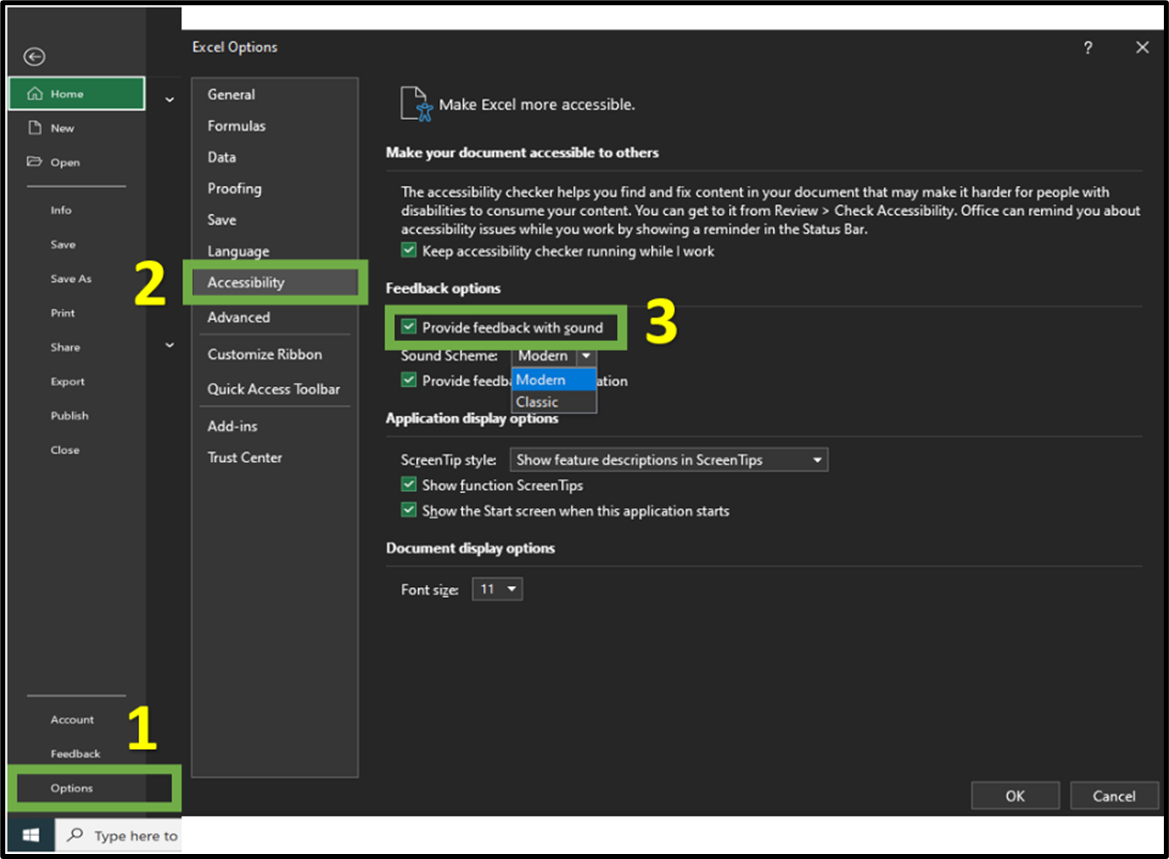
Magnifier
The magnifier tool is a feature within Windows 10 and 11 that allows users to enlarge parts of or the entire screen, even if the app doesn’t have built-in magnification tools making text, images, and other visual content more accessible. This can be particularly useful for individuals with low vision or visual impairments.
The magnifier tool has maintained a high degree of similarity amongst Windows 10 and Windows 11, guaranteeing continuity and accessibility for its users.
The image below, shows how to activate this tool on your Windows 10 device. Additional methods for activating the tool using keyboard shortcuts include:
- To open the tool directly through the Settings app: Windows key, Ctrl, M
- To open a compact dialogue box showcasing the main features of the tool: Windows key, +
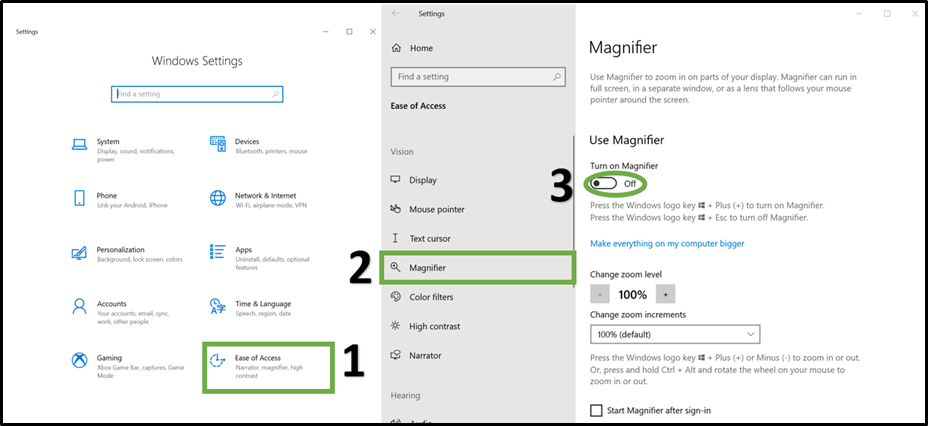
By accessing the magnifier settings, users can adjust the zoom level, allowing them to magnify the screen up to 16 times its original size. Additionally, users can opt to enhance the appearance of images and text by smoothing their edges, modify their view and change and invert colours to suit their preferences by selecting the respective checkboxes in the magnifier settings.
Automatic Activation
Within the Settings, the magnifier can be configured to automatically turn on either after sign-in or prior to sign-in, effectively eliminating the steps required to enable the feature. By simply clicking on the check boxes under the Magnifier settings, individuals can seamlessly access the magnifier tool without any additional effort.Magnifier behaviour
To ensure a smooth and integrated experience, the behaviour of the magnifier can be configured to follow any of the below options:
- Mouse pointer
- Keyboard focus
- Text cursor
- Narrator cursor
Reading Option
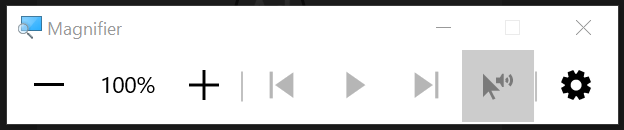
In addition to improving visibility on the screen, the magnifier tool also offers a convenient text-to-speech feature. To utilise this functionality, users can follow these steps:
- Launch the Magnifier tool on your Windows 10.
- Once the tool is open, activate the screen reader support by either clicking the play button, as show in the image below, or by using the keyboard shortcut: Ctrl, Alt, Enter.
Conclusion
This blog highlights the range of accessibility features available in Excel, as well as the accessibility features provided by Windows. It explores how these features can be utilised to improve accessibility and enhance the overall user experience. In the next blog, I will cover additional features that can also be used in conjunction with the features covered in this blog to achieve best practices in the creation and development of spreadsheets.Archive and Knowledge Base
This archive of Excel Community content from the ION platform will allow you to read the content of the articles but the functionality on the pages is limited. The ION search box, tags and navigation buttons on the archived pages will not work. Pages will load more slowly than a live website. You may be able to follow links to other articles but if this does not work, please return to the archive search. You can also search our Knowledge Base for access to all articles, new and archived, organised by topic.