
Excel workbooks very often contain sensitive and confidential information, and key security considerations can frequently be overlooked. It is also very easy for less experienced users to inadvertently ‘break’ a workbook by changing or deleting something that they shouldn't have. This topic was last covered in Tip #20 – while a lot has changed since then, the basics remain relevant. In this article we refresh security considerations in Excel and ways to protect your workbooks.
Before we get started, some of the questions you should ask yourself when considering security of your workbooks are listed below:
- Who needs to modify the workbook as opposed to simply viewing it?
- Where will it be stored (i.e., on your desktop, on a shared network, etc.)?
- Do you need to prevent unauthorised users from being able to open the workbook in the first place?
- How will the workbook be distributed between colleagues and clients (ie, emailed, accessed via a shared drive, etc)?
- Do you need to protect the whole workbook or just certain key sheets?
We will run through some of the most commonly used ways to protect your workbook contents including the following:
- Protect sheet contents.
- Protect workbook structure.
- Allow Edit Ranges.
- Password protect workbooks.
- Restrict access.
- Protecting data in external linked workbooks.
Protect Sheet Contents
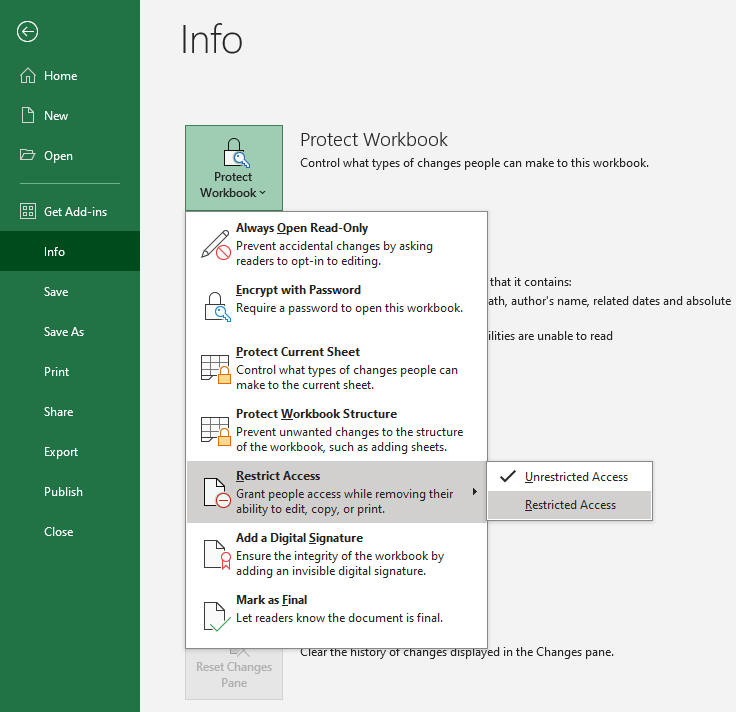
This is used to protect the contents of individual sheets within a workbook. This feature restricts what users are able to do on a worksheet (such as insert rows, format cells etc). A password is optional, and you can protect each sheet in the workbook individually with different settings.
How to find it: ‘Review’ > ‘ Protect Sheet’

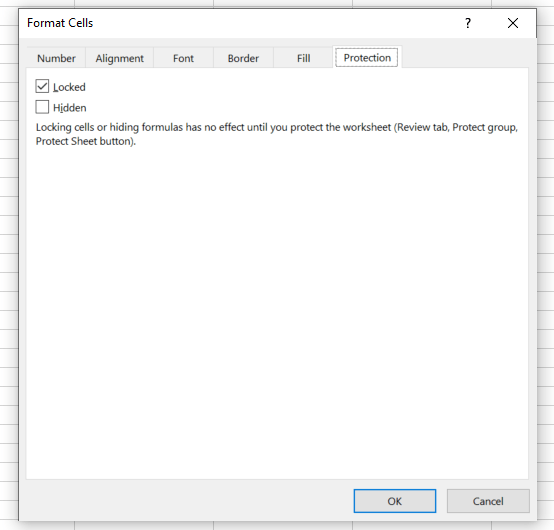
In addition to this, the ‘Format Cells’ menu also allows users to lock cells or hide formulas when sheet protection is enabled.
How to find it: ‘Format Cells’ > ‘ Protection'

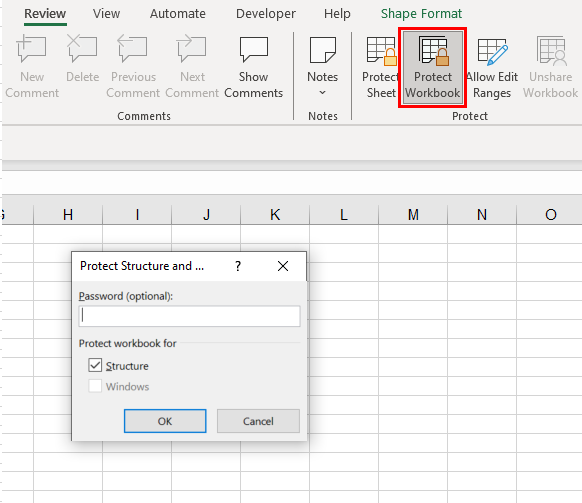
Protect Workbook Structure
This can be used to protect the structure of the workbook (such as preventing users from being able to move, add or delete worksheets). An optional password can also be set to prevent users from being able to unprotect the workbook.
How to find it: ‘Review’ > ‘ Protect Workbook’
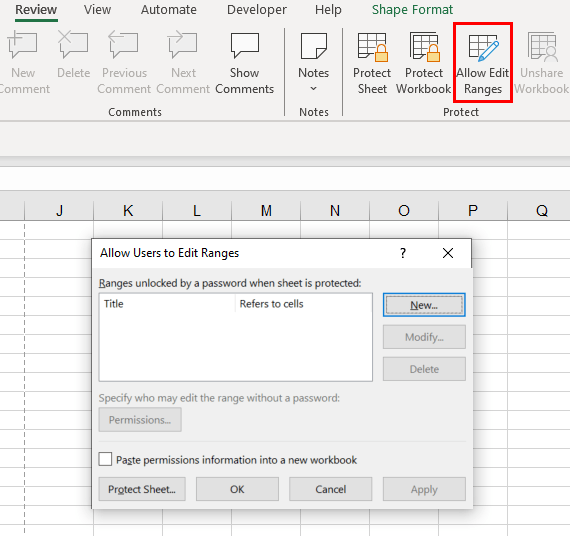
Allow Edit Ranges
This option can be used to give specific users permission to edit ranges of cells in a protected worksheet. To set up permissions, you can select the range and set a password the users must know to edit the range.
You can then select the users or groups you want to give access to and also specify which of these users or groups need a password to edit the range.
How to find it:' Review’ > ‘Allow Edit Ranges’
More on how to set up range permissions in Excel Online has also been covered in Tip #466.
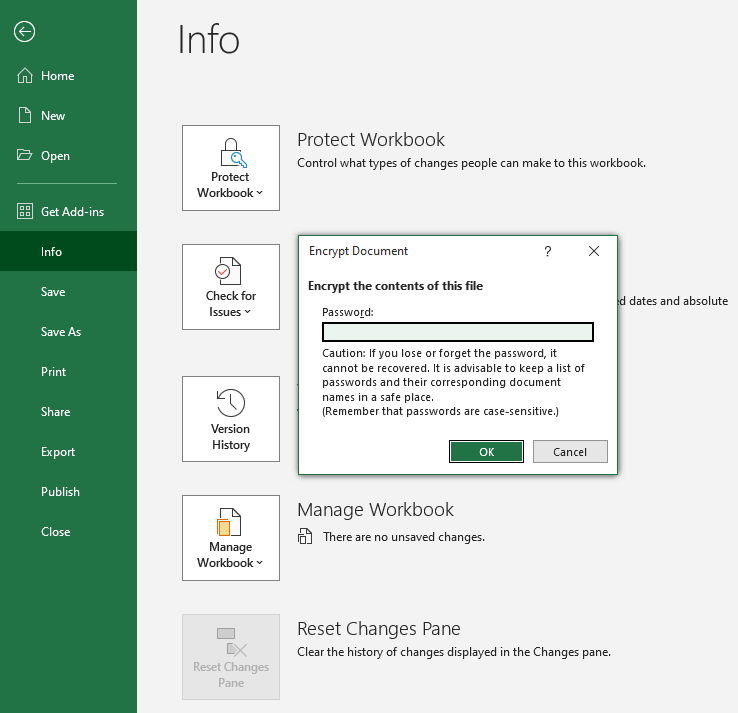
Password Protect Workbook
While the above techniques provide some level of security, they are ultimately flawed; as noted in Tip #441, the security settings can be modified and data can be accessed if the XLSX file is opened as a ZIP. To provide more absolute security, a password for the workbook can be set which must be entered by all users BEFORE they can either Open or Modify the document. When sharing files outside of SharePoint or OneDrive, this is the only way to completely prevent unauthorised access to data within Excel workbooks as this encrypts the entire file. However, note that it also means the file is not ‘machine readable’ – in other words, its contents can only be accessed by manually opening the file and it can’t be used as part of other automated processes.
How to find it: ‘File’ > ‘Info’ > ‘Protect Workbook’ > ‘Encrypt with Password’
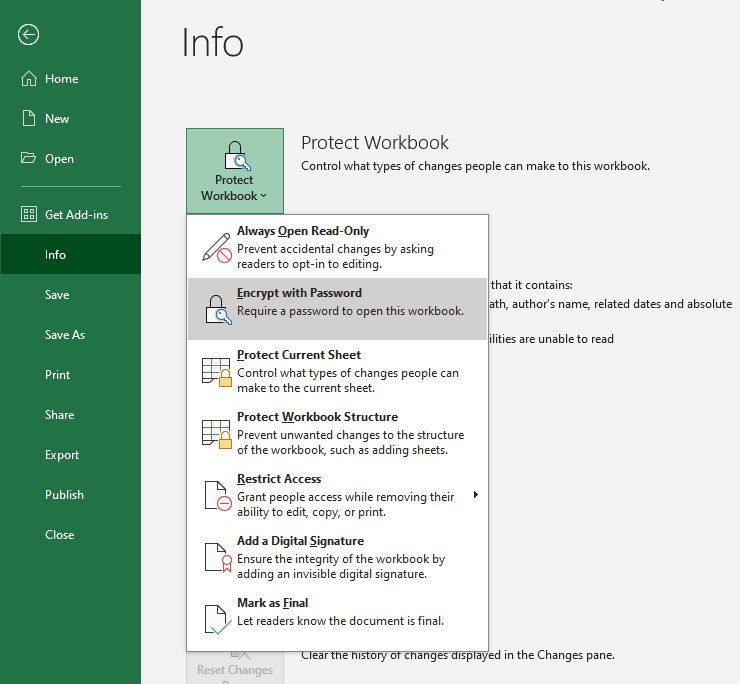
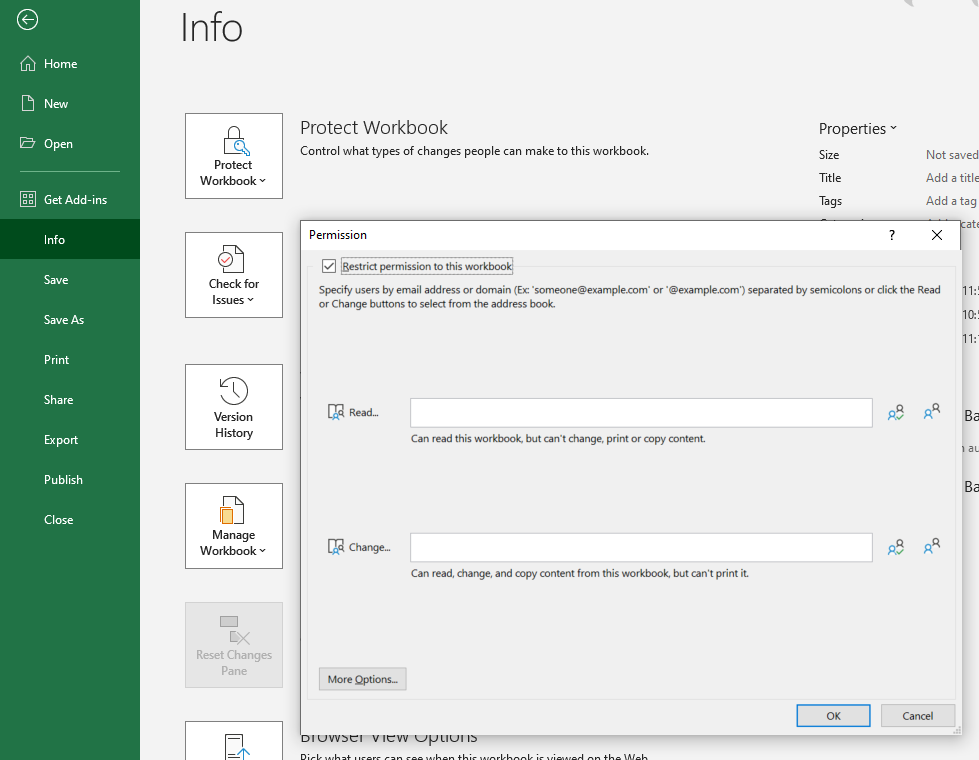
Restrict Access
There are a variety of features which allow you to restrict user access and set permissions to different users. For instance, you can set the workbook to restrict permissions to read only or restrict printing permissions which can be a useful way of protecting files held on a shared network drive.
How to find it: ‘File’ > ‘Info’ > ‘Protect Workbook’ > ‘Restrict Access’ > ‘Restricted Access’
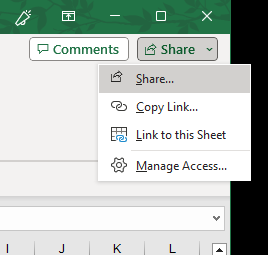
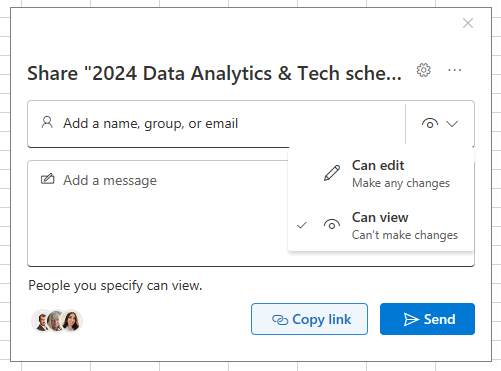
While this is useful to restrict permissions when sharing a document in a shared network drive, most files are now likely to be saved in OneDrive and shared with others using the share options.
Share options allow you to share your workbook and select permissions that allow others to edit or view the workbook.
How to find it: ‘Share’
Protecting data in external linked workbooks
If you are linking data from external workbooks into formulas, it is worthwhile to note that Excel maintains a cache of the data from the external file. This means that even if the external source is not directly shared or is deleted, the data is still maintained within the XLSX file and can be accessed if you know where to look.
This is important to consider when sharing workbooks that link to confidential files, as sensitive information in the externally linked workbooks could be shared with unauthorised users.
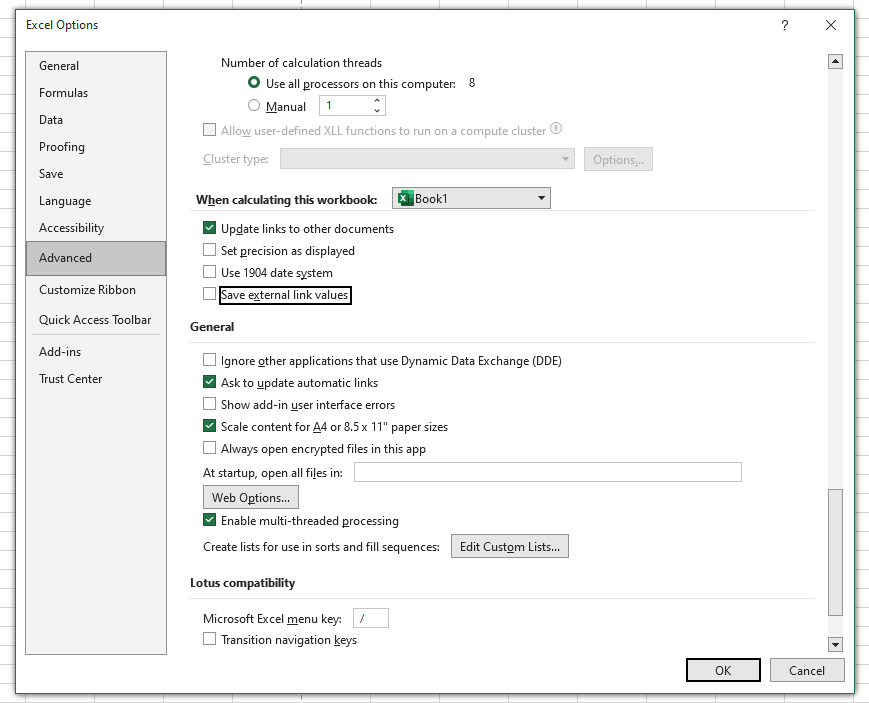
A workaround to avoid this is to disable the default setting that saves external link values.
How to find it: ‘File’ > ‘Options’ > ‘’ > ‘Advanced’ > uncheck ‘Save external link values’
Another risky alternative when using other sources of data in formulas is hiding sheets in an unprotected workbook. Unless the workbook structure is protected by a password anyone can unhide a worksheet. More on hidden worksheets has been covered in Tip #460.
Security considerations
While Excel security features are useful, they are by all means not watertight. They should not be used to replace proper IT procedures such as encryption, network drive access, etc.
It’s also important to emphasise that the only way setting a password makes it impossible to access/edit the data is when password protecting workbooks for opening, as this encrypts the entire workbook. Other protections have no impact on the accessibility of the file contents by a user who knows what they are looking for. Therefore, if you have an Excel file with sensitive data stored in it, the only way to truly restrict access to it is to password protect the entire file or set access restrictions at the directory level (or via SharePoint or OneDrive, if that’s where the file is stored).
Finally, remember that with all Excel passwords, there's no "I forgot my password"-style feature. If the workbook password is lost or forgotten, then so are the contents of the workbook.